5-4 WorkCentre C2424 Service Manual
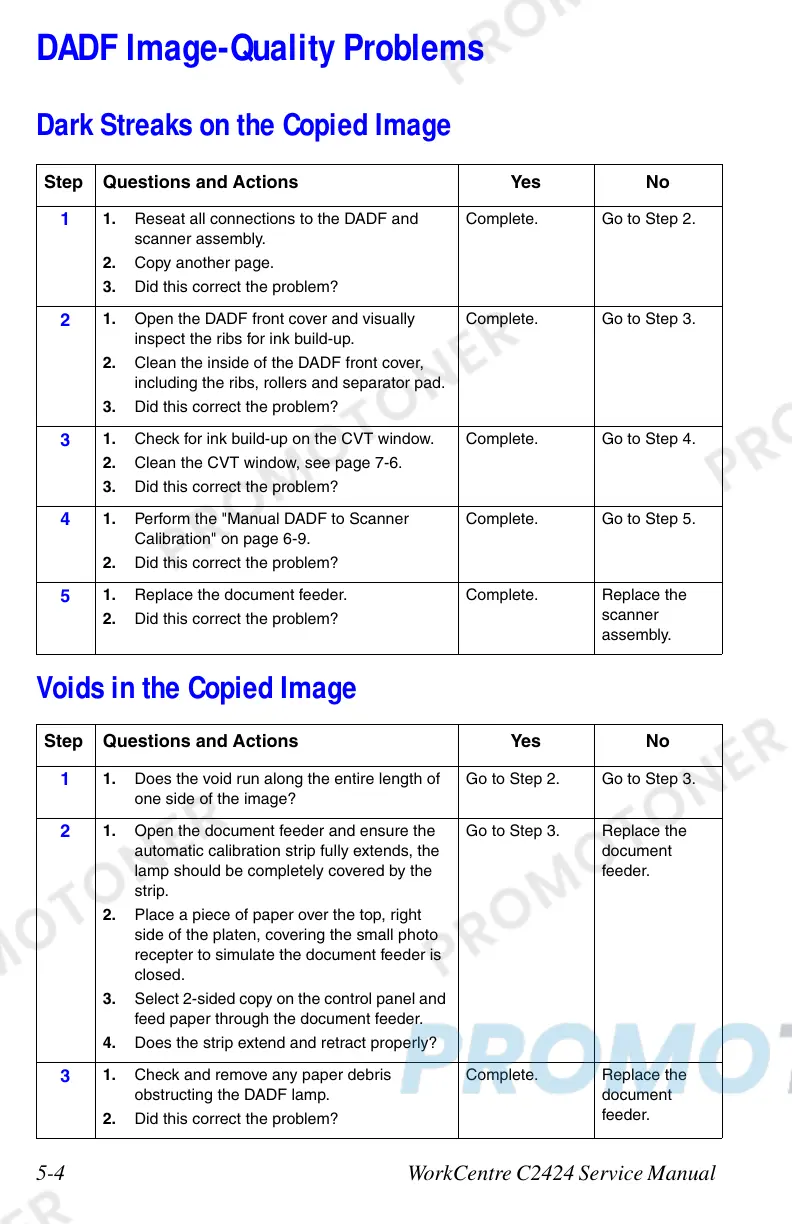
DADF Image-Quality Problems
Dark Streaks on the Copied Image
Voids in the Copied Image
Step Questions and Actions Yes No
1
1. Reseat all connections to the DADF and
scanner assembly.
2. Copy another page.
3. Did this correct the problem?
Complete. Go to Step 2.
2
1. Open the DADF front cover and visually
inspect the ribs for ink build-up.
2. Clean the inside of the DADF front cover,
including the ribs, rollers and separator pad.
3. Did this correct the problem?
Complete. Go to Step 3.
3
1. Check for ink build-up on the CVT window.
2. Clean the CVT window, see page 7-6.
3. Did this correct the problem?
Complete. Go to Step 4.
4
1. Perform the "Manual DADF to Scanner
Calibration" on page 6-9.
2. Did this correct the problem?
Complete. Go to Step 5.
5
1. Replace the document feeder.
2. Did this correct the problem?
Complete. Replace the
scanner
assembly.
Step Questions and Actions Yes No
1
1. Does the void run along the entire length of
one side of the image?
Go to Step 2. Go to Step 3.
2
1. Open the document feeder and ensure the
automatic calibration strip fully extends, the
lamp should be completely covered by the
strip.
2. Place a piece of paper over the top, right
side of the platen, covering the small photo
recepter to simulate the document feeder is
closed.
3. Select 2-sided copy on the control panel and
feed paper through the document feeder.
4. Does the strip extend and retract properly?
Go to Step 3. Replace the
document
feeder.
3
1. Check and remove any paper debris
obstructing the DADF lamp.
2. Did this correct the problem?
Complete. Replace the
document
feeder.
 Loading...