Service Parts Disassembly 8-59
Electronics
Scanner Power Supply
(PL 5.2)
arn
ng
Unplug the power cord. The scanner power supply connects directly to the
AC line.
1. Remove the DADF and scanner assemblies (page 8-4).
2. Remove the output tray (page 8-8).
3. Remove the left and right side covers (page 8-11).
4. Remove the rear cover and EMI shield (page 8-12).
5. Disconnect all wiring cables to the power supply board.
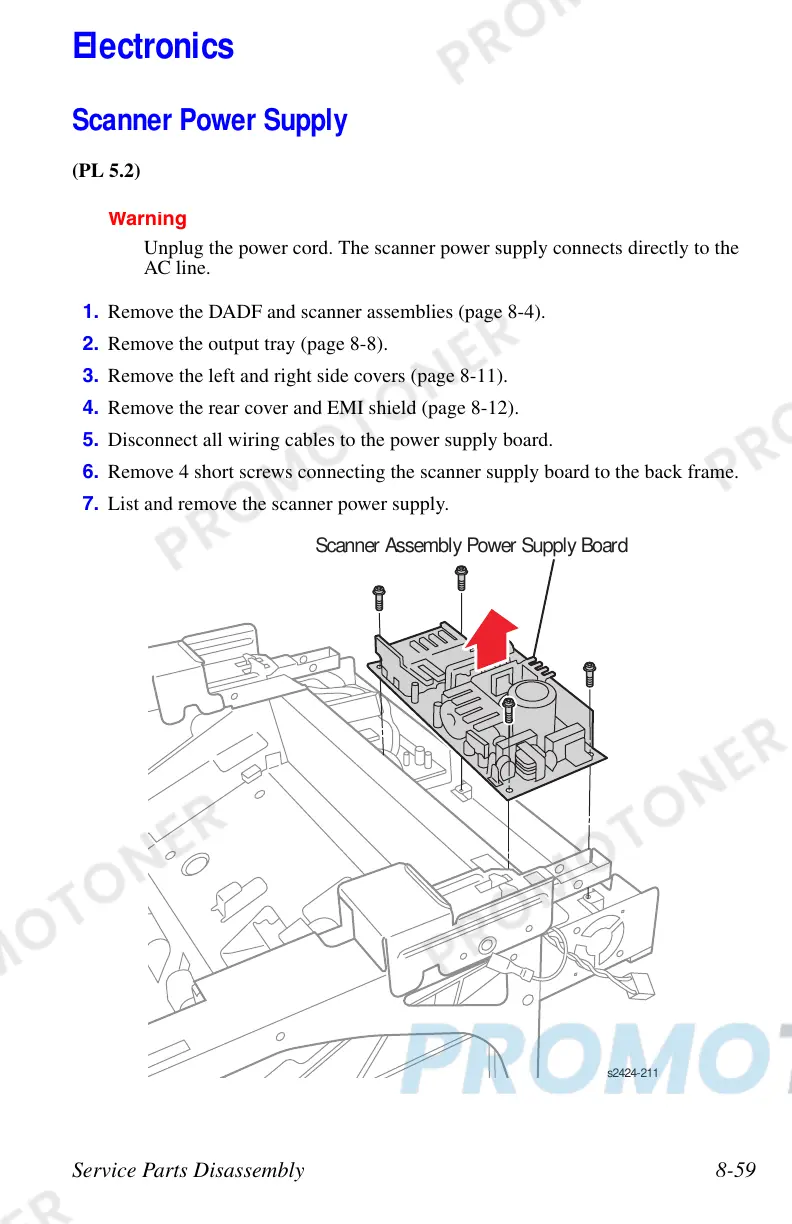
6. Remove 4 short screws connecting the scanner supply board to the back frame.
7. List and remove the scanner power supply.
s2424-211
Scanner Assembly Power Supply Board
 Loading...
