Service Parts Disassembly 8-51
Tray Lift Motor
(PL 4.10)
1. Remove the electronics module (page 8-61).
2. Remove Tray 2.
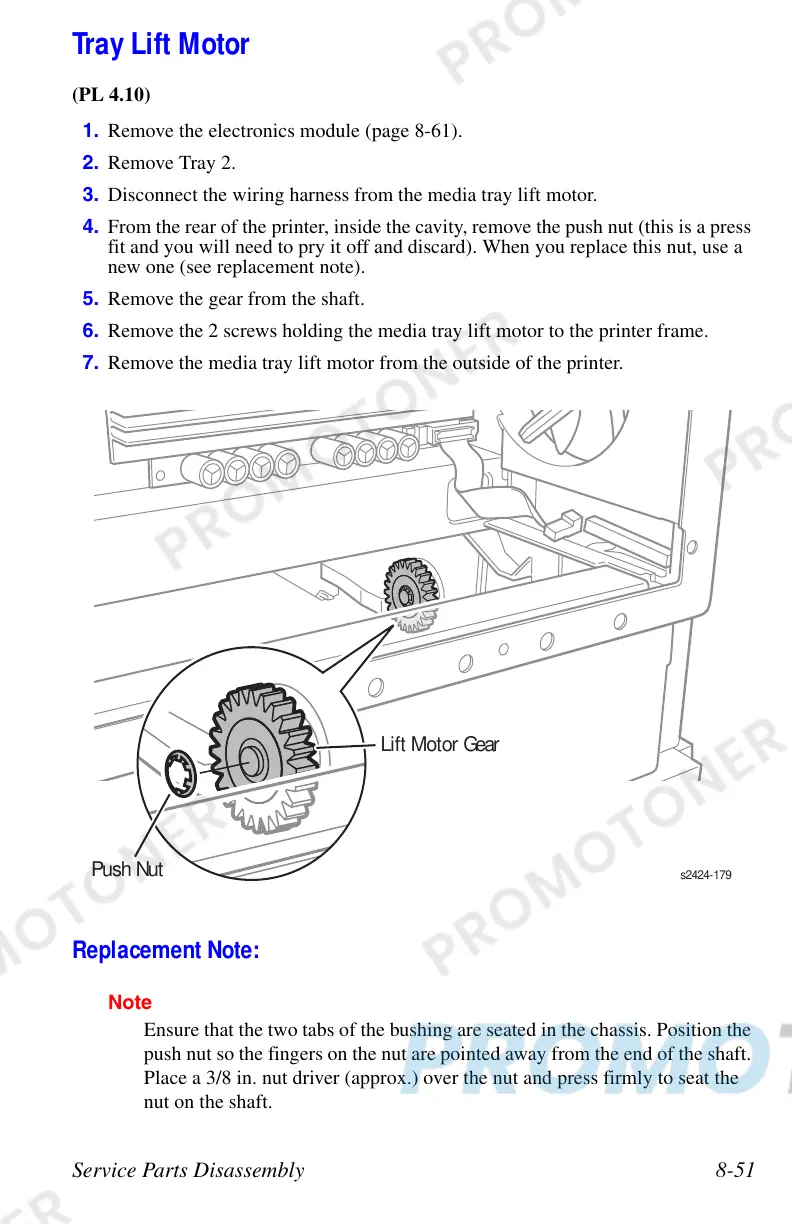
3. Disconnect the wiring harness from the media tray lift motor.
4. From the rear of the printer, inside the cavity, remove the push nut (this is a press
fit and you will need to pry it off and discard). When you replace this nut, use a
new one (see replacement note).
5. Remove the gear from the shaft.
6. Remove the 2 screws holding the media tray lift motor to the printer frame.
7. Remove the media tray lift motor from the outside of the printer.
Replacement Note:
Note
Ensure that the two tabs of the bushing are seated in the chassis. Position the
push nut so the fingers on the nut are pointed away from the end of the shaft.
Place a 3/8 in. nut driver (approx.) over the nut and press firmly to seat the
nut on the shaft.
s2424-179
ush Nut
Lift Motor Gear
 Loading...