Service Parts Disassembly 8-63
Back Frame and Printer Stabilizer
( Stabilizer PL 3.14) (Backframe PL 5.24)
Caution
If replacing a back frame, perform the following procedure on a flat surface.
1. Remove the DADF and scanner assemblies (page 8-4).
2. Remove the output tray (page 8-8).
3. Remove the left and right side covers (page 8-11).
4. Remove the scanner power supply and MEP control board (page 8-42).
5. Remove the Electronics Module(page 8-61).
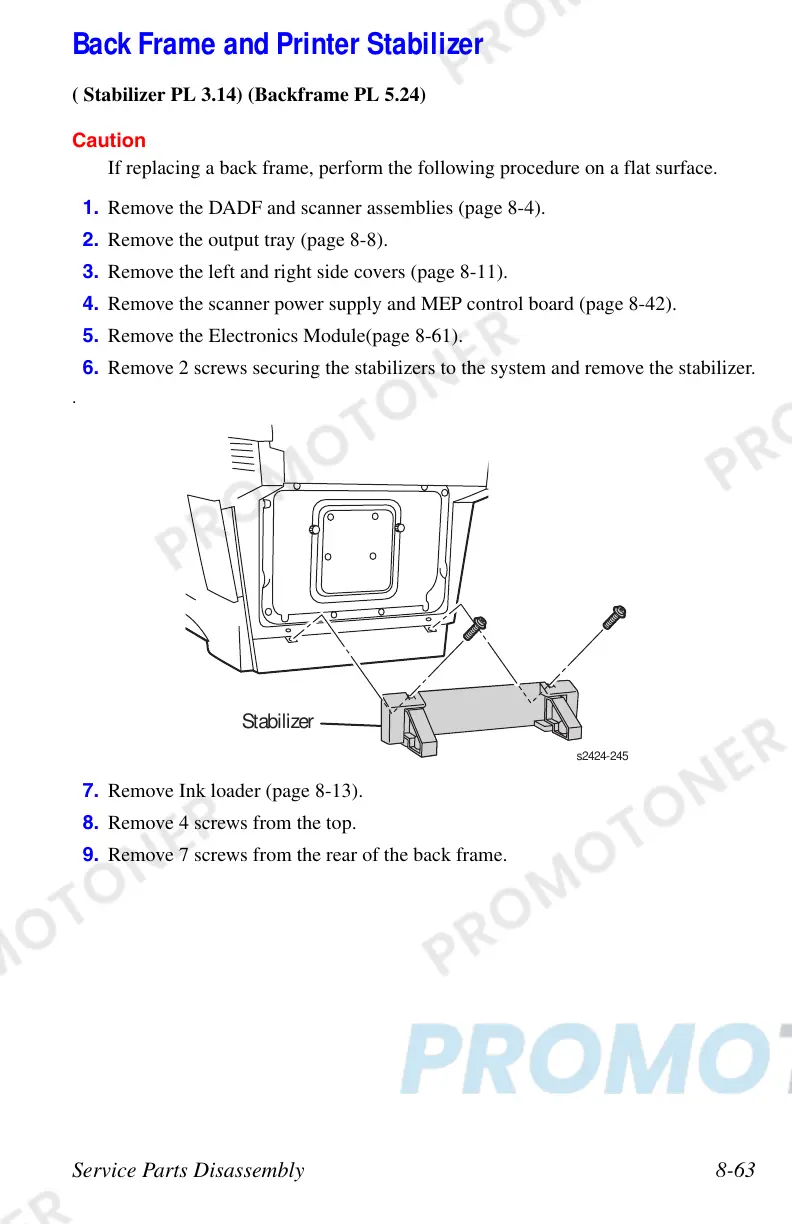
6. Remove 2 screws securing the stabilizers to the system and remove the stabilizer.
.
7. Remove Ink loader (page 8-13).
8. Remove 4 screws from the top.
9. Remove 7 screws from the rear of the back frame.
Stabilizer
 Loading...