Service Parts Disassembly 8-11
Right and Left Side Covers
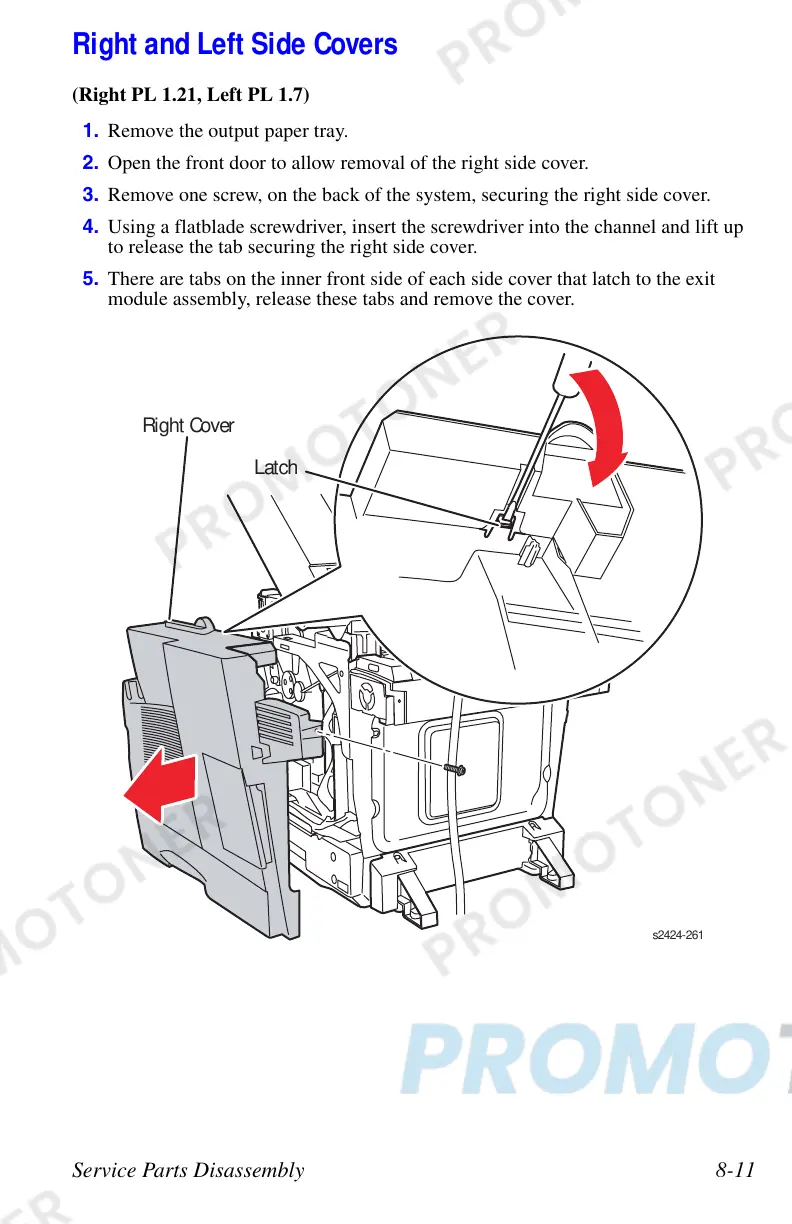
(Right PL 1.21, Left PL 1.7)
1. Remove the output paper tray.
2. Open the front door to allow removal of the right side cover.
3. Remove one screw, on the back of the system, securing the right side cover.
4. Using a flatblade screwdriver, insert the screwdriver into the channel and lift up
to release the tab securing the right side cover.
5. There are tabs on the inner front side of each side cover that latch to the exit
module assembly, release these tabs and remove the cover.
s2424-26
Latch
Right Cover
 Loading...