Service Parts Disassembly 8-15
6. Disconnect the motor wiring harness connector from the printer.
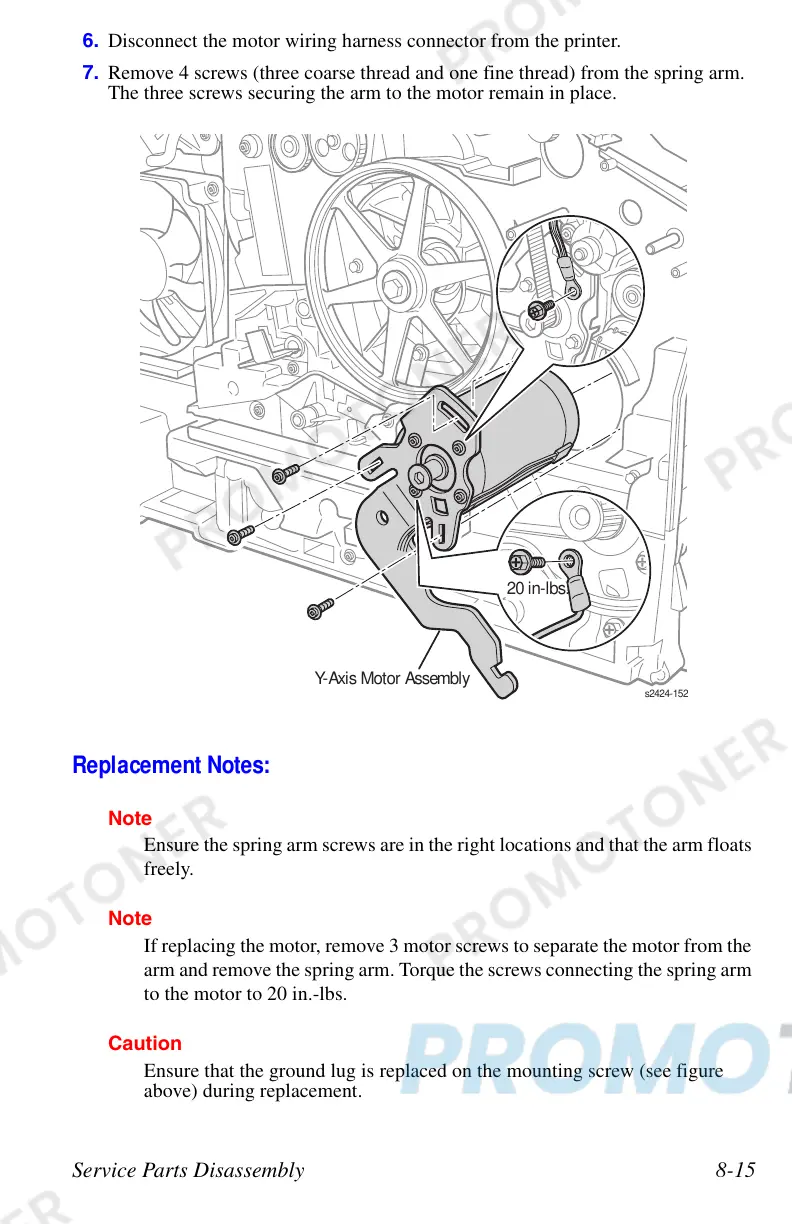
7. Remove 4 screws (three coarse thread and one fine thread) from the spring arm.
The three screws securing the arm to the motor remain in place.
Replacement Notes:
Note
Ensure the spring arm screws are in the right locations and that the arm floats
freely.
Note
If replacing the motor, remove 3 motor screws to separate the motor from the
arm and remove the spring arm. Torque the screws connecting the spring arm
to the motor to 20 in.-lbs.
Caution
Ensure that the ground lug is replaced on the mounting screw (see figure
above) during replacement.
s2424-1
20 in-lbs.
Y-Axis Motor Assembly
 Loading...