Service Parts Disassembly 8-21
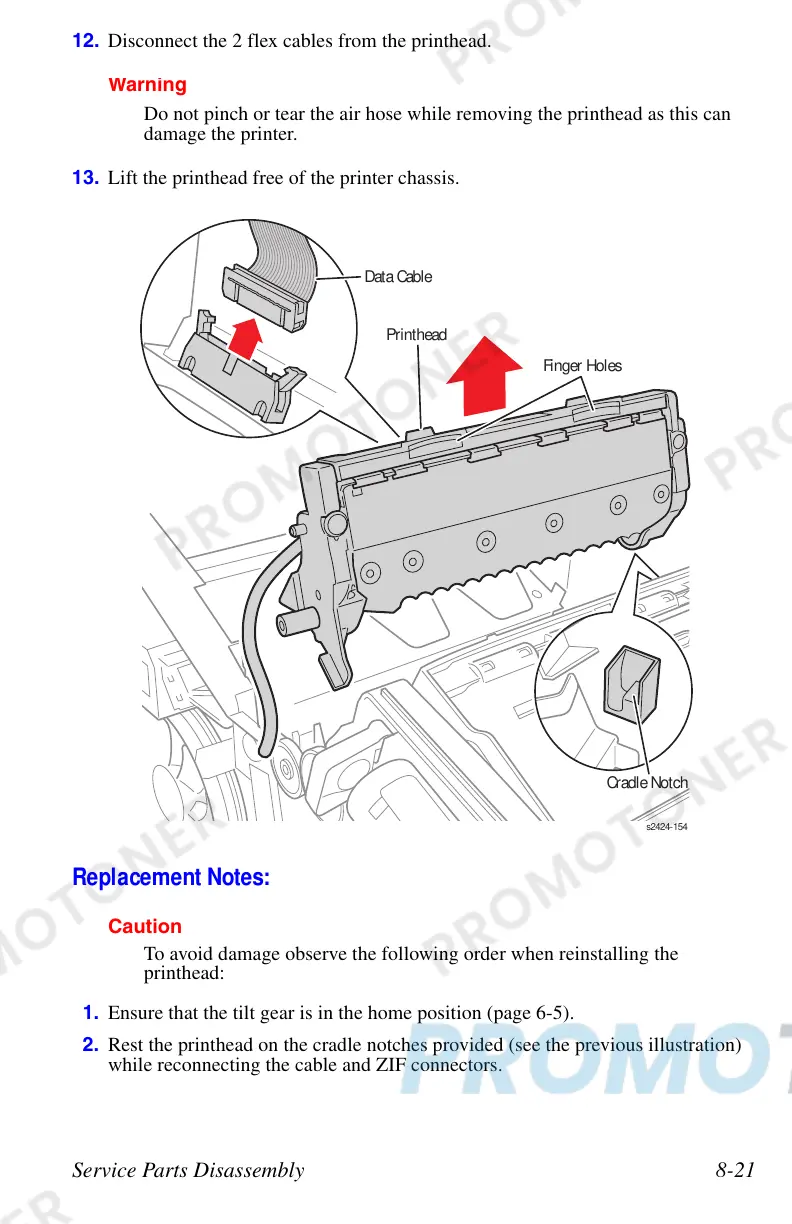
12. Disconnect the 2 flex cables from the printhead.
arn
ng
Do not pinch or tear the air hose while removing the printhead as this can
damage the printer.
13. Lift the printhead free of the printer chassis.
Replacement Notes:
Caution
To avoid damage observe the following order when reinstalling the
printhead:
1. Ensure that the tilt gear is in the home position (page 6-5).
2. Rest the printhead on the cradle notches provided (see the previous illustration)
while reconnecting the cable and ZIF connectors.
Data Cable
Cradle Notc
Printhead
Finger Holes
 Loading...