60H5E11
7
2. Drain the fluid from the reservoir to check
any damage. Also check the cap and O-
ring. Replace if necessary.
Disassembling the gear pump unit
1. Remove the gear pump unit.
60h70620
NOTE:
Make sure that the O-ring, valve pin, and check
valve assembly are removed.
2. Remove the filter, down-relief valve assem-
bly, O-ring, and filter from the gear pump
unit.
60h70630
NOTE:
To remove the filter in the back, blow com-
pressed air carefully not to make the filter jump
out abruptly.
Disassembling the reservoir
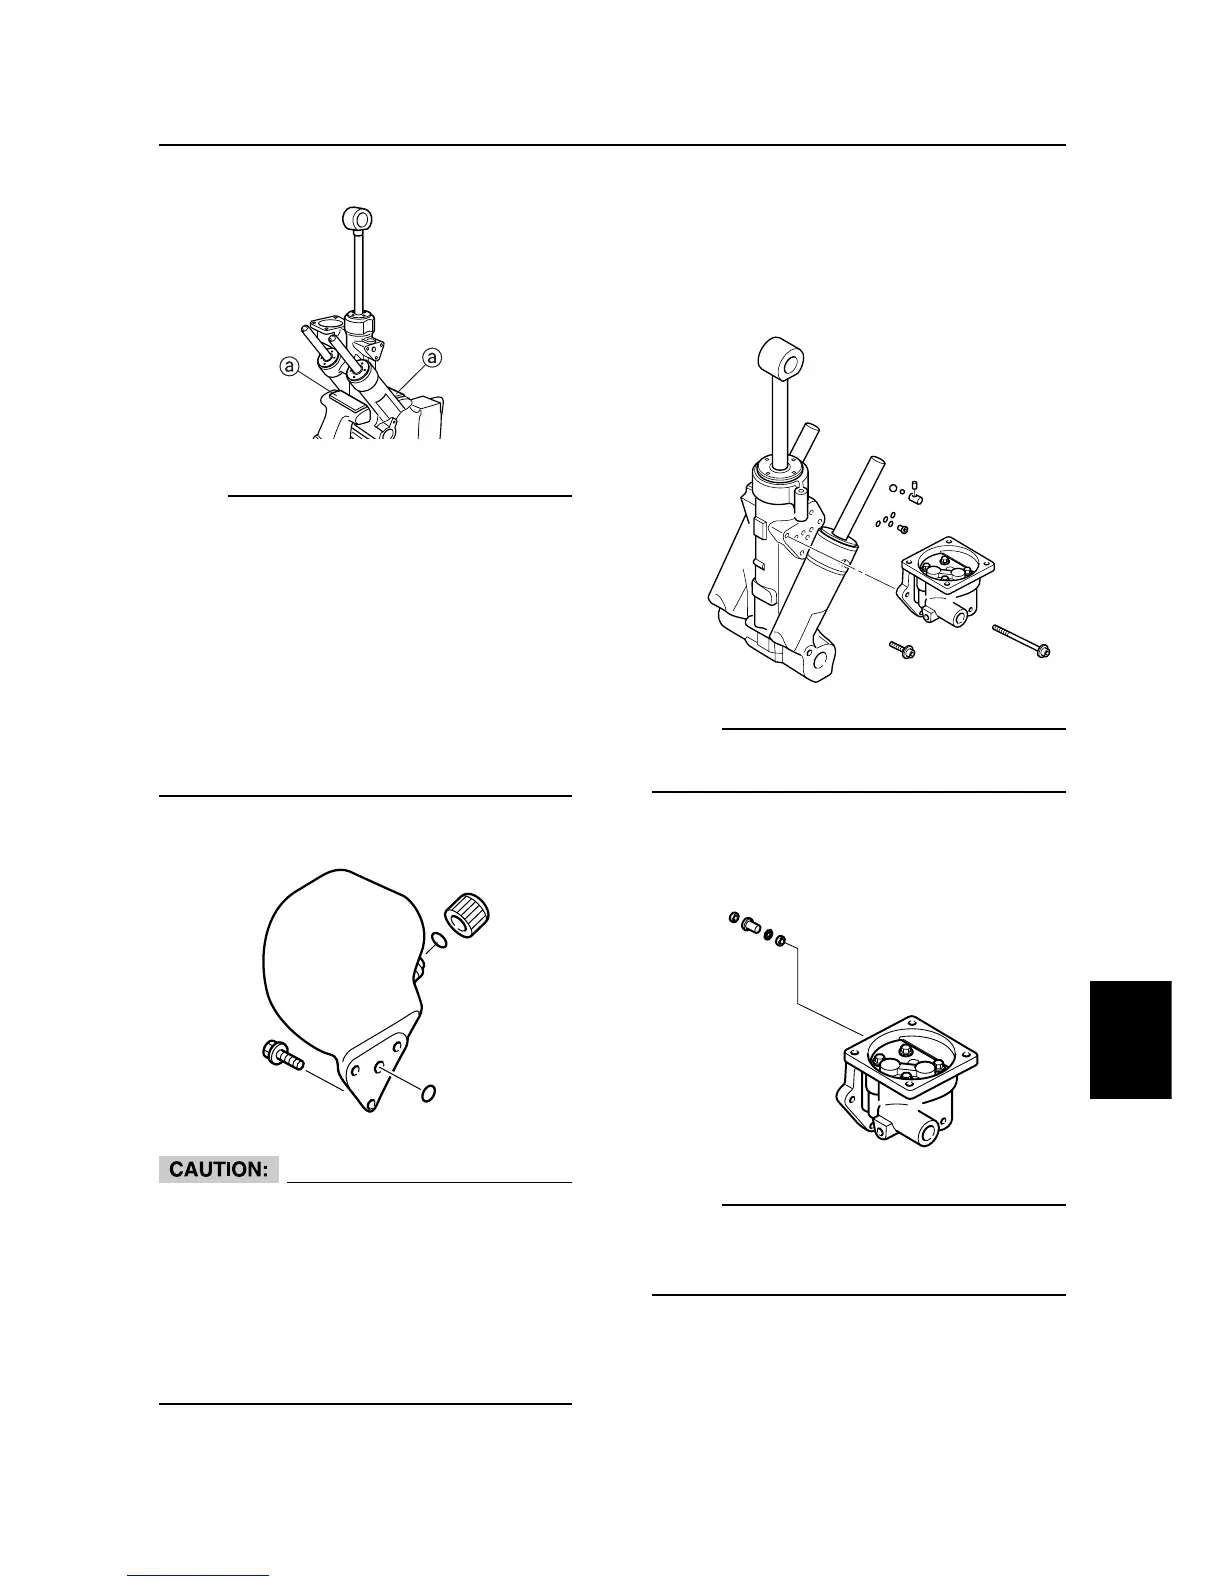
60h70600
NOTE:
• Do not use rags or paper to clean the hy-
draulic system components. Small pieces
of fibers remaining on them may cause mal-
function of the system.
• Fluid may flow out while overhauling the
power trim and tilt unit. Place an appropri-
ate tray to prevent the fluid from spilling out
on the floor.
• Hold the power trim and tilt unit in a vise to
work on it. Put an aluminum plates A on
both sides of the unit.
1. Remove the reservoir and O-ring.
60h70610
• Make sure that the tilt and trim rods are
fully extended when removing the reser-
voir. If they are not, fluid may spurt out
from the unit due to the internal pressure.
• Do not push down the tilt rod and trim
rods while the reservoir is removed. Fluid
may spurt out from the reservoir mount-
ing area.
PTT motor and Reservoir
7-28



 To Next Page