60H5E11
4
4-12
Carburetor
Disassembling the carburetor
NOTE:
• Write down how many turns you have actu-
ally turned out the pilot screw.
• Disassembled jets and other components
shall be sorted out and kept in order, so that
they are re-assembled to the original posi-
tion without fail.
• Do not bend the plate of the float.
Checking the carburetor
1. Clean the fuel passage, air passage and
the carburetor body, and blow off any clog-
ging with compressed air.
Wear appropriate protective eye gear dur-
ing the cleaning process to prevent any eye
injury by the blown-off fractions or liquid.
Do not use steel wire and the like for clean-
ing the carburetor. Do not try to disas-
semble the main nozzle if it does not come
out easily. Excessive force may impair the
performance in the serious way.
NOTE:
Clean the needle valve, main jet, and pilot jet
afrer removal.
2. Check the carburetor body for cracks or
damage. Replace it if necessary.
3. Check the pilot screws and needle valves
for bending or stepped wear. Replace them
if necessary.
60H40150
4. Check the main jet, pilot jet, main air jet,
pilot air jet, and main nozzle for clogging
and contamination. Clean or replace them
whenever appropriate.
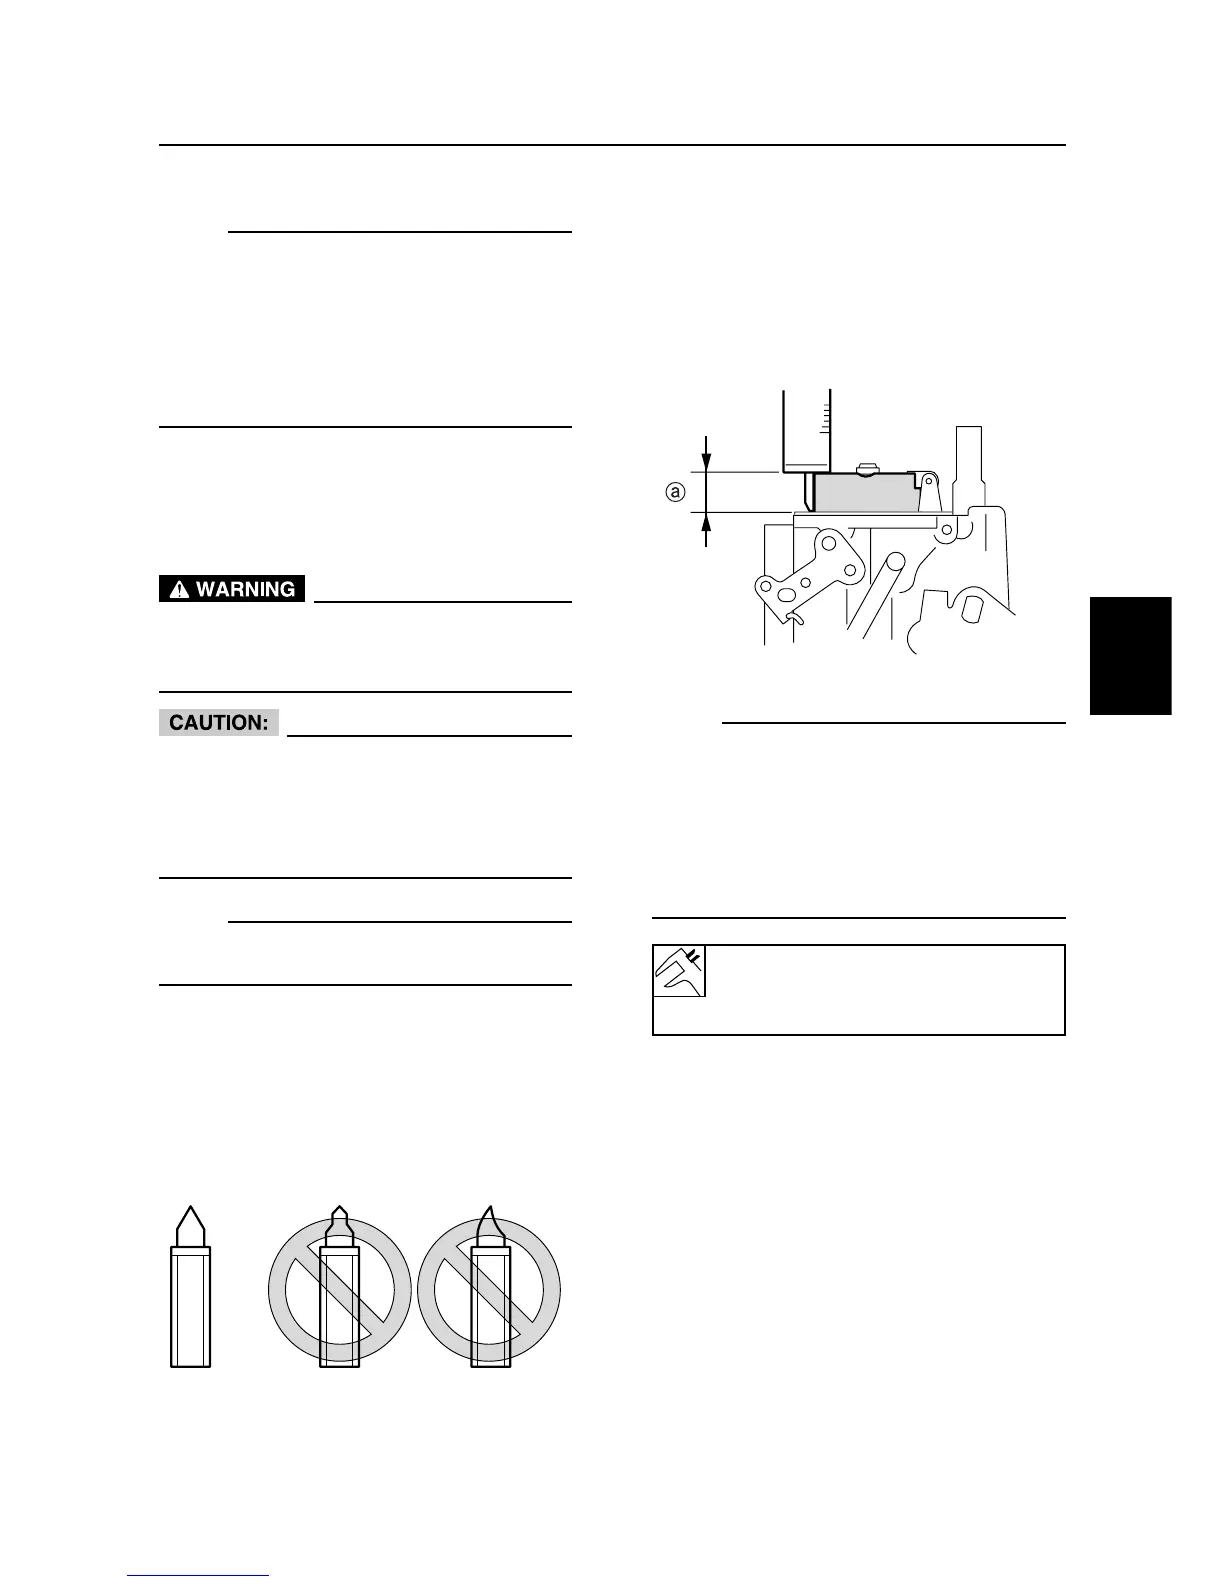
5. Check the float for damage, and make sure
it is at the appropriate height A. Replace
the float or needle or both if necessary.
60H40160
NOTE:
• Measure the float's height at the end oppo-
site to the needle valve.
• The float should be resting on the needle
valve, but not compressing it.
• Measure the distance A i.e. from carburetor
mating face to the float bottom. Invert the
carburetor for the measurement.
Vertical position of the float A
(with gasket):
15.5 - 16.5mm (0.61-0.65 in)