60H5E11
7
A
A
A
242
LT
A
A
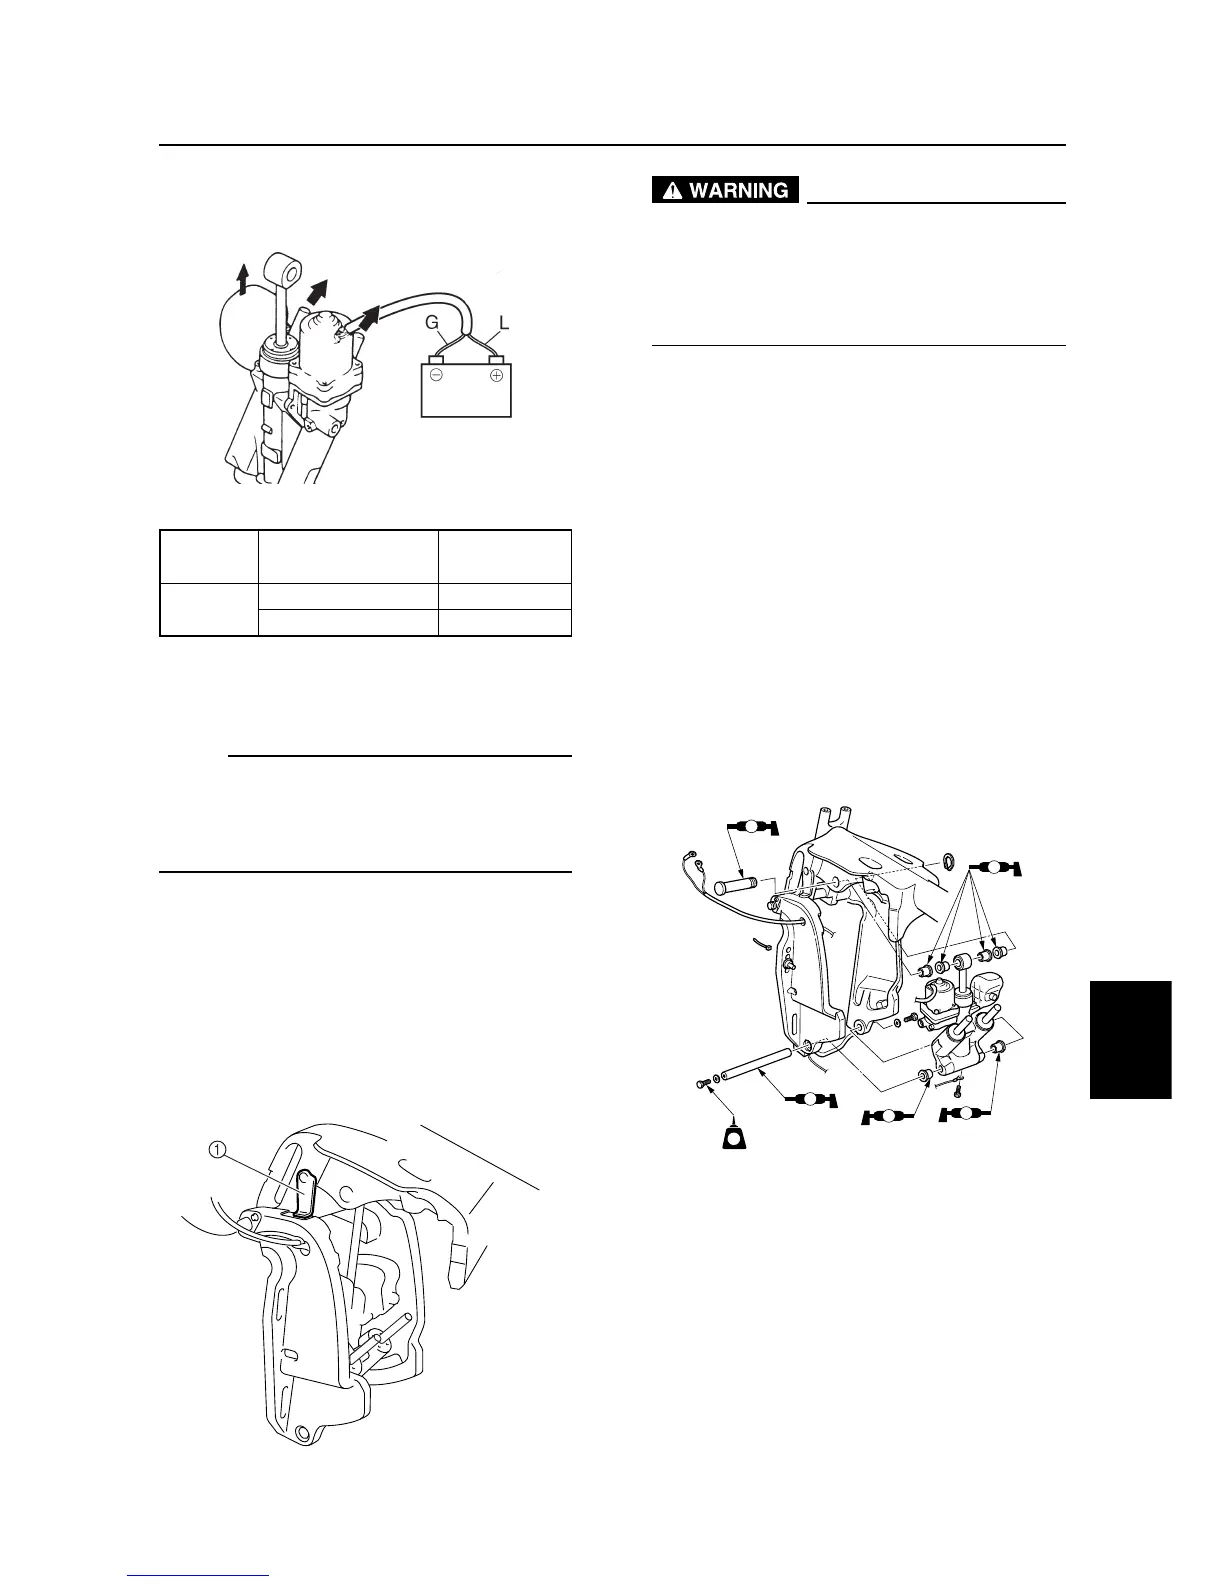
2. Connect the power trim and tilt motor leads
to the battery terminals, and fully extend
the trim and tilt rods.
60h71090
3. Repeat the procedures above for four or
five times.
NOTE:
Wait for a few seconds before switching the
PTT motor leads connections.
Assist the rods movement by hands if they do
not operate well.
4. Check the fluid level while the tilt rod is fully
extended, and add sufficient amount of rec-
ommended fluid.
Installing the power trim and tilt unit
1. Fully tilt up the outboard motor, and lock it
with the tilt stop lever 1.
60h30430
After tilting up the outboard motor, be sure
to support it with the tilt stop lever. Other-
wise, the outboard motor could suddenly
lower if the power trim and tilt unit should
lose fluid pressure.
2. Install the collar.
3. Insert the upper mount pins while support-
ing the power trim and tilt unit by hands.
4. Install the circlip.
5. Insert the lower mount pins, and tighten up
the bolts.
6. Install the clamps, route the PTT motor
leads through the hole, and install the
clamps.
7. Connect the ground lead under the power
trim and tilt unit.
60h71150
Tilt cylinder and trim cylinder
7-40
Rods PTT motor leads
Battery
terminal
Blue (L) +
UP
Green (G) –



 To Next Page