5-12
POWR
E
ASSEMBLY AND ADJUSTMENT
G73000-0
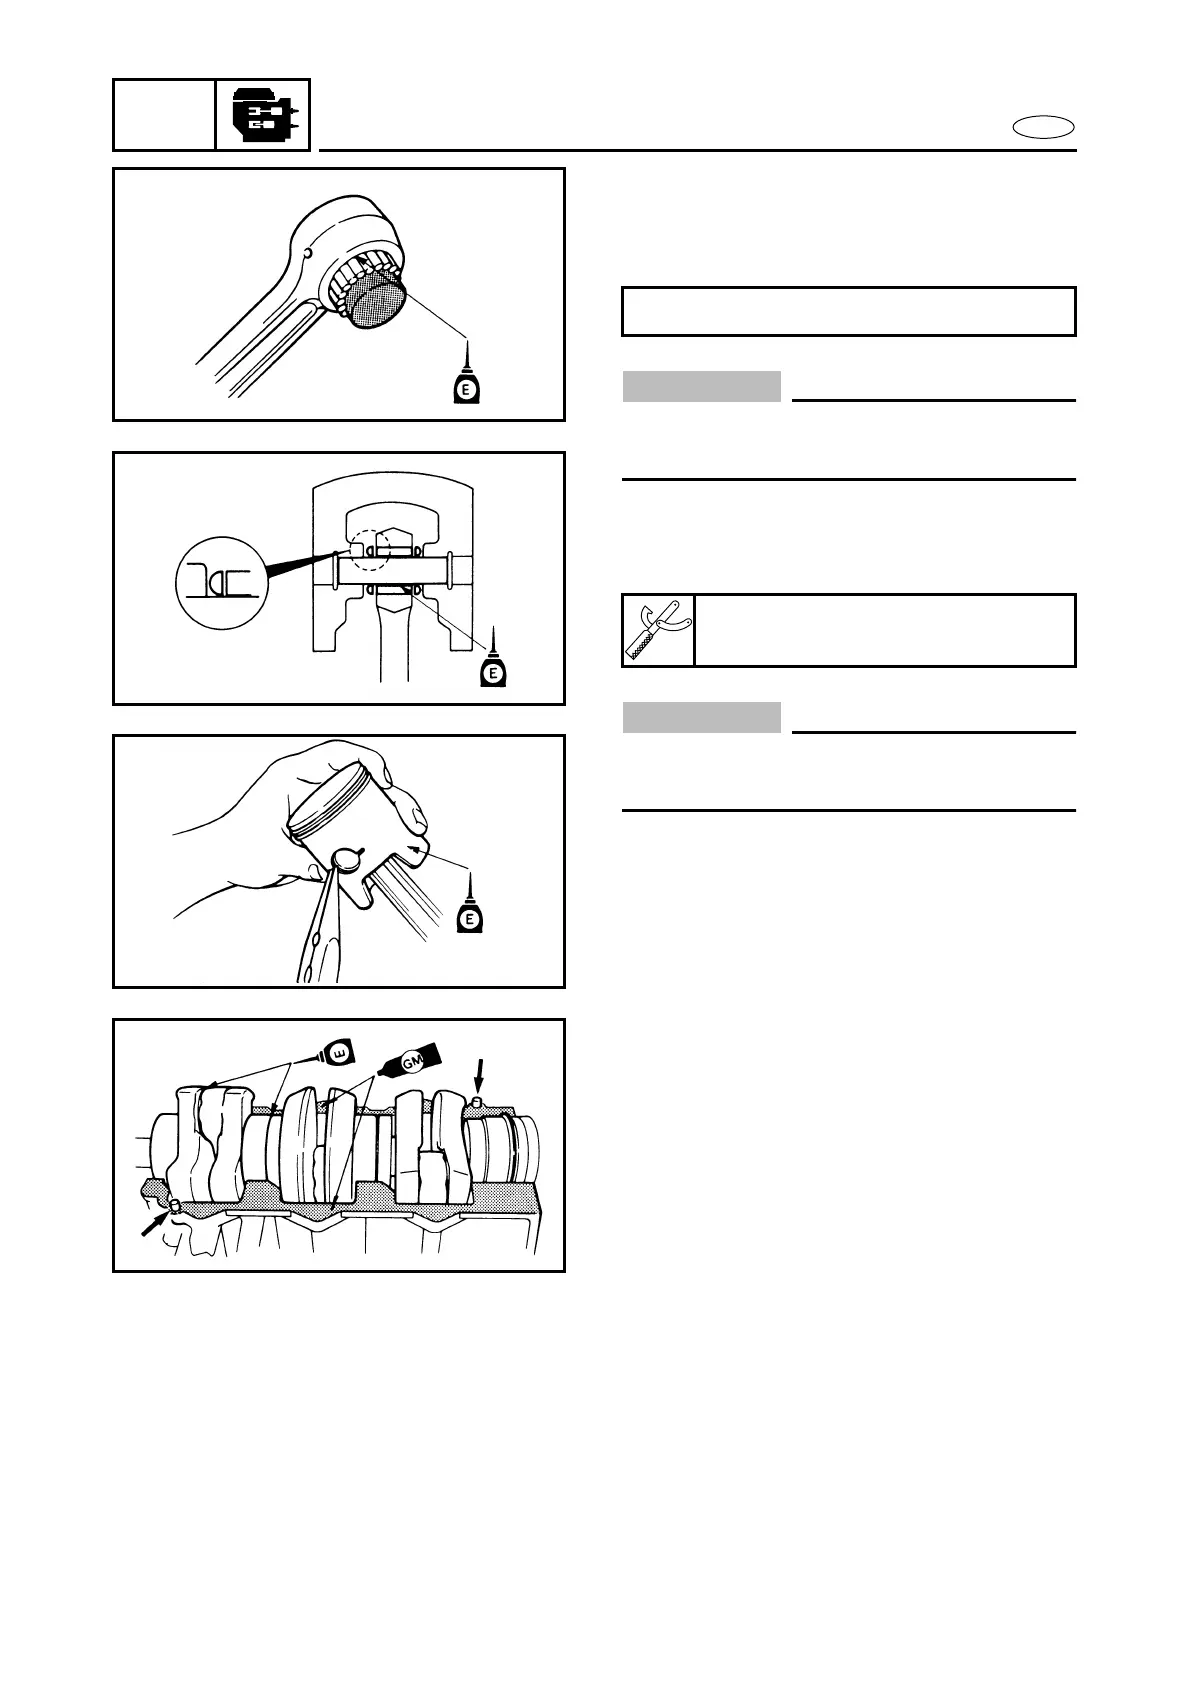
SMALL END BEARINGS AND PISTON
ASSEMBLY
1. Count the small-end bearing needles.
CAUTION:
Do not use a mixture of new and used bear-
ing needles in the same small end.
2. Using the special tool, install the bear-
ings in the connecting-rod small end,
and place washers on both sides.
CAUTION:
The washer should be placed with their
convex sides facing the piston.
3. Insert the piston-pin into the piston.
4. Align the “UP” mark on the piston
crown towards the crankshaft tapered
end. Install the piston in the connecting-
rod small end, insert the piston-pin, and
then install new piston-pin clips.
5. Lubricate each bearing with two-cycle
outboard-motor oil.
G74000-0
CRANK CYLINDER ASSEMBLY
1. Lubricate the piston-rings and pistons
with two-cycle outboard-motor oil, and
install the crank assembly into the cylin-
der block.
2. Lift the crank assembly a little so as to
be able to install a washer on the lower
crank-case, and align each locating-pin
of the bearings and labyrinth-seals with
each cut on the cylinder-block, then fit
the crank assembly in place.
3. Film-coat the cylinder-block mating sur-
face with Gasket Maker or equivalent.
4. Install the dowel-pins.
Number of needles per piston: 28 pcs
Small end bearing installer:
YB-6105/90890-06525