ZEISS FIRST-TIME SET-UP Axio Imager 2
Attaching the condenser carrier to the transmitted-light / reflected-light stage carrier
50 430000-7544-001 01/2016
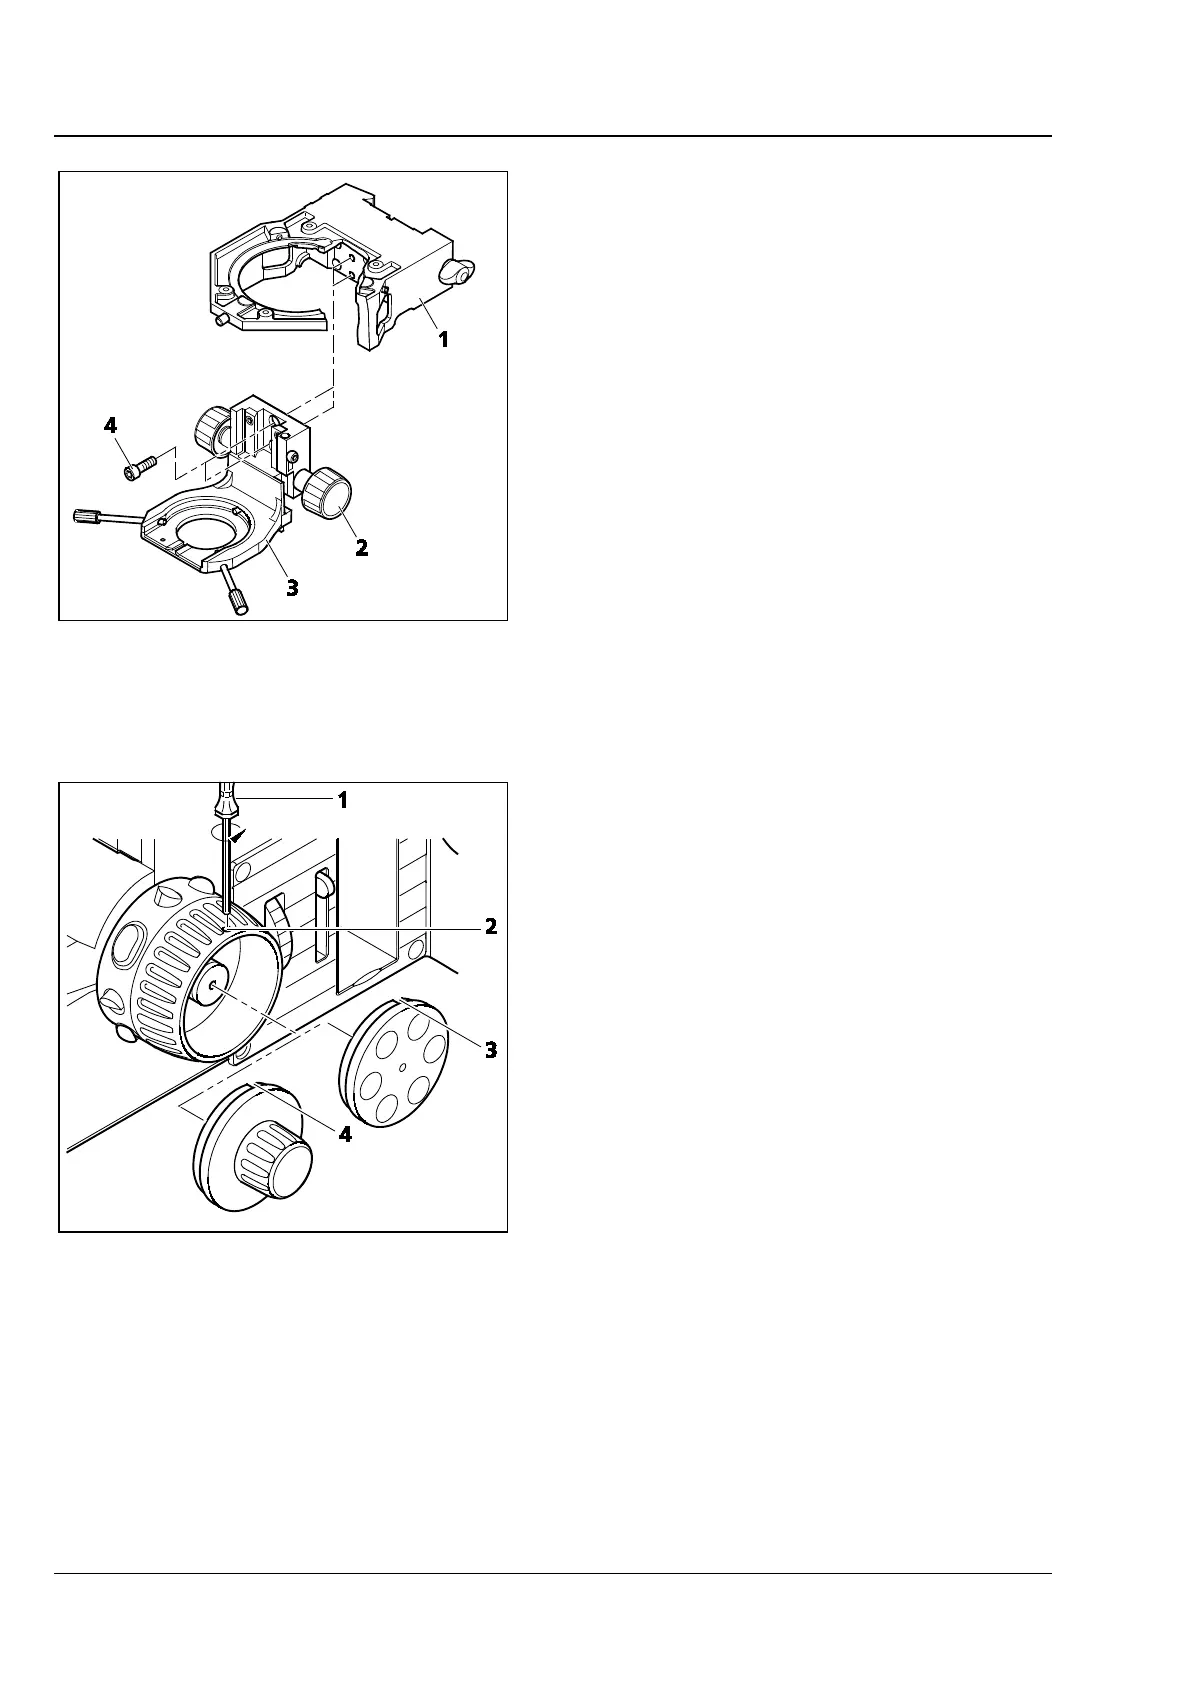
3.20 Attaching the condenser carrier to
the transmitted-light / reflected-
light stage carrier
• Use the drive knob (Fig. 32/2) to adjust the
guide of the condenser carrier (Fig. 32/3) in
such a way that the two screws (Fig. 32/4) are
accessible.
• Attach the condenser carrier to the stage carrier
(Fig. 32/1). Push it firmly in a straight line to the
upper stop, and tighten the two screws.
3.21 Changing the fine-drive knob or
the fine-drive disk on the stand
The fine-focusing drive to the right and left on the
stand can be provided either with a fine-drive knob
or a fine-drive disk.
To change the fine-drive knob or the fine-drive
disk, proceed as follows:
• Turn the coarse-drive knob on the relevant side
of the stand so that the mounting hole
(Fig. 33/2) points upward.
• Insert the ball-headed screwdriver SW 1.5
(Fig. 33/1) into the mounting hole and loosen
the locking screw of the fine-drive knob or the
fine-drive disk.
• Pull the fine-drive knob or the fine-drive disk
sideways off the shaft.
• Slide the fine-drive disk or the fine-drive knob
onto the shaft, so that the recess (Fig. 33/3
or 4) is located under the mounting hole.
• Tighten the locking screw.
Fig. 32 Attaching the condenser carrier to
the stage carrier
Fig. 33 Changing the fine-drive knob or
fine-drive disk