ZEISS FIRST-TIME SET-UP Axio Imager 2
Mount sample stage
72 430000-7544-001 01/2016
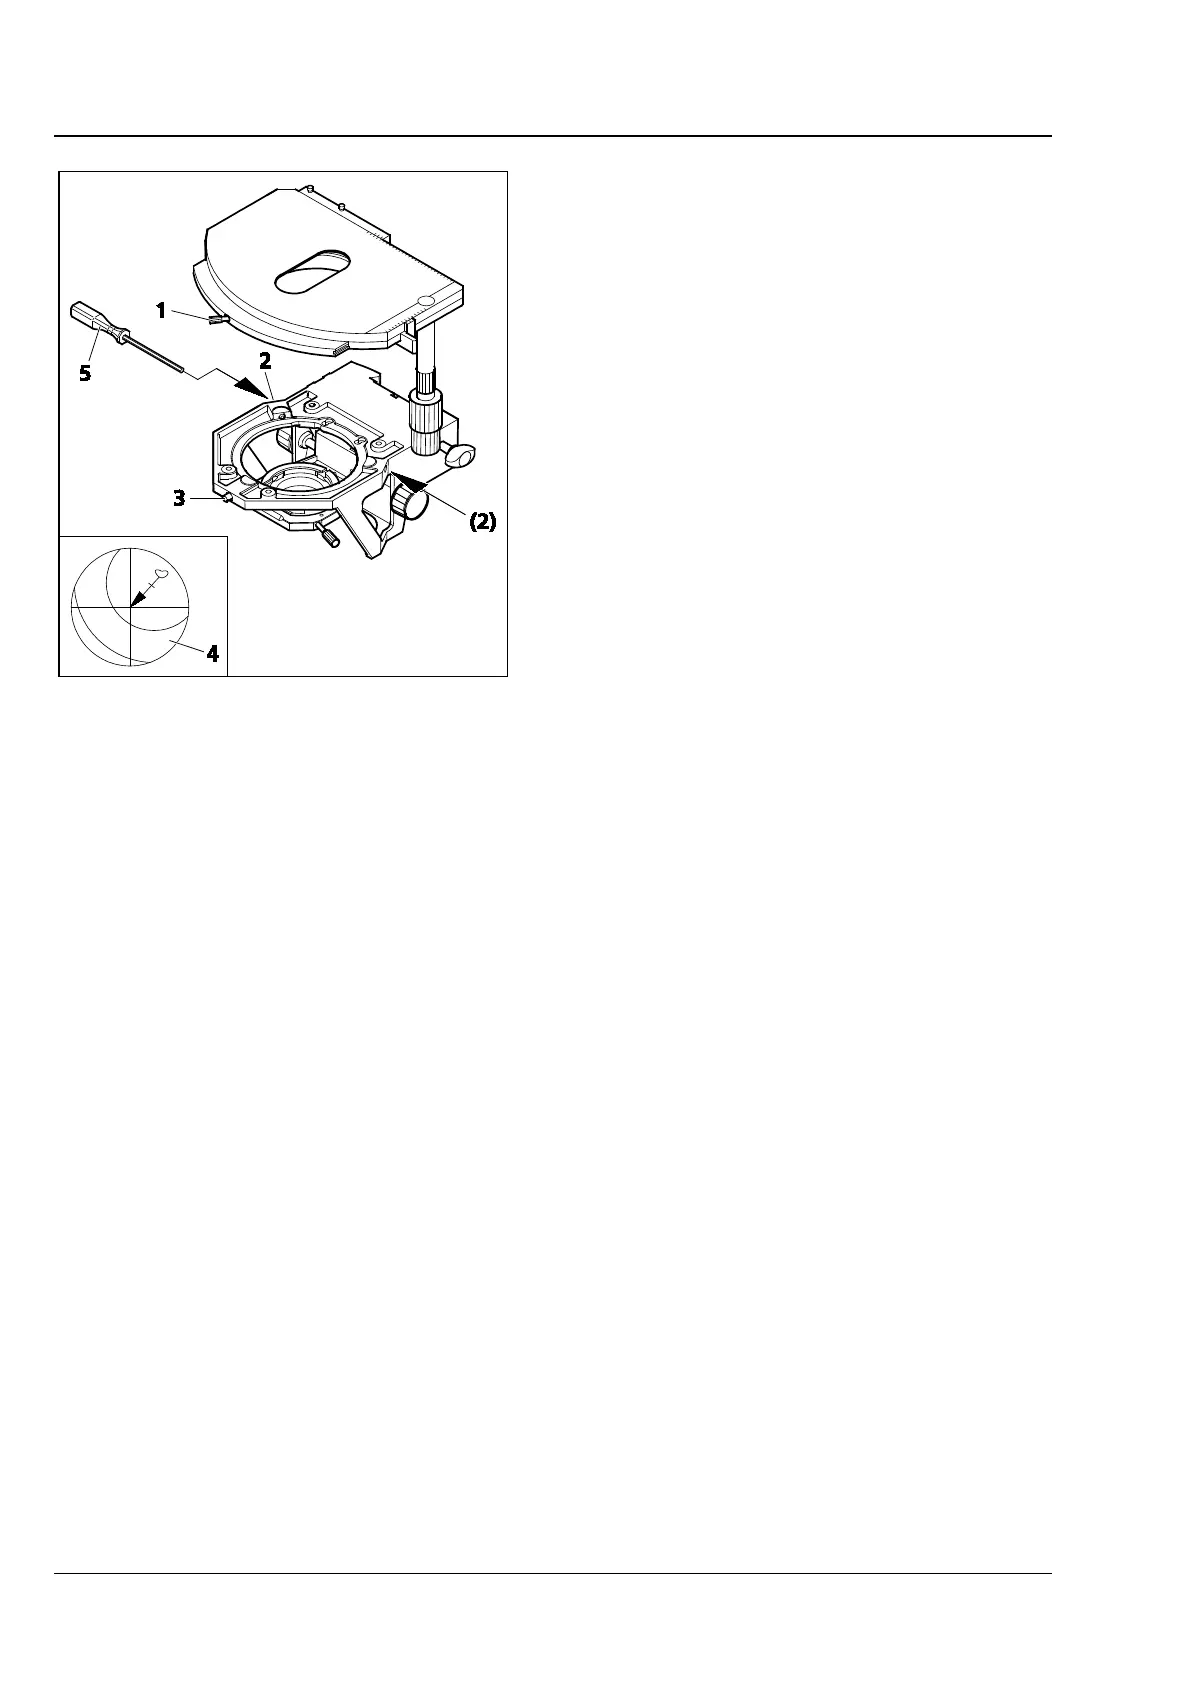
(3) Centering the stage
When objectives with high magnification are used,
the centering can only be exact for one selected
objective.
All stages are factory-precentered, i.e. a set
specimen detail remains in the image center when
the stage is rotated. If the image detail moves from
the image center (Fig. 64/4), recenter the stage as
follows:
• Loosen stage clamping screw (Fig. 64/1) and the
screw cap on the stage carrier (Fig. 64/3).
• Rotate the stage to determine the maximum
specimen deflection (Fig. 64/4, tip of arrow) to
the eyepiece reticles.
• Reset the two centering screws on the stage
carrier (Fig. 64/2) using one SW 1.5 Allen
screwdriver (Fig. 64/5) each to move the
specimen detail by half the arrow length in the
direction of the crossline center. Check whether
the specimen detail moves when the stage is
rotated again; repeat the procedure, if required.
• When centering is finished, tighten screw cap
(Fig. 64/3) again.
The stage can be turned by 240° within an adjustment range of y ≤ 27 mm. No rotation is possible
beyond this.
3.35.3 Adjusting the stage drive length on the ergonomic drive
On mechanical stages with ergo-drive, the length of the x and y stage drive can be extended by
max. 15 mm by axial movement of the drive knobs to further improve operating ease.
Fig. 64 Centering the rotatable mechanical
stage