Axio Imager 2 FIRST-TIME SET-UP ZEISS
Mount sample stage
01/2016 430000-7544-001 73
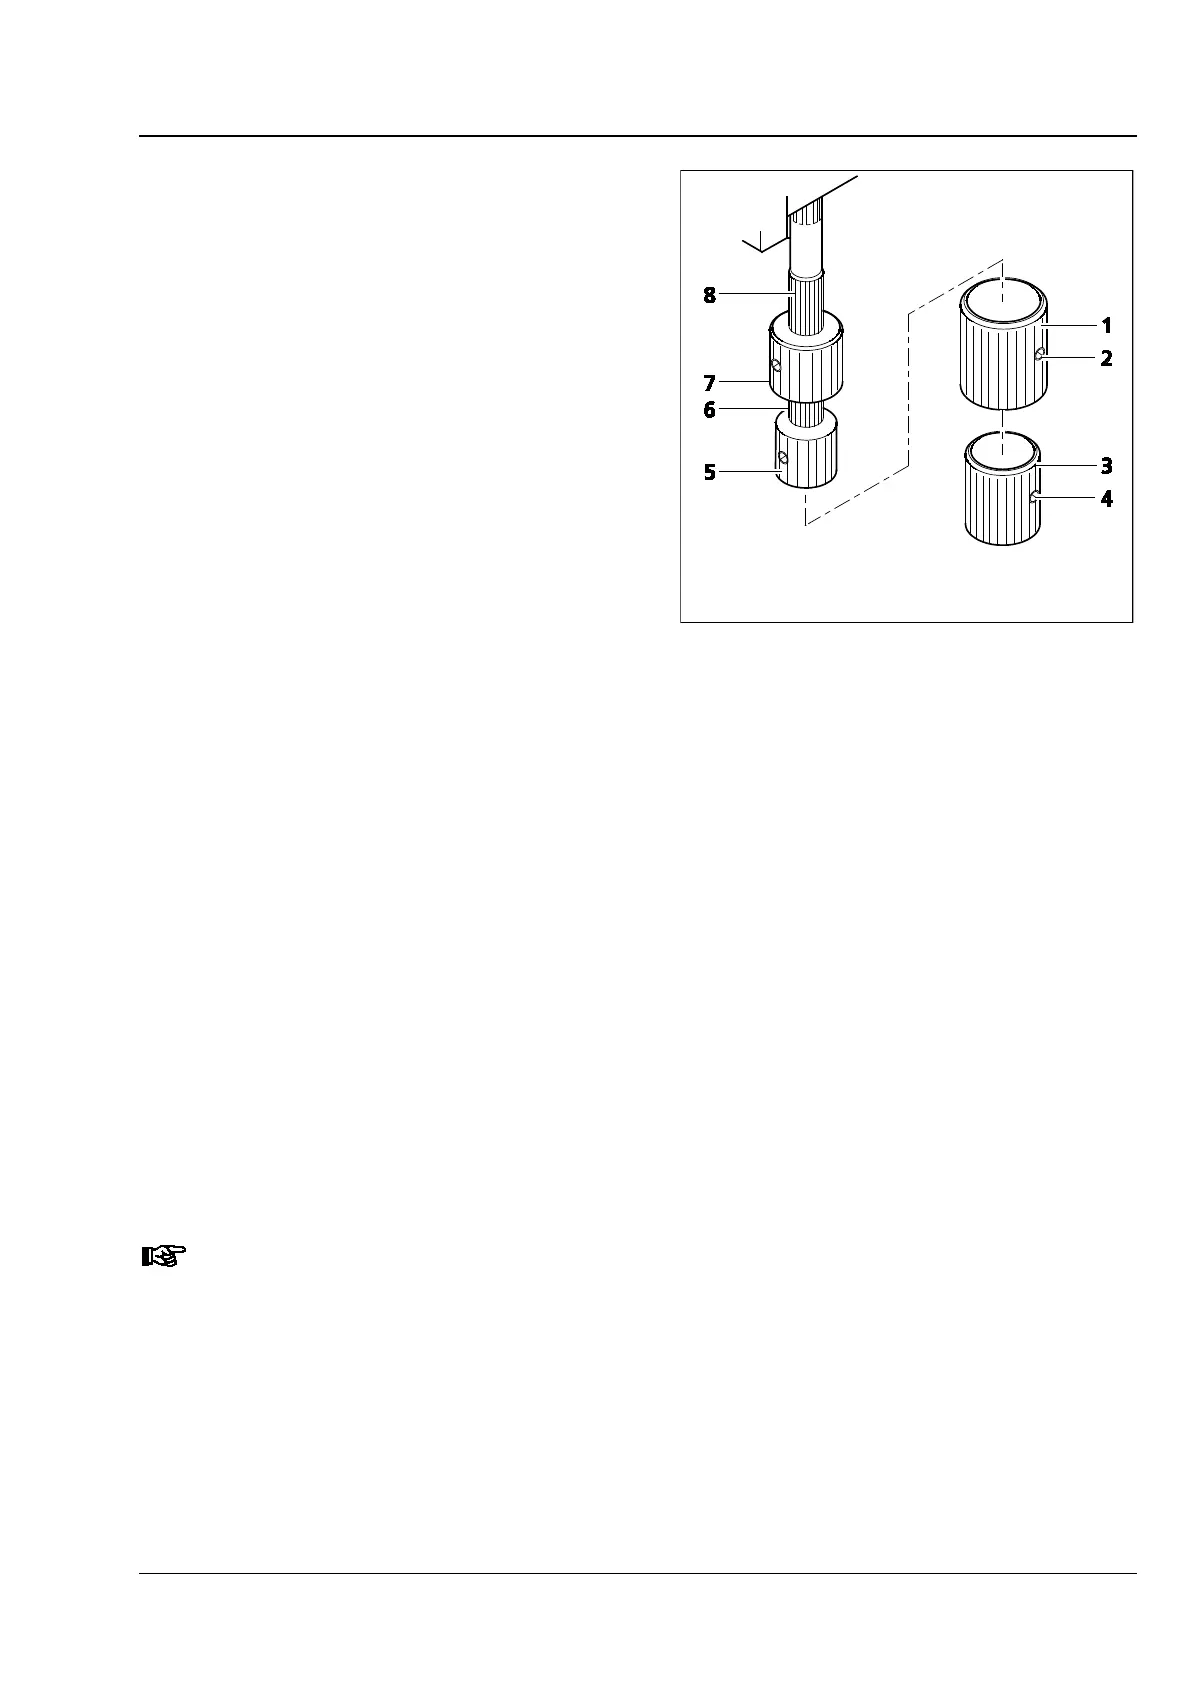
3.35.4 Removing and attaching additional
sleeves
Both drive knobs are fitted with additional sleeves
(optional). These help achieve more sensitive
adjustment of an object position and can be
removed if faster specimen movement is more
important.
• First, loosen the two clamping screws (Fig. 65/4)
on the bottom additional sleeve (Fig. 65/3) and
remove the latter downwards, then loosen the
two clamping screws (Fig. 65/2) on the top
additional sleeve (Fig. 65/1) and pull it down as
well.
• Mount the additional sleeves back on the drive
knobs in reverse order and tighten both
clamping screws.
3.35.5 Adjusting the action (torque) of the two drive knobs of the ergonomic drive
The ergonomic drive has been factory-set to an average torque. You can change this setting as follows:
(1) Adjusting the x direction
• Remove the additional sleeves (Fig. 65/1 and 3) from the drive knobs if necessary. Loosen the clamping
screws to do so.
• Push the x drive knob (Fig. 65/5) down and the y drive knob (Fig. 65/7) up.
• Hold the x drive knob (Fig. 65/5) and turn the light knurled ring (Fig. 65/6) above it clockwise (easy
action) or counterclockwise (sluggish action) until the desired torque is achieved.
(2) Adjusting the y direction
• Hold the y drive knob (Fig. 65/7) and turn the light knurled sleeve (Fig. 65/8) above it clockwise right
(sluggish action) or counterclockwise (easy action) until the desired torque is achieved.
• Replace the additional sleeves if necessary and tighten the clamping screws.
To ensure a long service life for the stage, remove any grit from the specimen slide at regular
intervals. Make sure that the grit does not get into the guiding components for x adjustment.
Fig. 65 Setting the ergonomic drive