Axio Imager 2 FIRST-TIME SET-UP ZEISS
Attaching or changing the condenser
01/2016 430000-7544-001 45
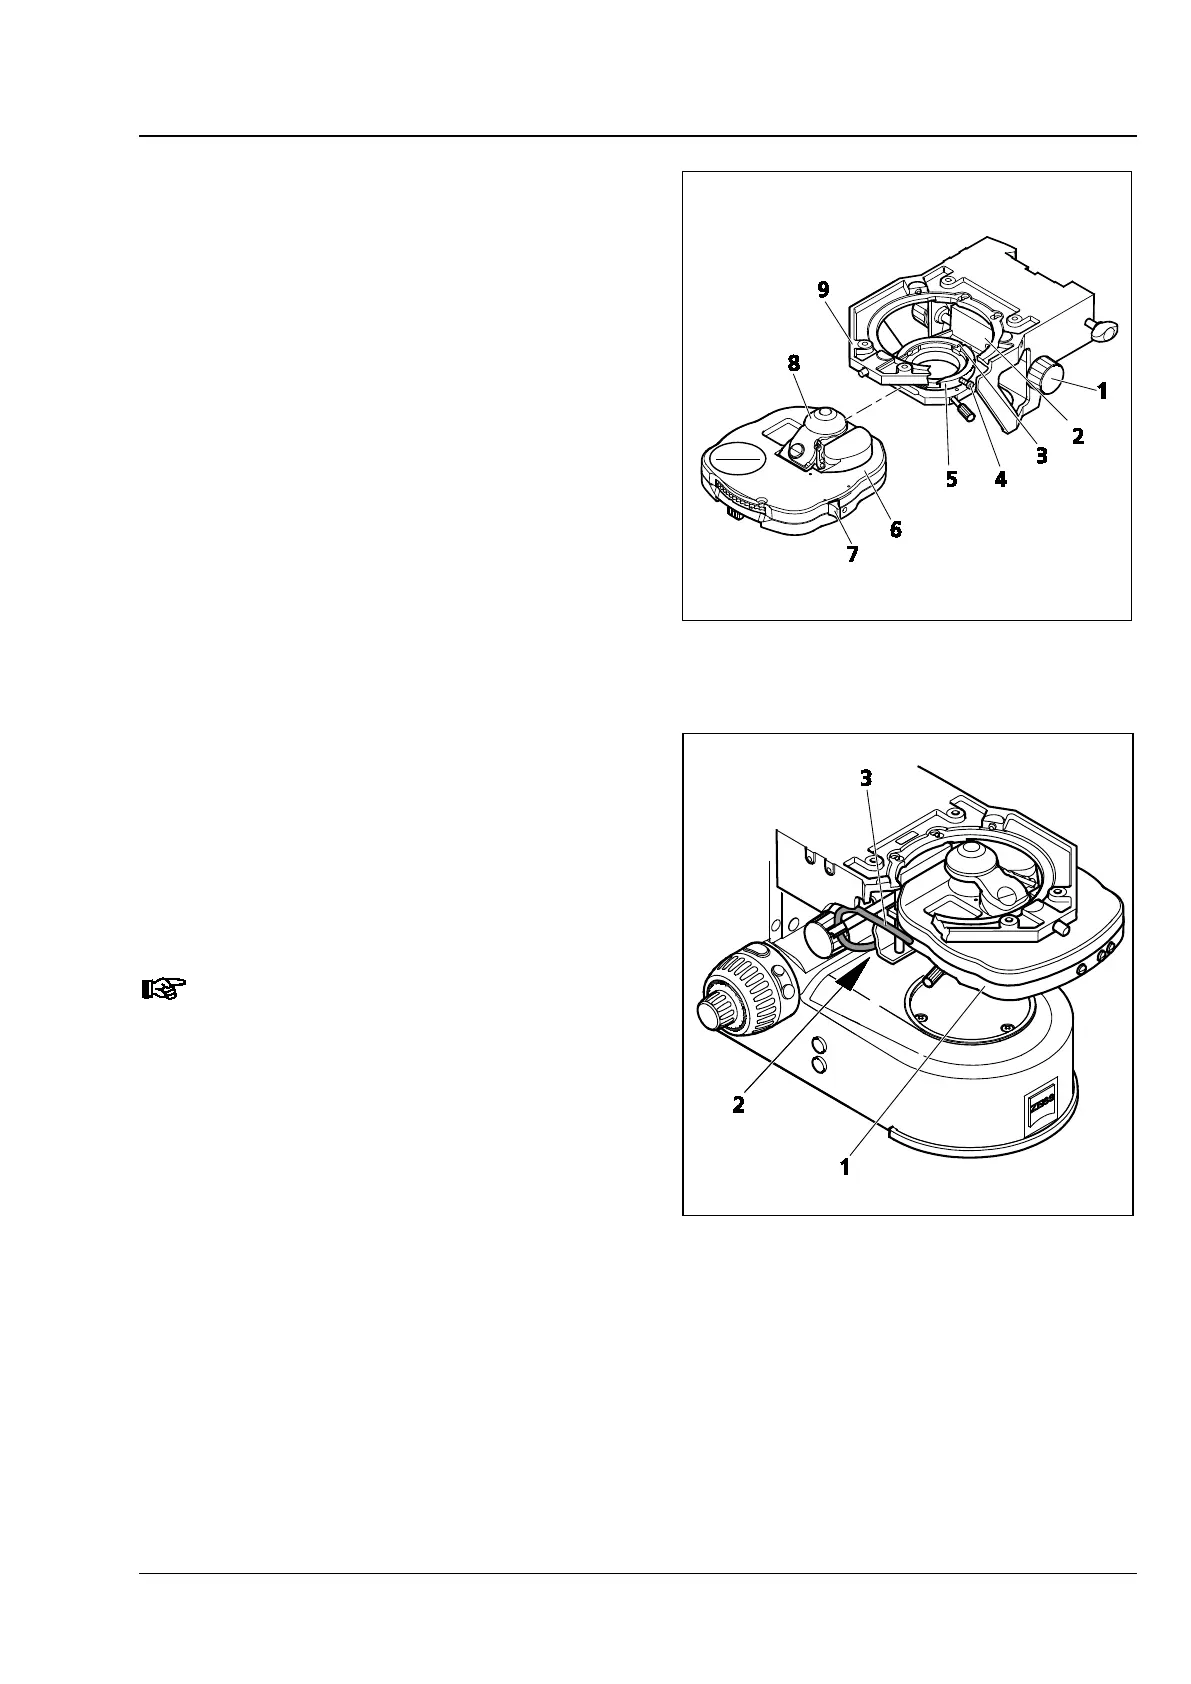
3.14 Attaching or changing the
condenser
• Use the coarse focusing drive to move the stage
carrier to the upper stop position.
• Turn height control (Fig. 25/1) to lower
condenser carrier (Fig. 25/2).
• Unscrew clamping screw (Fig. 25/4) (SW 1.5)
slightly, if necessary.
• If available, swivel out the front lens (Fig. 25/8)
of the condenser using lever (Fig. 25/7).
• Insert the condenser (Fig. 25/6) fully into the
centering condenser mount (Fig. 25/5) between
the condenser carrier (Fig. 25/2) and the stage
carrier (Fig. 25/9). Turn the set screw on the
bottom of the condenser towards the groove
(Fig. 25/3).
• Tighten the clamping screw (Fig. 25/4) on the
condenser mount. To avoid any damage to the
condenser mount, do not apply excessive force.
• When using a motorized condenser (Fig. 26/1)
(on the motorized stand) thread the connecting
cable (Fig. 26/3) through the opening in the
stage carrier to the back and insert the plug into
socket (Fig. 26/2) on the right of the stand base.
Remove the condenser in the reverse order.
When using other types of condensers,
use the same process.
Fig. 25 Attaching the achromatic-aplanatic
universal condenser
Fig. 26 Attaching the achromatic-aplanatic
universal condenser, mot.