Axio Imager 2 FIRST-TIME SET-UP ZEISS
HAL 100 halogen illuminator
01/2016 430000-7544-001 61
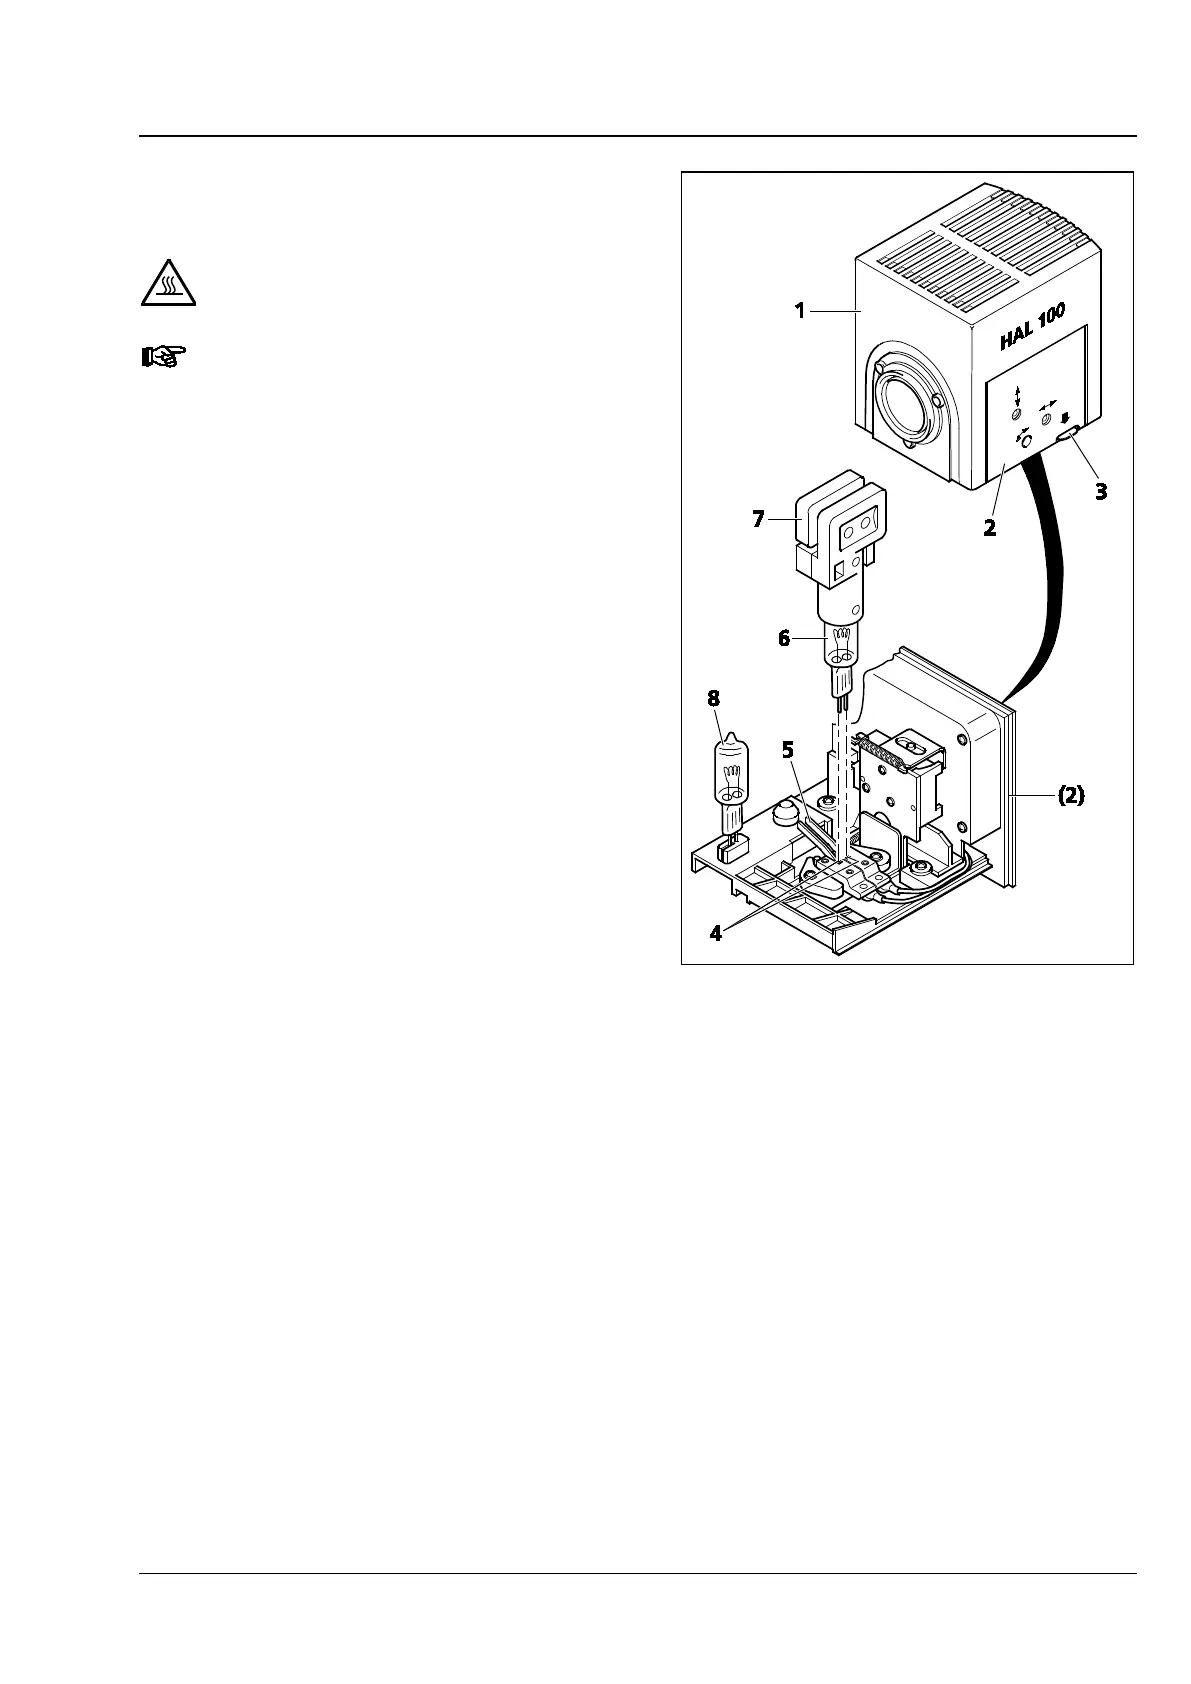
3.29.4 Replacing the HAL 100 halogen
lamp
Hot surface!
You do not need to remove the lamp
housing from the stand to replace the
halogen lamp. Do not
supplied replacement tool (Fig. 47/7)
for lamp replacement in the lamp
housing while the illuminator is
operating.
The replacement lamp (
Fig. 47/8
remain fitted in the lamp housing.
• Switch off the microscope as described in
Section 4.3, disconnect plug (Fig. 43/7) from
connector 12 V/100 W (Fig. 43/3 – reflected
light or Fig. 43/5 – transmitted light) and allow
to cool down for approximately 15 minutes.
• Depress unlock button (Fig. 47/3) of halogen
illuminator HAL 100 (Fig. 47/1), extract lamp
carrier (Fig. 47/2) fully and put it down
separately.
• Depress both spring levers (Fig. 47/5) and
remove the old halogen lamp (Fig. 47/6)
upward.
• Depressing both spring levers, insert the new
lamp in the lamp socket (Fig. 47/4) and release
the spring levers. Always hold/grasp the
halogen lamp by means of the replacement tool
(Fig. 47/7), as even traces of grease on the lamp
may affect its lifetime.
• Shortly depress the spring levers once more to
center the lamp.
• Insert the lamp carrier until it locks.
Fig. 47 Changing the halogen lamp