Axio Imager 2 FIRST-TIME SET-UP ZEISS
Mount sample stage
01/2016 430000-7544-001 71
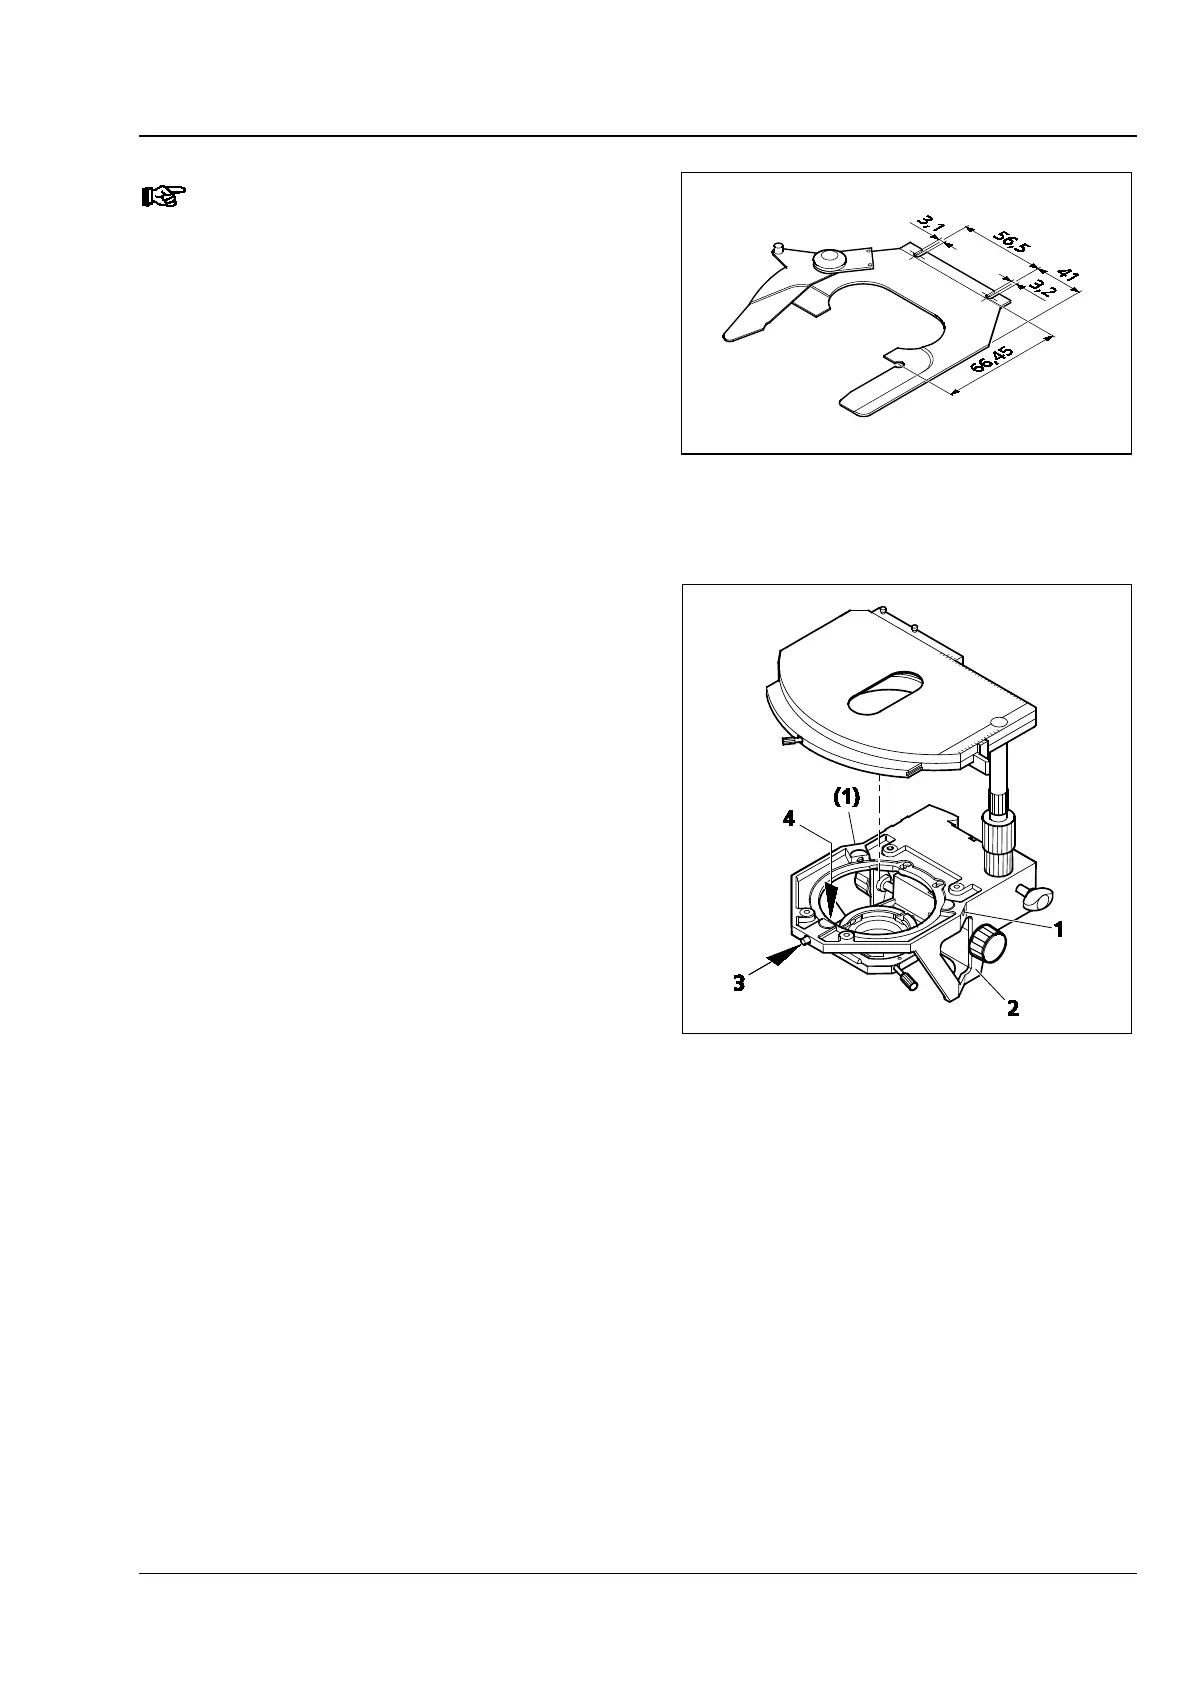
The hole spacings of the specimen
holder are shown in Fig. 62.
3.35.2 Rotatable mechanical stage
75x50/240° R
(1) Removing the stage
• Loosen screw cap (Fig. 63/3) from the spring
housing (roughly three rotations).
• Turn back centering screws (Fig. 63/1), if
necessary.
• Press the stage to the front against spring pin
(Fig. 63/4), lift it off the stage carrier (Fig. 63/2)
from the back and remove it upwards.
• Retighten screw cap (Fig. 63/3).
(2) Attaching the stage
• Loosen screw cap (Fig. 63/3) from the spring
housing (roughly three rotations).
• Place the stage with the dovetail groove on the
spring pin (Fig. 63/4).
• Press the stage to the front against the spring
pin and lower it towards the back of stage
carrier (Fig. 63/2), and then release it.
• Retighten screw cap (Fig. 63/3).
Fig. 62 Hole spacing of the slide
Fig. 63 Changing the rotatable mechanical
stage