273
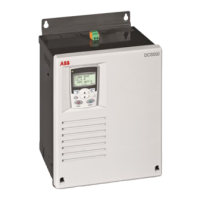
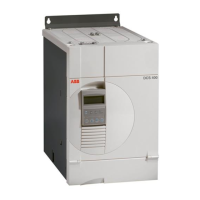
DCS550 panel operation
3ADW000379R0501 DCS550 Manual e e
Note:
The current parameter value appears below the highlighted parameter.
4. Press UP/DOWN to step to the desired parameter value.
Note:
To get the parameter default value press UP/DOWN simultaneously.
5. Press SAVE to store the modified value and leave the PAR EDIT mode or press CANCEL to leave the
PAR EDIT mode without modifications.
6. Press EXIT to return to the listing of parameter groups, and again to step back to the MAIN MENU.
Start-up assistants mode:
Use the start-up assistants mode for basic commissioning of the drive.
When the drive is powered up the first time, the start-up assistants guide you through the setup of the basic
parameters.
There are seven start-up assistants available. They can be activated one after the other, as the ASSISTANTS
menu suggests, or independently. The use of the assistants is not required. It is also possible to use the
parameter mode instead.
The assistant list in the following table is typical:
Enter the motor data, the mains (supply) data, the most important protections and follow the
instructions of the assistant.
After filling out the parameters of this assistant it is
- in most cases - possible to turn the motor for the
Selects an application macro.
Autotuning field current
controller
Enter the field circuit data and follow the instructions of the assistant.
During the autotuning the main respectively field contactor will be closed, the field circuit is measured
by means of
increasing the field current to nominal field current and the field current control
parameters are set. The armature current is not released while the autotuning is active and thus the
motor should not turn.
When the autotuning is finished
successfully, the parameters changed by the assistant are shown for
confirmation. If the assistant fails, it is possible to enter the fault mode for more help.
Autotuning armature current
controller
Enter the motor nominal current, the basic current limitations and follow the instructions of the
assistant.
During the autotuning the main contactor will be closed, the armature circuit is measured by means of
armature current bursts and the armature current control parameters are set. The field current is not
released while
the autotuning is active and thus the motor should not turn, but due to remanence in
the field circuit about 40% of all motors will turn (create torque).
Lock these motors.
When the autotuning is finished
successfully, the parameters changed by the assistant are shown for
confirmation. If the assistant fails, it is possible to enter the fault mode for more help.
Enter the EMF speed feedback parameters, - if applicable - the parameters for the pulse encoder
respectively the analog t
acho and follow the instructions of the assistant.
The speed feedback assistant detects the kind of speed feedback the drive is using and provides help
to set up pulse encoders or analog tachometers.
During the autotuning the main contactor and the field c
ontactor - if existing - will be closed and the
motor will run up to base speed [
M1BaseSpeed (99.04)]. During the whole procedure,
the drive will be
in EMF speed control despite the setting of
M1SpeedFbSel (50.03).
When the assistant is finished
successfully, the speed feedback is set. If the assistant fails, it is
possible to enter the fault mode for more help.
Autotuning speed controller
Enter the motor base speed, the basic speed limitations, the speed filter time and follow the
instructions of the assistant.
EXIT
LOC
PARAMETERS--------------
EDIT
9901 Language
9902 M1NomVolt
350 V
9903 M1NomCur
9904 M1BaseSpeed
CANCEL
LOC
PAR EDIT---------------------
SAVE
9902 M1NomVolt
60 V