323
Some features have remained the same but have been reorganized or are accessible in multiple places:
• Settings Section: This section is no longer uses that name as it contains many other functions
including slice conversion and assignment.
• Select Slice: This feature is now assigned to Q-Link Knob Q16 rather than Q15.
• Zero Snap (previously Snap to Zero): This button is now above the Q-Link Knobs rather than in the
Settings Section.
• Link Slices: This button is now above the Q-Link Knobs rather than in the Settings Section.
• Audition and One Shot / Note On: The earlier Audition feature, which assigned each slice to a
pad, is now always activated. The One Shot / Note On menu, which determines how the pads play
their slices, is now labeled Pad Audition.
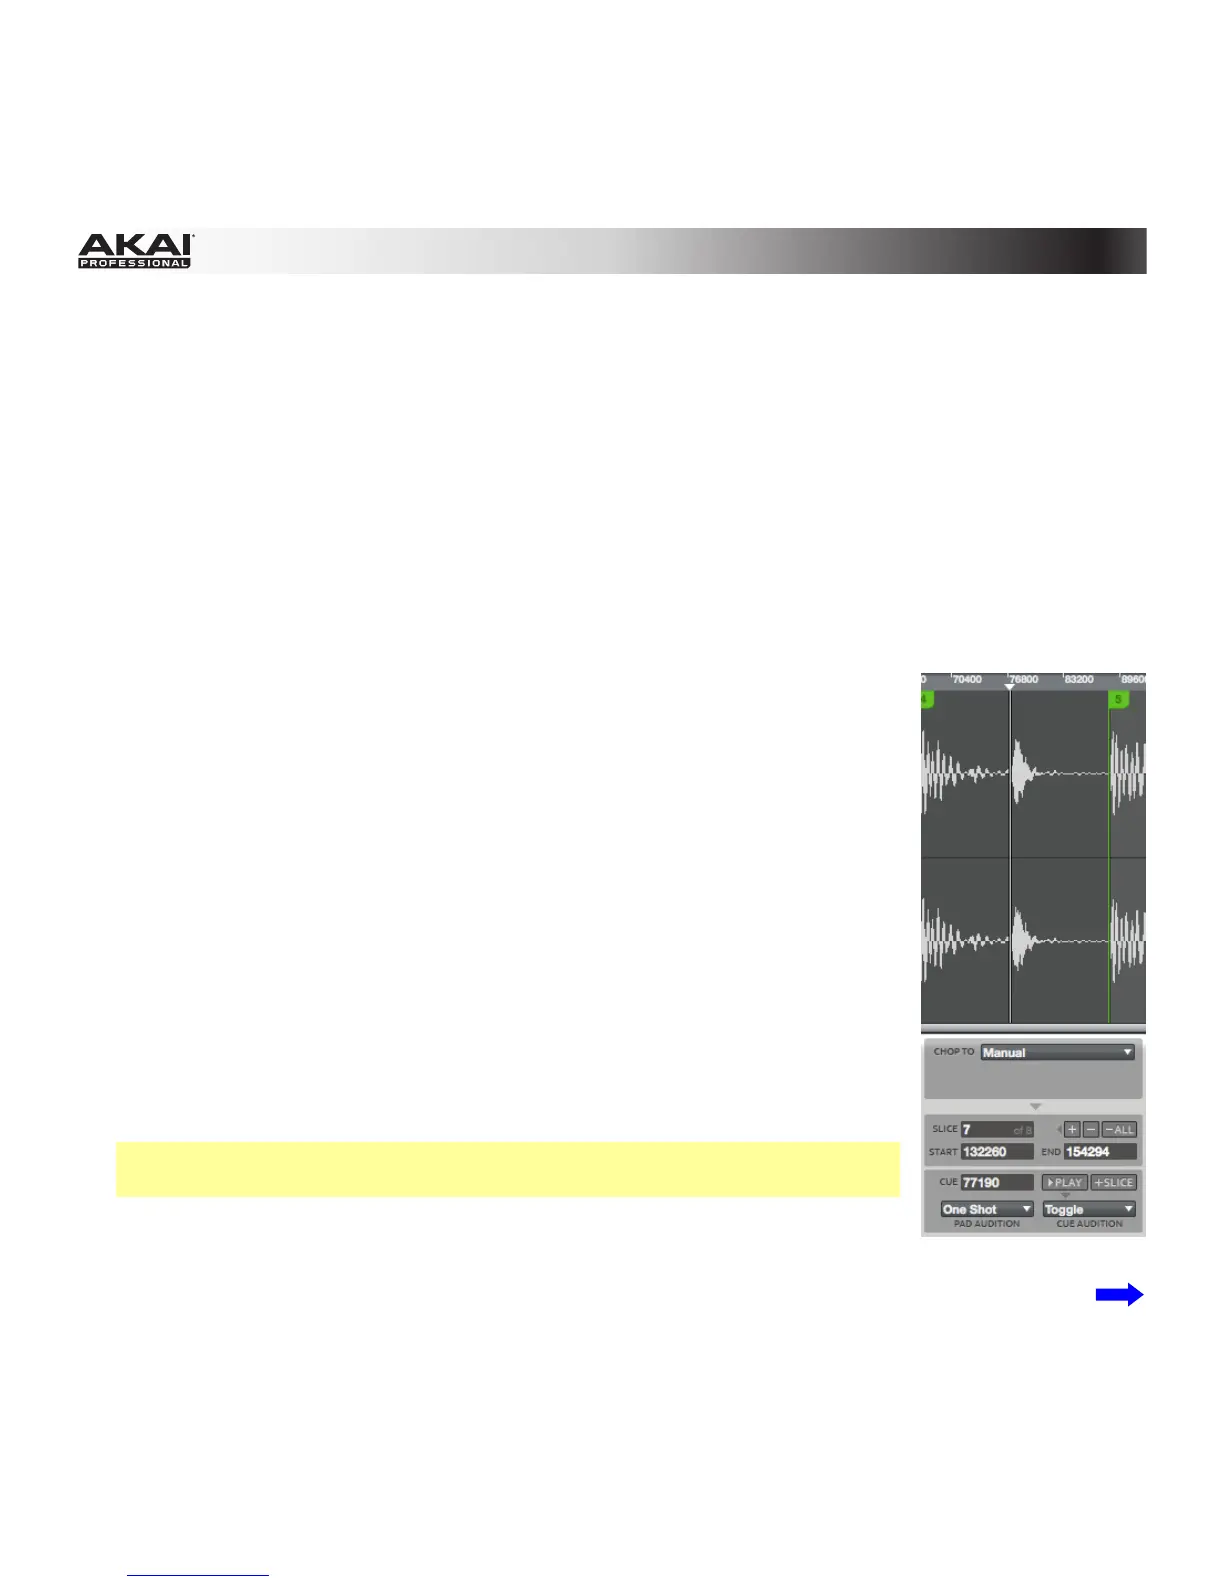
There is now a cue playhead, which is useful when manually inserting slice
markers. You can set its position and behavior to suit your workflow. To quickly
place it, click the desired location in the grey timeline. You can also click and
drag it to adjust it further.
To use the cue playhead:
1. Click the desired location in the grey timeline to quickly place it at that point
in the sample waveform. You can also click and drag it to adjust it further.
The Cue field will show the current position (in samples). Alternatively,
double-click the Cue field and type in the desired position (in samples).
2. Click the Cue Audition drop-down menu and select one of the following:
• One Shot: Clicking Cue Play (Play) will play the entire sample from the
cue playhead.
• Toggle: Clicking Cue Play (Play) once will start playback from cue
playhead. Clicking it once more will stop playback.
Note: The Pad Audition button is the same as the Audition button in earlier
MPC releases' Settings Section.
3. Click Cue Play (Play) to play the sample from the cue playhead.
4. If you want to set a slice marker at that position, click +Slice.
If you want to adjust the slice marker further, repeat Steps 1 and 3 as desired.