Chapter 5: Installing the Switch in an Equipment Rack
112
Installing the Switch
If you have not chosen an orientation for the switch in the equipment rack,
review “Switch Orientations in the Equipment Rack” on page 110.
Please review the installation guidelines in “Choosing a Site for the
Switch” on page 97 before installing the switch in an equipment rack.
Caution
The chassis can be heavy and awkward to lift. Allied Telesis
recommends that you get assistance when mounting the chassis in
an equipment rack. E28
To install the switch in a 19-inch equipment rack, perform the following
procedure:
1. Place the switch on a level, secure surface.
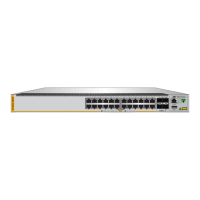
2. Attach the two brackets to the sides of the switch in the selected
position, using the eight M4x6mm screws supplied with the unit. The
illustration in Figure 40 shows the installation of the brackets such that
the front panel of the switch is even with the front of the equipment
rack.
Figure 40. Example of Attaching the Brackets to the Switch
4568
3 51791113 15 17 19 21 23 27/S1
28/S2
25 SFP+
26
AT-x530-28GTXm
16 18 2014
10G/1G
4 6810 122
22 24
FDX HDX COL
1G LINK
ACT
100 LINK
ACT
5G/2.5G/1G LINK
ACT
100 LINK
ACT
PORTS 21-24
PORTS 1-20
5G/2.5G/1G/100
4570
CLASS
1
LASER PRODUCT
CONSOLE

 Loading...