Chapter 6: Installing the Switch on a Wall
116
Switch Orientations on a Wall
Follow these guidelines for positioning the switch on a wall:
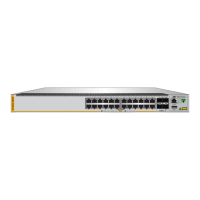
Install the x530-28GTXm or x530-28GSX switch on a wall with the
front panel facing up, left or right, as shown in Figure 42. Do not
install the switch with the front panel facing down.
Install the x530-10GHXm, x530-18GHXm, x530-28GPXm, x530-
52GTXm, or x530-52GPXm switch on a wall with the front panel
facing left or right, as shown in Figure 43. Do not install the switch
with the front panel facing up or down.
Figure 42. Positioning the x530-28GTXm or x530-28GSX Switch on the
Wall
35179111315171921 23 27/S1
28/S2
25 SFP+
26
AT-x530-28G
TXm
16 18 2014
10G/1G
46810122
22 24
FDX HDX COL
1G LINK ACT 100 LINK ACT 5G/2.5G/1G LINK ACT 100 LINK ACT
PORTS 21-24
PORTS 1-20
5G/2.5G/1G/100
CLASS1
LASER PRODUCT
CONSOLE
35179111315171921 23 27/S1
28/S2
25 SFP+
26
AT-x530-28GT
Xm
16 18 2014
10G/1G
46810122 22 24
FDX HDX COL
1G LINK ACT 100 LINK ACT 5G/2.5G/1G LINK ACT 100 LINK ACT
PORTS 21-24
PORTS 1-20
5G/2.5G/1G/100
CLASS1
LASER PRODUCT
CONSOLE
3
5
1 79
11
13
15
17
19
2
1
23 27/
S
1
2
8/
S2
25
SFP+
26
A
T-x530-28GPXm
1
6
18
20
14
10
G/
1G
4
6
8
1
0
122
22
24
F
D
X
H
DX C
OL
1
G LINK
A
CT
100 L
INK
A
CT
5G/2.5G/1G LINK
A
CT
100 LINK
A
CT
POR
T
S 21-24
PO
R
TS
1
-
2
0
5G
/
2.5G/1G/100
CL
A
S
S
1
LA
S
E
R
P
R
O
D
U
C
T

 Loading...