3. Initial Settings
119
ML-2050A/2051A/2150A
Chapter 5 Laser Welding by External Communication Control (RS-485 CONTROL)
Introduction Part
Installation and
Preparation Part
Operating Part Maintenance Part Appendixes
3. Initial Settings
Perform initial settings to control laser welding by external communication
(RS-485 CONTROL). Set communication schedules and equipment No. on the
control panel of the laser.
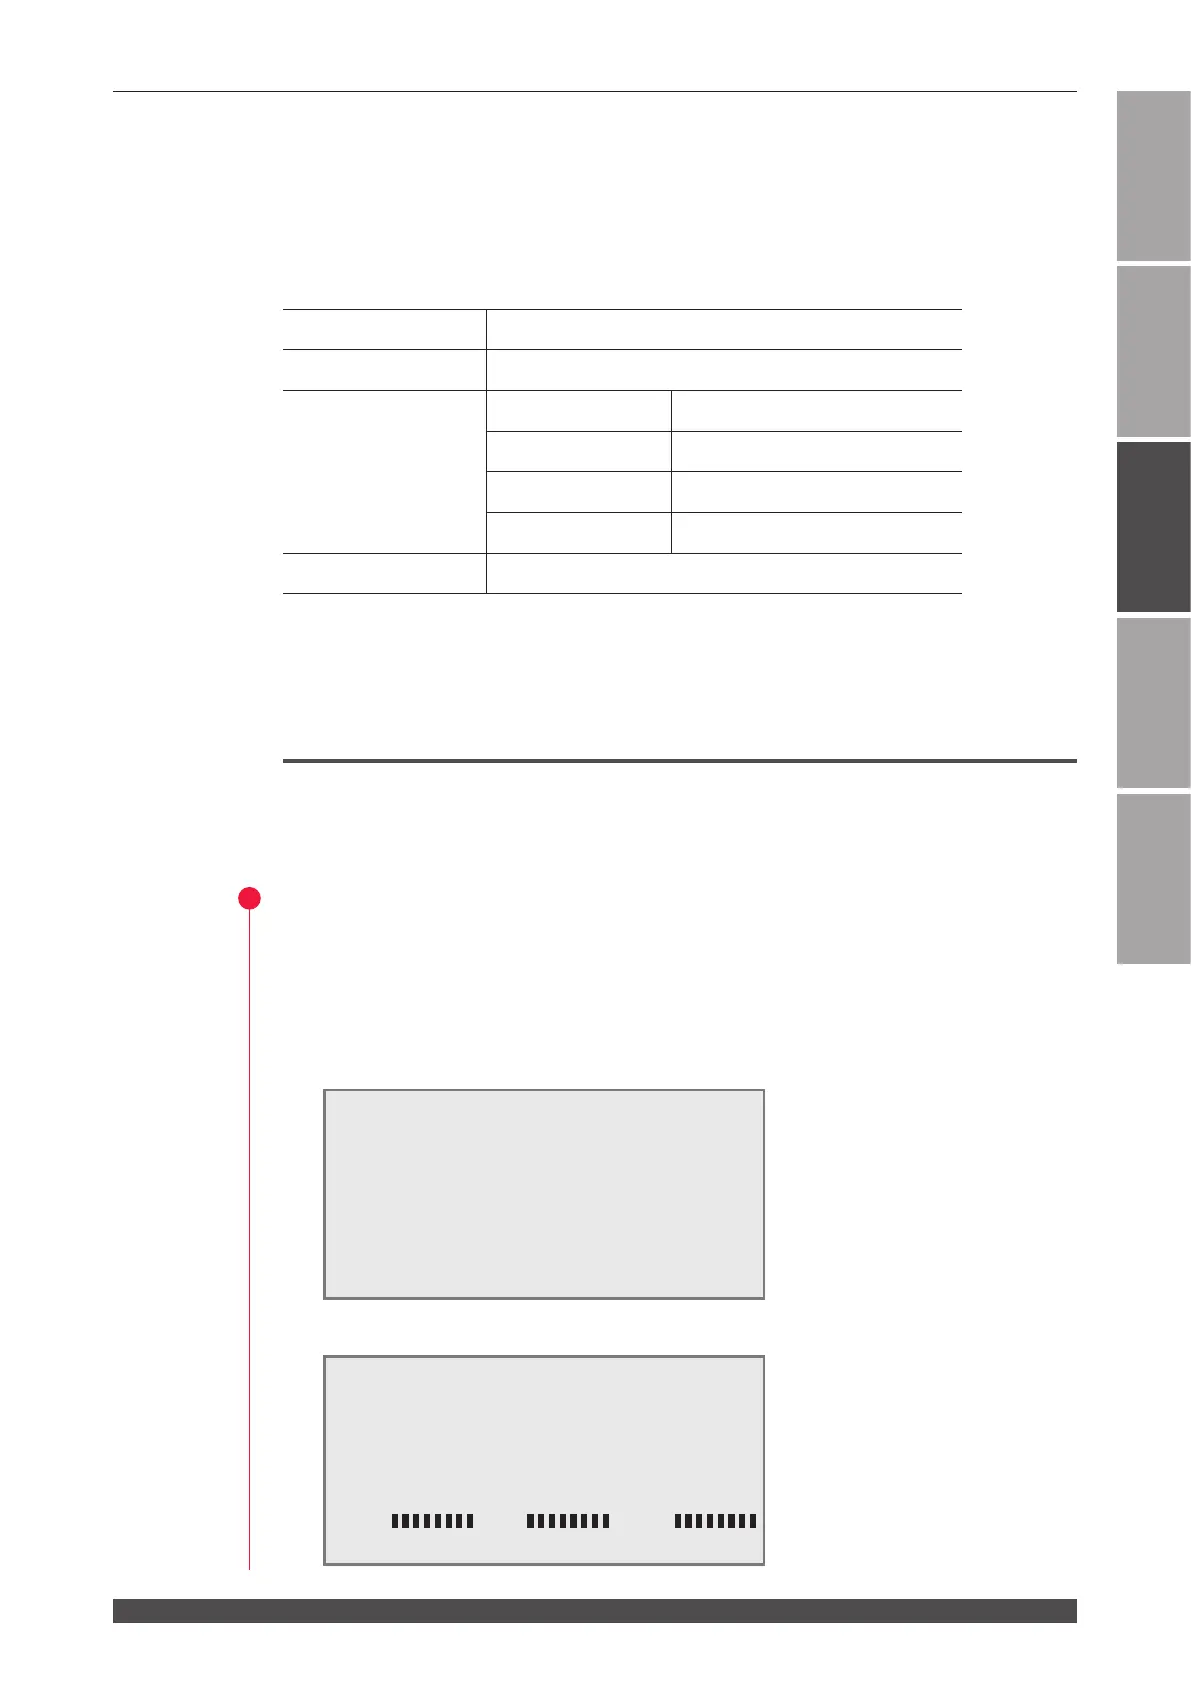
The communication schedules for data transfer are as follows.
Data transfer system Conforming to RS-485, asynchronous, full duplex
Transfer rate 9600, 19200, 38400 bps
Data type Start bit 1
Data bit 8 or 7
Stop bit 2 or 1
Parity bit Even/odd/none
Character code ASCII
⇒
For setting the transfer rate, data type, and equipment No., display the INITIAL
screen on the control panel of each equipment to be connected to a personal
computer, etc. and set them on this screen.
Setting Communication Schedules
Display the INITIAL screen on the control panel of the laser and then set
communication schedules.
1
Displaying the INITIAL Screen
(1) Turn OFF the CONTROL keyswitch, and turn ON the MAIN POWER switch while
holding down the MENU key.
⇒
Hold down the MENU key until the SELF-CHECK > screen appears.
The power supply is turned ON, the POWER lamp comes on, and the SELF-
CHECK > screen appears.
At completion of the self check, the INITIAL screen appears.
INITIALIZE:OFF WATER 28˚C
NETWORK #00
TEMP CONT 30˚C ALARM L20˚C H40˚C
POSITION AUTO OFF 60min
SW1-12345678 SW2-12345678 SW3-12345678
ON ON ON
OFF
OFF
OFF
WATER 28˚C
AUTO-START
SELF-CHECK >


 To Next Page