88
ML-2050A/2051A/2150A
2. Control Panel Functions
2. Control Panel Functions
This section explains the functions of the control panel.
At PANEL CONTROL, welding schedules are set by using the control panel keys and
laser light is output by pressing the LASER START/STOP button. After the output,
you can check the laser output energy on the POWER MONITOR screen.
⇒
When the optional laser controller is connected, laser welding operations can be
performed by using the control panel of the laser controller in the same way in a
place remote from the laser.
When the laser controller is used, the control panel and LASER START/STOP
button of the main unit cannot be used. However, the EMERGENCY STOP
button and CONTROL keyswitch can be used.
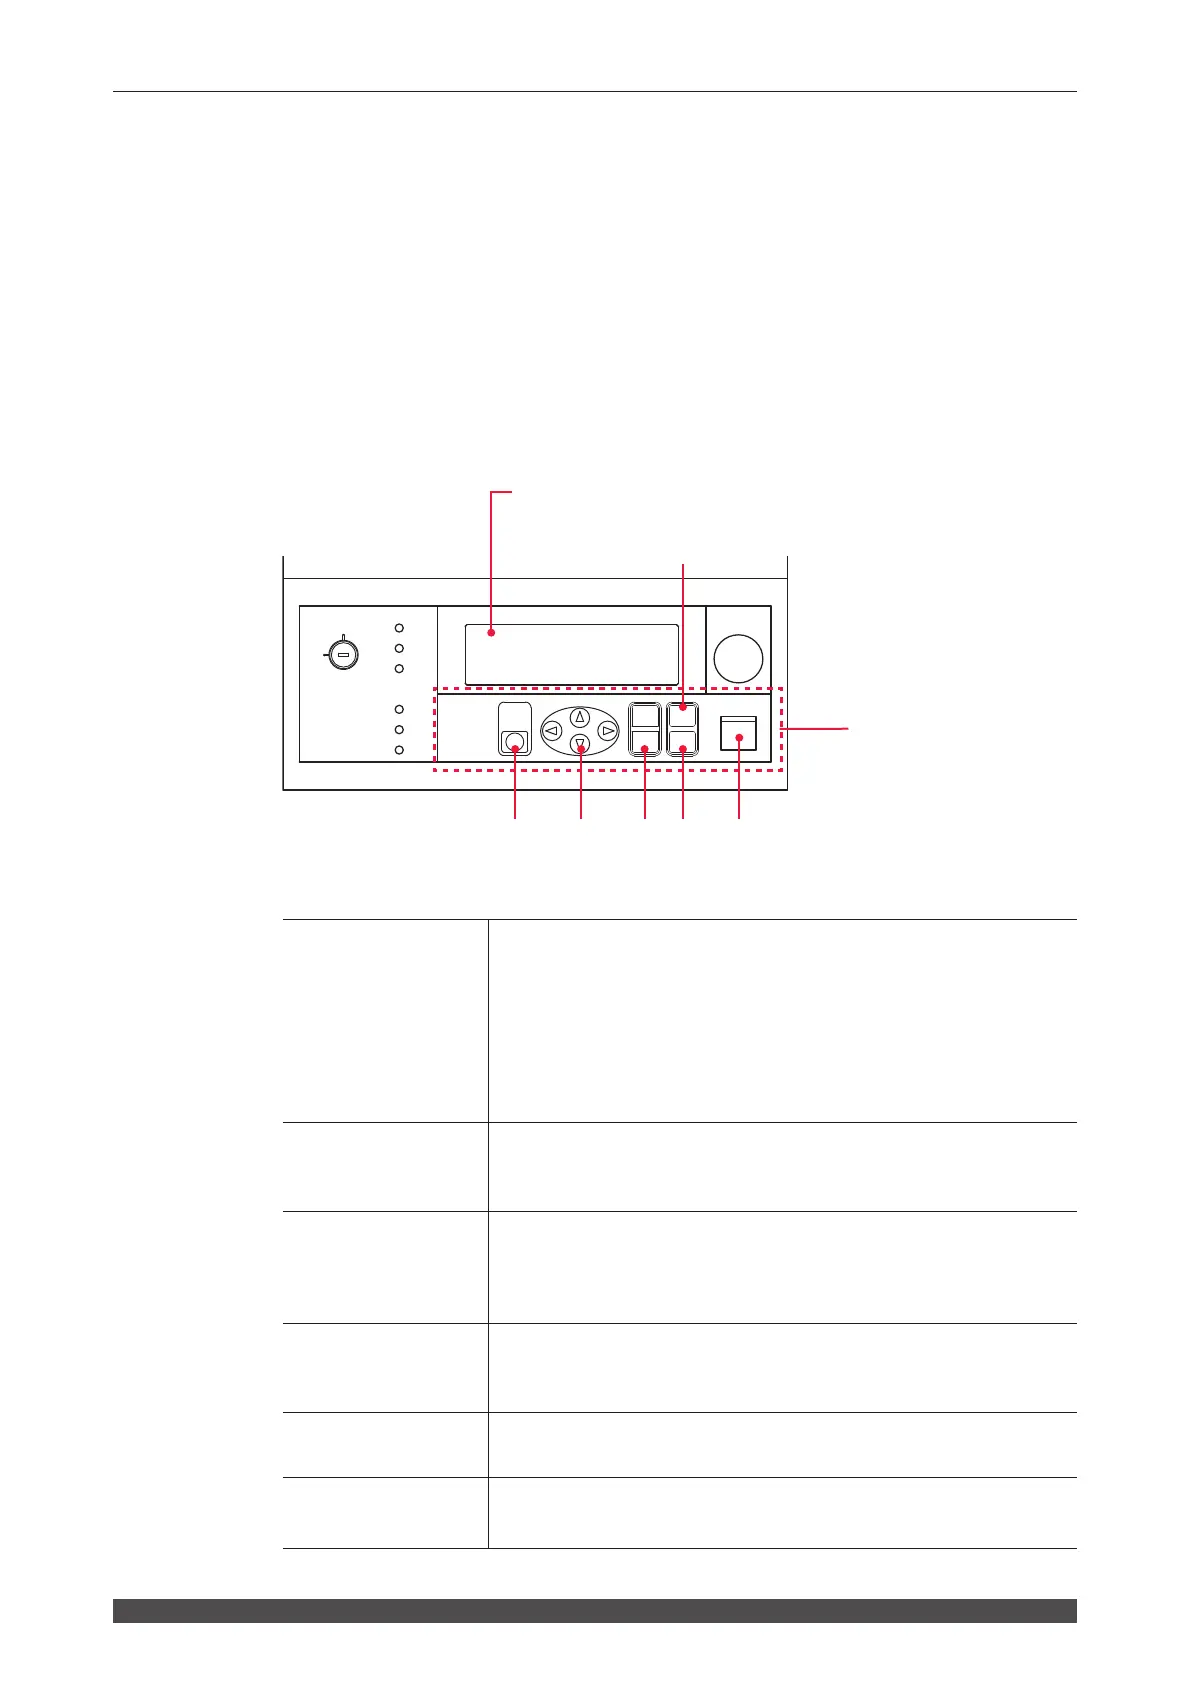
Function of Each Section on the Control Panel
(1)
LASER
START/STOP
(Button)
EMISSION
(
Lamp)
If you press the button when a laser light output becomes ready (*),
laser light is output. If the button is pressed again while laser light is
repeatedly output, the repeated output is stopped.
*
Pin No.23 (control switching) of the EXT.I/O (1) connector is in a
closed circuit, a high voltage is supplied, and the branch shutter
is open.
When a high voltage is applied to the laser oscillator section, the
EMISSION lamp comes on.
(2)
MENU
(Key)
Switches the liquid crystal display screen. Each time this key is
pressed, the SCHEDULE screen, STATUS screen, and POWER
MONITOR screen are displayed in sequence.
(3)
ENTER
(Key)
Sets a set numeric value or ON/OFF specication denitively.
After changing data, be sure to press the ENTER key to denitively set
the set value. Without this operation, the set value will return to the
pre-change value in several seconds.
(4)
ON (+)
OFF (-)
(Key)
Species the ON/OFF status of the setting item.
Changes the numeric value or alphabet at the cursor position to the
ascending order (ON key) or descending order (OFF key).
(5)
CURSOR
(Key)
Moves the cursor (
■
) up and down or left and right on the screen.
(6)
TROUBLE RESET
(Key)
Clears the trouble display and resets the screen after completing
trouble processing.
ON
OFF
CURSOR
RESET
MENU
OFF
(-)
(+)
ENTER
TROUBLE
ON
Y
E
G
R
M
E
E
T
P
O
C
N
S
SHUTTER 1
SHUTTER 2
READY
SHUTTER 3
CONTROL
HIGH VOLTAGE
POWER
START/STOP
LASER
EMISSION
Liquid crystal display (screen)
Setting items, set values, and error messages are displayed.
Control panel
Laser welding operations
are performed.
(6)
(5)
(4)
(3)
(1)
(2)
 Loading...


