1. Connecting the Power Supply
41
ML-2050A/2051A/2150A
Chapter 2 Connections and Preparations of Each Section
Introduction Part
Installation and
Preparation Part
Operating Part Maintenance Part Appendixes
Chapter 2
●
Connections and Preparations of
Each Section
1. Connecting the Power Supply
CAUTION
Your qualified electrician must carry out the electrical connection to main power
supply. (Also follow your local accident prevention regulations, such as the German
Regulation, BGVA2.)
CAUTION
For the power supply side, we earnestly recommend using a leakage breaker with
the rated current of 15 A or more, which is applicable to harmonics and surges.
Item required
Phillips screwdriver
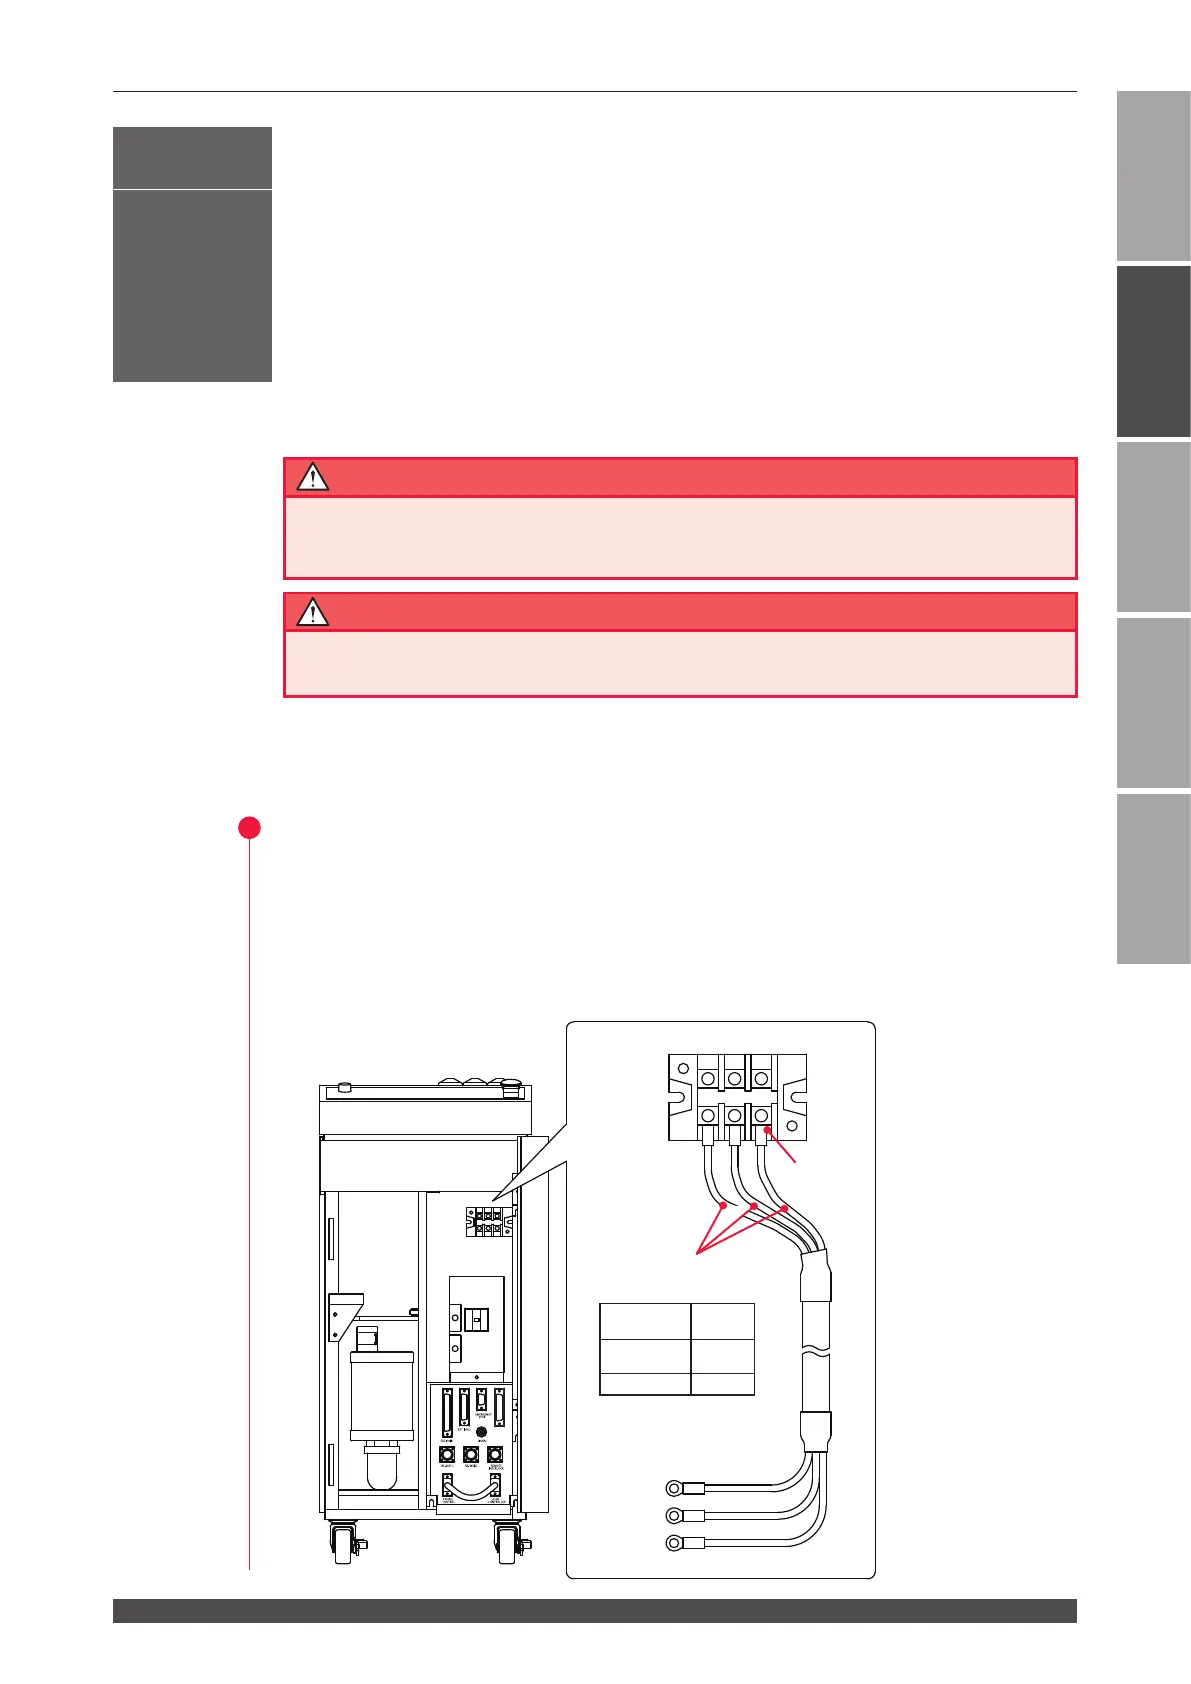
Operating Procedure
(1) Open the front door and remove the plastic cover on the power input terminal
200 V AC/220 V AC/240 V AC (depending on the specication).
(2) Lead the attached power cable inward from the hole on the bottom plate of the
main unit.
(3) While conrming the terminal colors of the power cable, connect the power cable
to the PE (yellow/green), L (R) brown, and N (S) blue power input terminals.
P-1518
LOWER LIMIT
UPPER LIMIT
EXT.I/O(3)
PE L N
YEL/GRN BRN BLU
PE YEL/GRN
(GND)
L(R)BRN
N(S)BLU
Power cable
2.5 sq
M4
Power input terminals
Rated voltage 300 V AC
Number of
cores
3
Cross section 2.5 mm
2
Installation and
Preparation Part