2. Setting the Laser Light Delivery
81
ML-2050A/2051A/2150A
Chapter 2 Various Settings
Introduction Part
Installation and
Preparation Part
Operating Part Maintenance Part Appendixes
Controlling Branch Shutters Independently
In the following, the method of setting branch shutters to independent control
by setting DIP switches.
⇒
Usually, the sharing specication is changed by our engineer.
When "BEAM-1" to "BEAM-3" are set to ON and the branch shutter is opened, the
branch shutter and the timesharing unit are automatically operated to transmit laser
light. When branch shutters are put under independent control, the timesharing unit
and the branch shutter are not operated in the interconnected form even if "BEAM" is
set to ON. Accordingly, laser light can be transferred by a sharing method other than
the prepared 5 types of sharing specication.
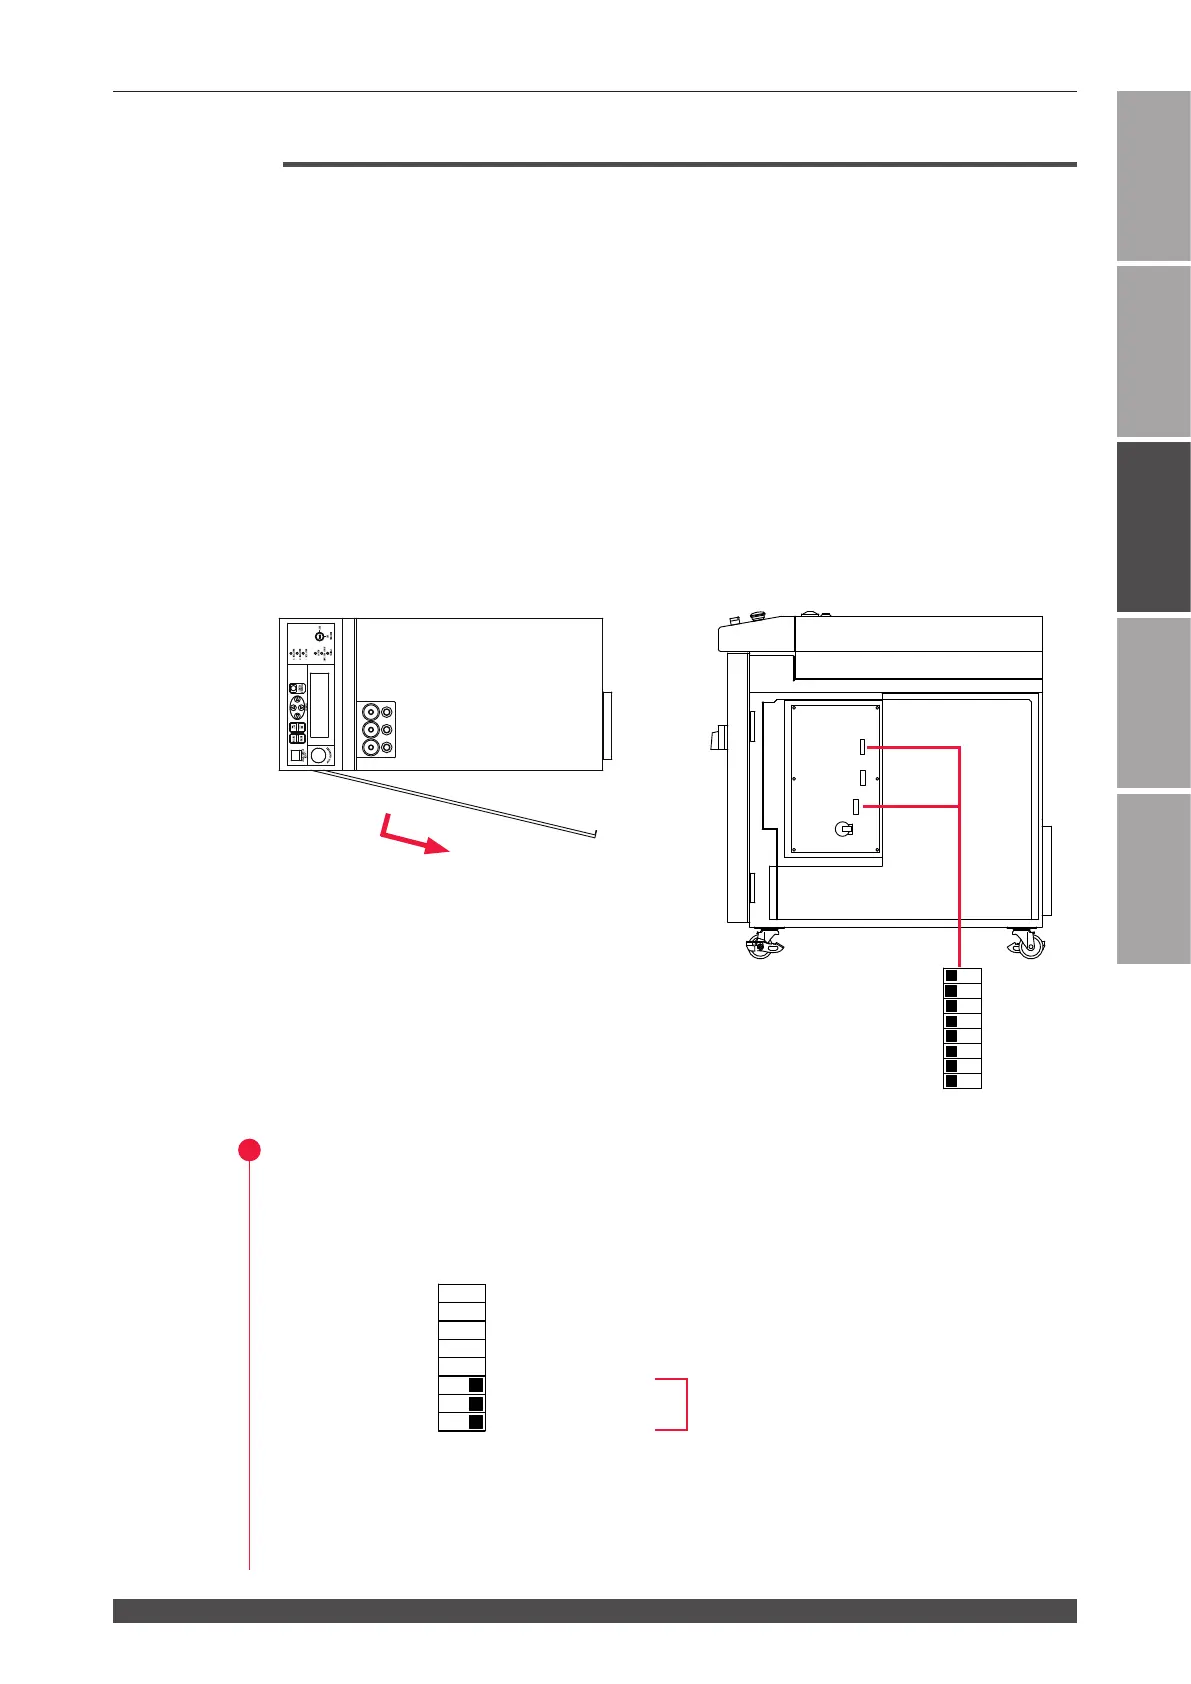
The 3 DIP switches of SW1, SW4, and SW2 are provided on the CPU board in the
main unit. Set the branch shutter by SW1 and the timesharing unit by SW2. The
branch shutter independent control function is assigned to No.6, No.7, and No.8
of SW1. So remove the side cover of the main unit and change the SW1 ON/OFF
setting.
Side cover
Loosen the screw at the rear of the cover.
Pull the cover forward and then pull it out
backward.
SW1 is used to set the branch
shutter and SW2 is used to set
the timesharing unit.
Setting Independent Control
(1) Remove the side cover of the main unit and set No.6, No.7, and No.8 of DIP
switch SW1 to ON.
SW1
(branch shutter)
Set No.6 to ON.
Set No.7 to ON. Branch shutter independent control
Set No.8 to ON.
The independent control of the branch shutter is set and the items "MIRR-1" and
"MIRR-2" to operate the timesharing unit are displayed on the STATUS screen. Laser
light can be output according to an optional specification resulting from combining
"BEAM-1", "BEAM-2", "BEAM-3", "MIRR-1", and "MIRR-2."
SW1
SW4
SW2
1
2
3
4
5
6
7
8
O
F
F
SW1
SW2
1
2
3
4
5
6
7
8
O
F
F