3. Changing the Acceptance Time for Laser Start Signal/Schedule Signal
83
ML-2050A/2051A/2150A
Chapter 2 Various Settings
Introduction Part
Installation and
Preparation Part
Operating Part Maintenance Part Appendixes
16ms 16ms
4ms 4ms
*1 *1
*2 *2
*2 *2
1
2
3
4
5
6
7
8
O
F
F
SW4
3. Changing the Acceptance Time for Laser Start Signal/
Schedule Signal
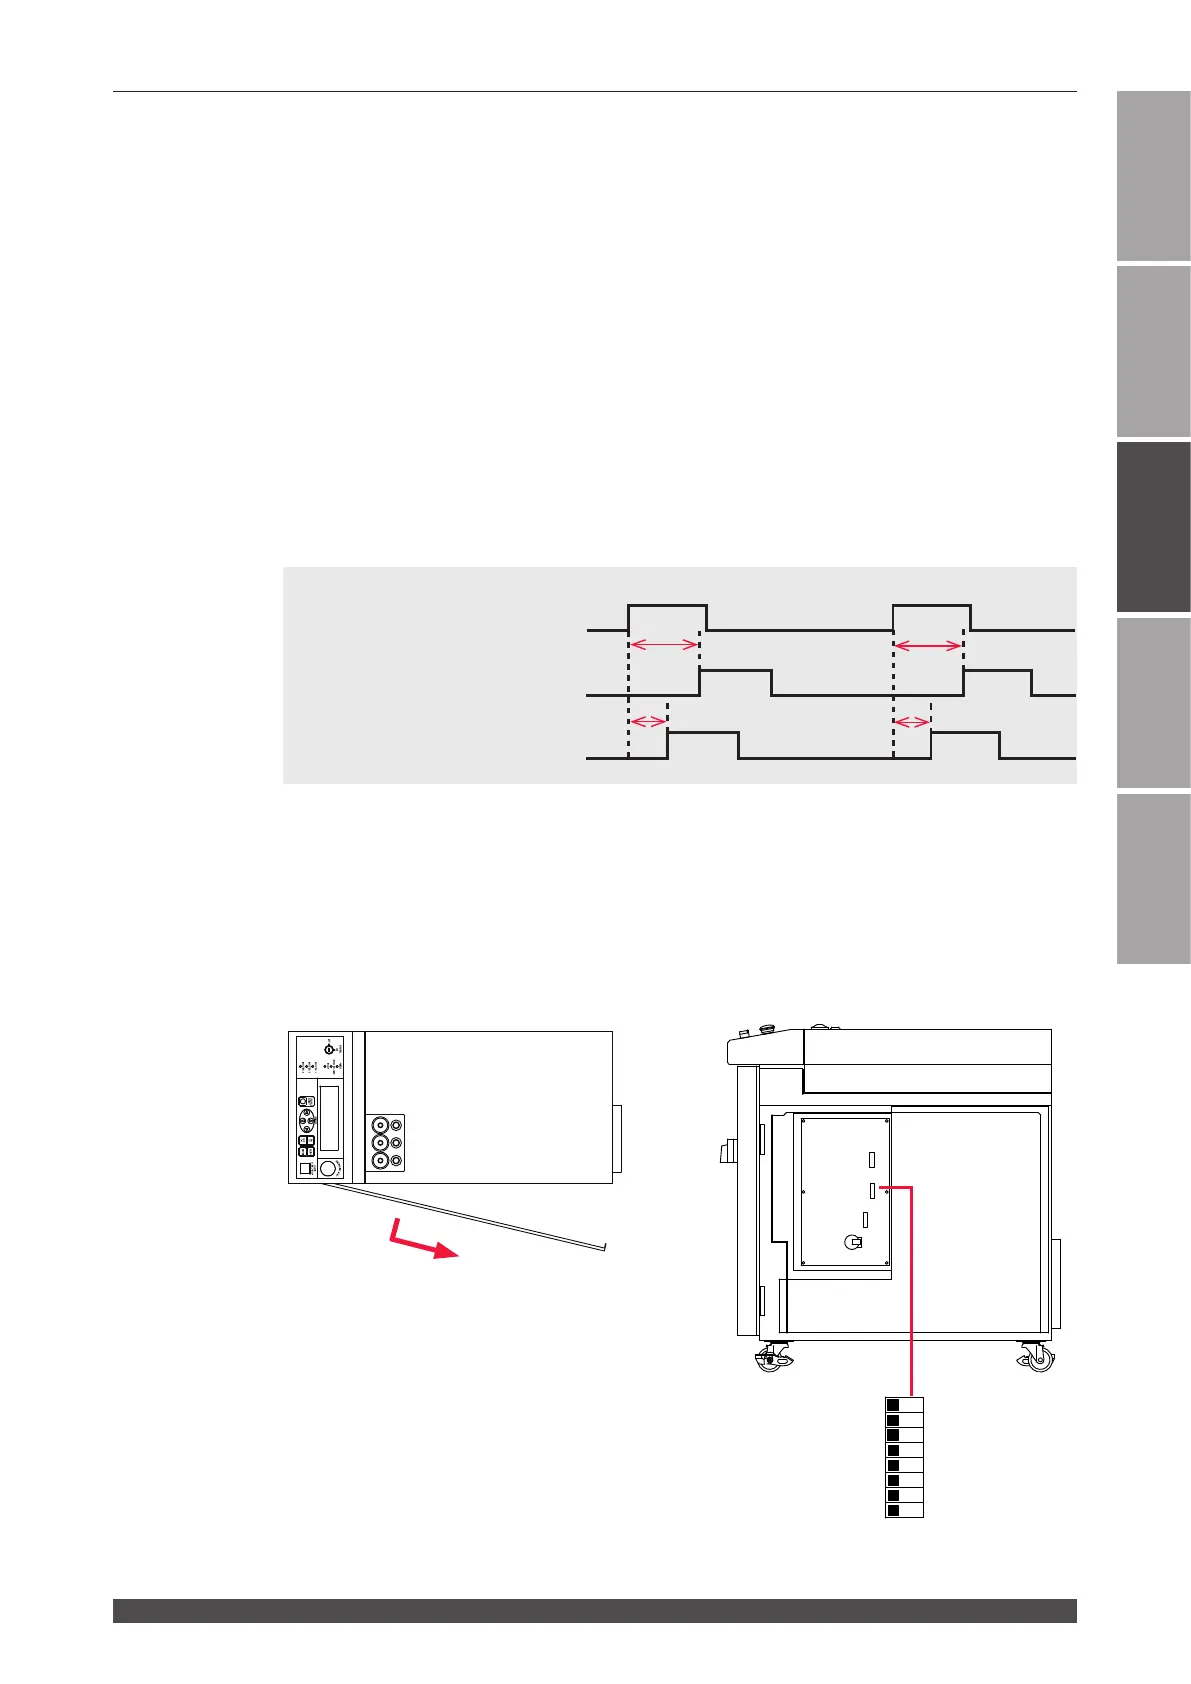
This section explains how to change the acceptance time for the laser start
signal and schedule signal to be input into the EXT.I/O (1) connector by setting
the DIP switches provided in the side face of the main unit when EXTERNAL
CONTROL is exerted by external input/output signals.
The laser signal acceptance time means the time required until laser light is actually
output after the laser start signal is input. The schedule signal acceptance time
means the time required until this laser establishes schedules after a schedule signal
1, 2, 4, 8, or 16 to select a SCHEDULE number is input.
The following timing chart shows the laser light output timing when the laser signal
acceptance time is 16 ms and 4 ms.
*1: Laser start signal input *2: Laser light output
Laser start signal (input)
Laser light output (acceptance 16 ms)
Laser light output (acceptance 4 ms)
⇒
The laser start signal acceptance time and the schedule signal acceptance time
are common. A dierent value cannot be set for the respective time.
The 3 DIP switches of SW1, SW4, and SW2 are arranged on the CPU board in the
main unit. To change the acceptance time, remove the side cover and switch the ON/
OFF status of No.1 and No.2 of SW4.
Side cover
Loosen the screw at the rear of the cover.
Pull the cover forward and then pull it out
obliquely backward.
SW1
SW4
SW2