4. Setting the Function of the Output Unit with Fiber Sensor (Option)
85
ML-2050A/2051A/2150A
Chapter 2 Various Settings
Introduction Part
Installation and
Preparation Part
Operating Part Maintenance Part Appendixes
4. Setting the Function of the Output Unit with Fiber
Sensor (Option)
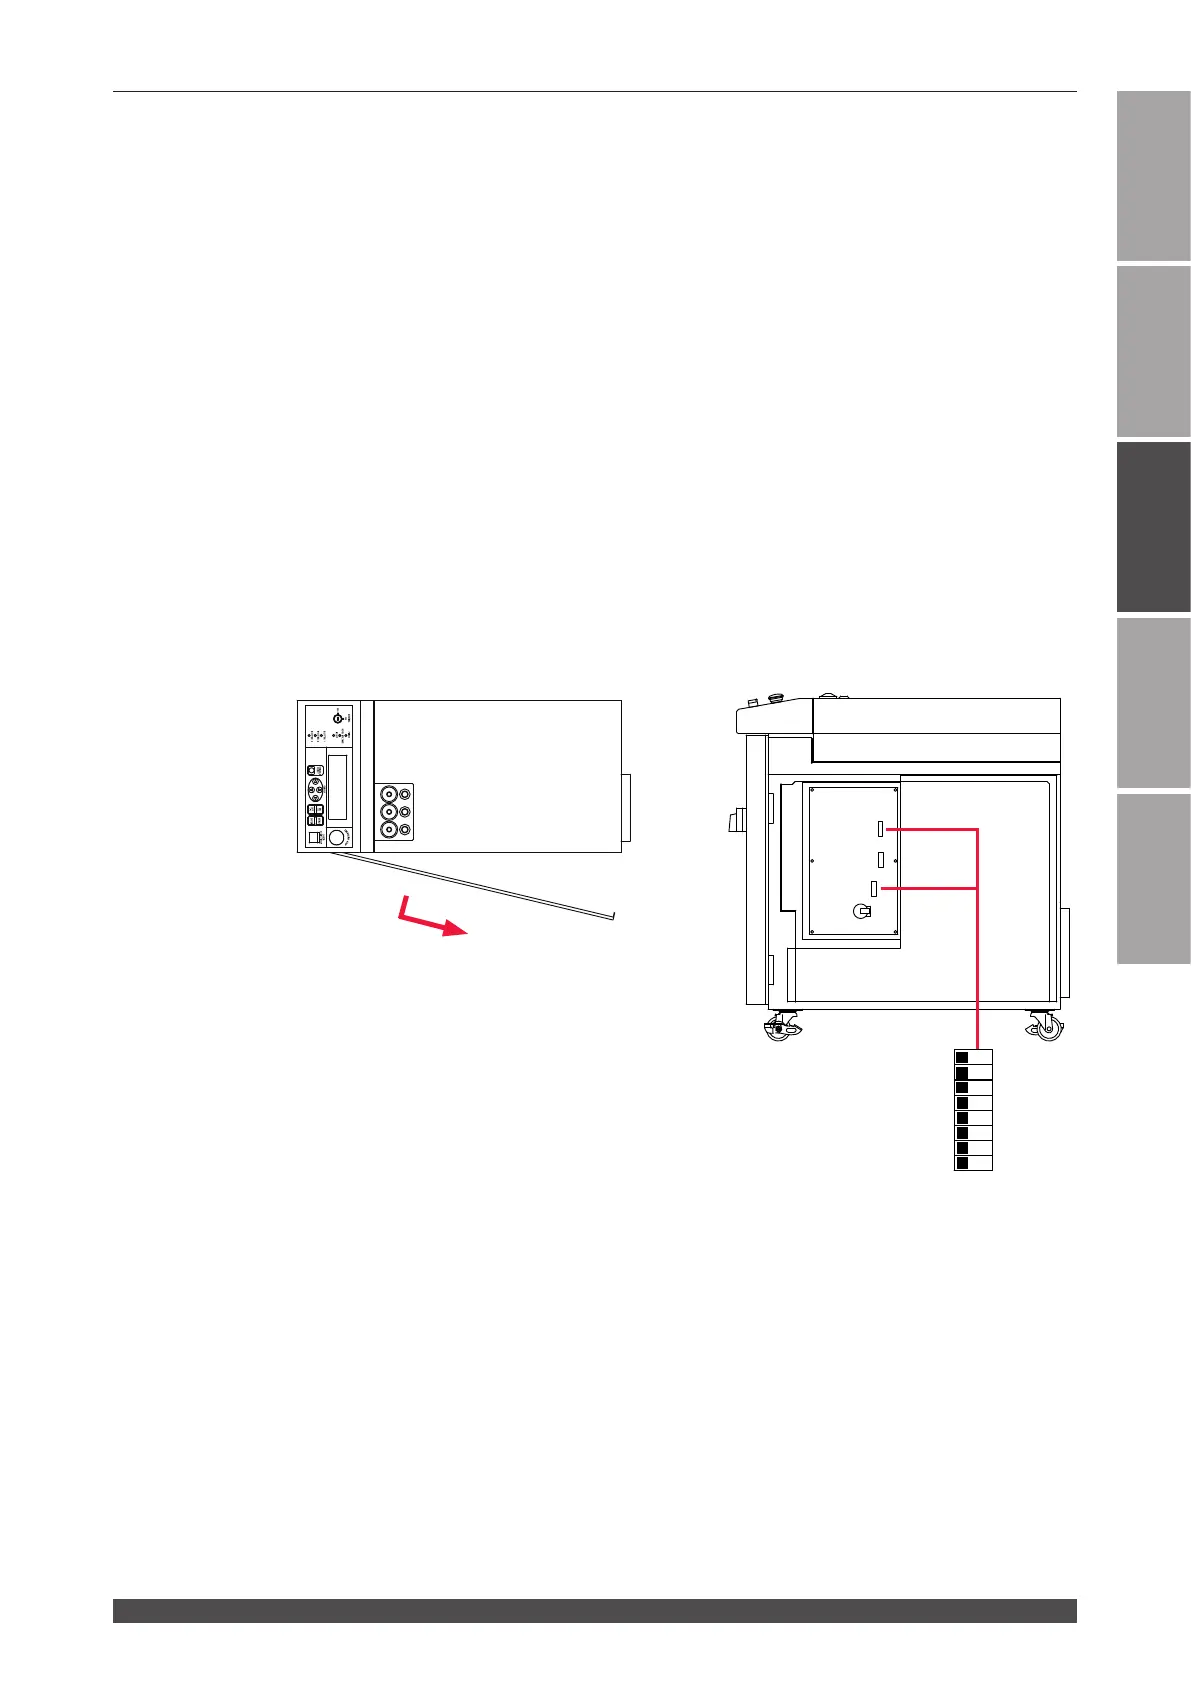
For using the output unit with ber sensor (option), perform a setting to make the
function eective by the DIP switches provided in the side face of the main unit.
This section explains how to set the function of the output unit with ber sensor.
The output unit with ber sensor is provided with the following 3 functions.
Fiber breakage detection: Detects that the ber was broken during laser output.
Fiber mount check: Check that the ber is correctly mounted in the output unit.
LED ON check: Check that the HV-ON lamp of the output unit lights when
a high voltage is applied.
The 3 DIP switches of SW1, SW4, and SW2 are arranged on the CPU board in the
main unit. To set the function, remove the side cover and switch the ON/OFF status
of No.3 of SW1 and No.3 to No.8 of SW2.
Side cover
Loosen the screw at the rear of the cover.
Pull the cover forward and then pull it out
backward.
1
2
3
4
5
6
7
8
O
F
F
SW1
SW4
SW2
SW1
SW2