SmartROC D65 Tier 4 Final 12 Compressor and air system
176
1.
Make sure the rig is standing level.
2.
Switch off the rig and allow the oil level to settle for at least 5 minutes.
3.
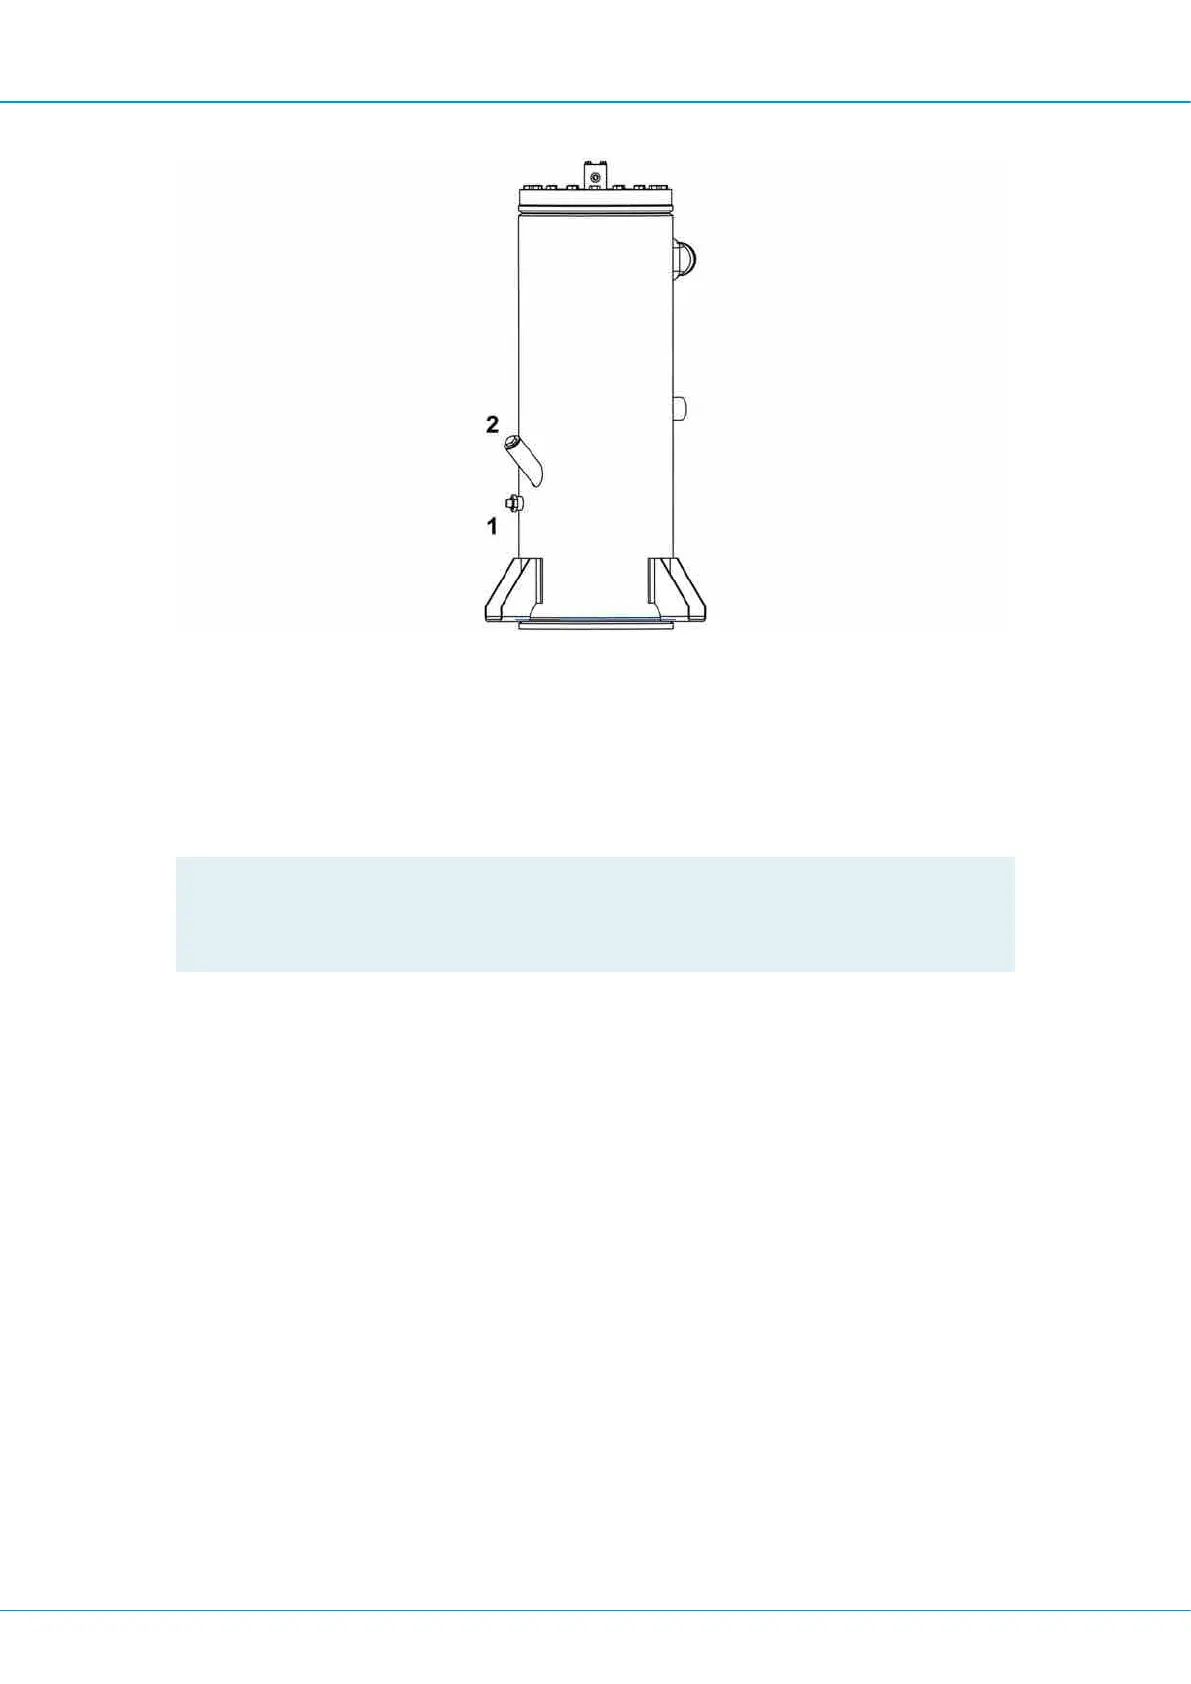
Check the compressor oil level. The indicator on the gauge (1) must be in the green
zone.
4.
Fill with oil at (2), if required.
!
NOTE: Never fill with too much oil. Overfilling results in high oil consumption.
NOTE: Take care to use the correct oil grade". See "Recommended oils and lubric-
ants".
12.3.5 Changing oil and oil filter
The intervals for oil change are determined by oil grade and operating temperature. The
prescribed interval (see maintenance schedules) is based on up to a certain oil temperat-
ure and normal operating conditions (see oil temperature under the heading "Safety" in the
chapter "Compressors and air system" in the maintenance instructions). Oil should be
changed more frequently when working in high ambient temperatures or very dusty or
damp conditions.
1.
Run the compressor to operating temperature. Switch of the engine and wait until the
pressure has eased through the automatic outlet valve. Unscrew the oil filler plug one
turn. This uncovers a ventilation hole which releases pressure from the system.
2.
Drain the oil through the removed drain plugs for compressor tank, compressor cooler
and compressor element. Collect the oil in a receptacle. Screw out the plug on the fil-
ter housing to speed up the draining. Tighten the plugs after draining.
3.
Remove the oil filters, for example by means of a special tool. Collect the oil in a re-
ceptacle.
4.
Clean the filter seat on the filter housing using oil, and make sure that no dirt falls
down into the system. Lubricate the gasket on the new filters. Screw the filters in
place until the gasket makes contact with the seat. Then screw a further half turn.
 Loading...