DL205 User Manual, 4th Edition, Rev. D
4-27
Chapter 4: System Design and Configuration
1
2
3
4
5
6
7
8
9
10
11
12
13
14
A
B
C
D
Configuring the CPU’s Remote I/O Channel
This section describes how to configure the DL250–1 and DL260’s built-in remote I/O
channel. Additional information is in the Remote I/O manual, D2–REMIO–M, which
you will need in configuring the Remote slave units on the network. You can use the D2–
REMIO–M manual exclusively when using regular Remote Masters and Remote Slaves for
remote I/O in any DL205 system.
The DL250–1 and DL260 CPU’s built-in remote I/O channel only supports RM–Net which
allows it to communicate with up to seven remote bases containing a maximum of 2048 I/O
points per channel, at a maximum distance of 1000 meters. If required, you can still use
Remote Master modules in the local CPU base (2048 I/O points on each channel).
You may recall from the CPU specifications in Chapter 3 that the DL250–1 and DL260’s Port
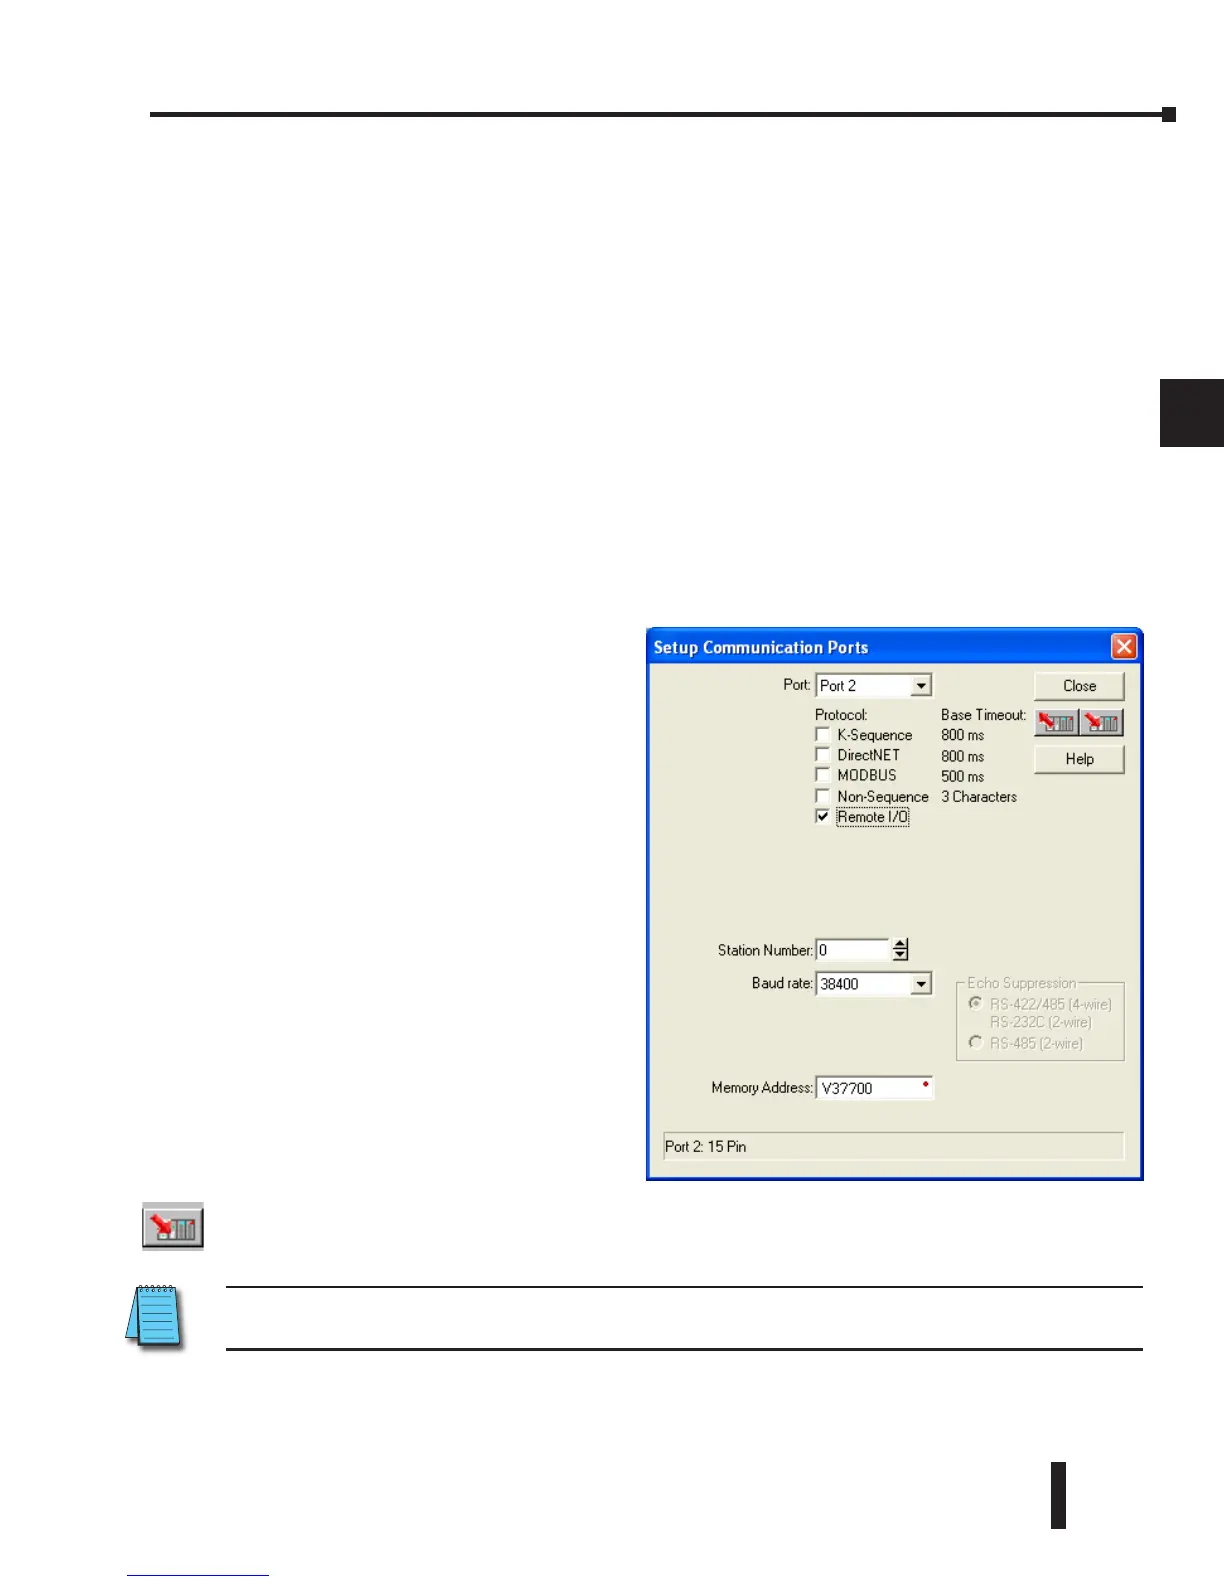
2 is capable of several protocols. To configure the port using the Handheld Programmer, use
AUX 56 and follow the prompts, making the same choices as indicated below on this page. To
configure the port in DirectSOFT, choose the PLC menu, then Setup, then Setup Secondary
Comm Port.
• Port: From the port number list box at the
top, choose “Port 2.”
• Protocol: Click the check box to the left
of “Remote I/O” (called “M–NET” on the
HPP), and then you’ll see the dialog box
shown below.
• Station Number: Choose “0” as the station
number, which makes the DL250–1 or
DL260 the master. Station numbers 1–7
are reserved for remote slaves.
• Baud Rate: The baud rates 19200 and
38400 are available. Choose 38400
initially as the remote I/O baud rate, and
revert to 19200 baud if you experience
data errors or noise problems on the link.
• Memory Address: Choose a V-memory
address to use as the starting location of a
Remote I/O configuration table (V37700
is the default). This table is separate
and independent from the table for any
Remote Master(s) in the system, and it is
32 words in length.
Then click the button indicated to send the Port 2 configuration to the CPU, and click Close.
NOTE: You must configure the baud rate on the Remote Slaves with DIP switches to match the baud rate
selection for the CPU’s Port 2.