DL205 User Manual, 4th Edition, Rev. D
4-56
Chapter 4: System Design and Configuration
1
2
3
4
5
6
7
8
9
10
11
12
13
14
A
B
C
D
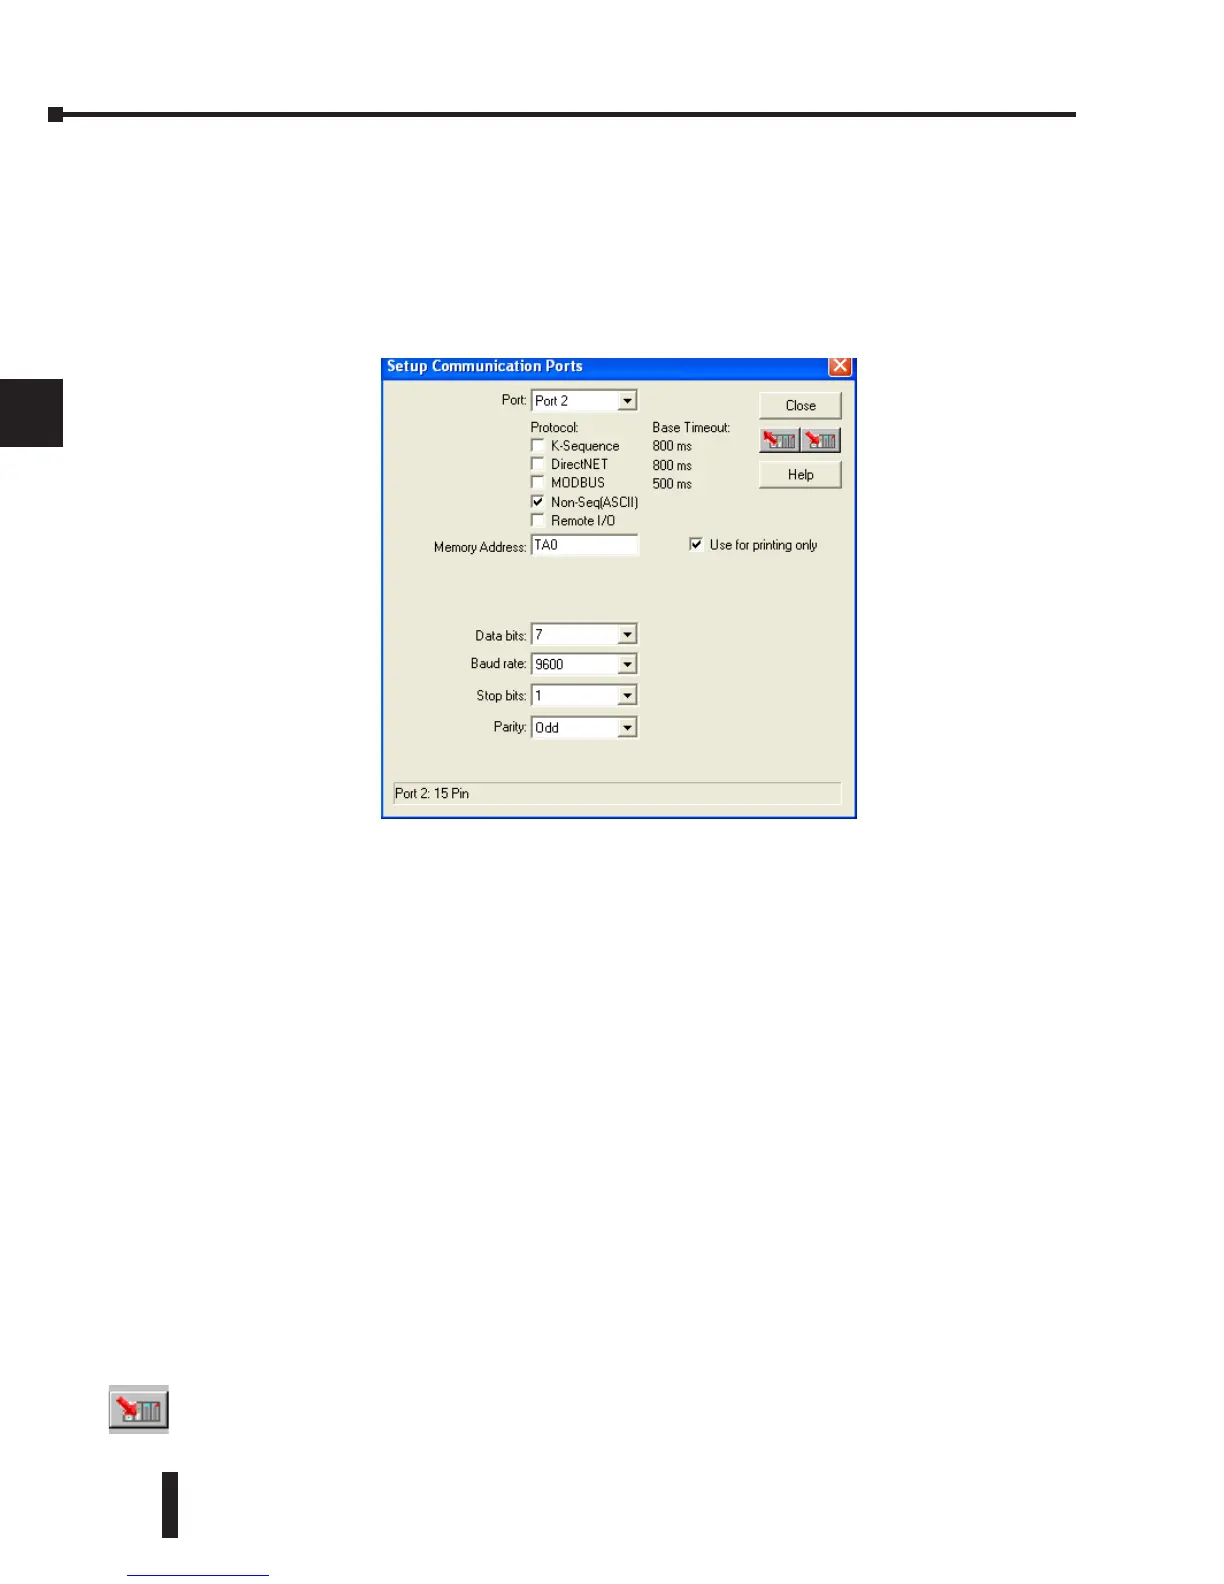
• Memory Address: Choose a V-memory address to use as the starting
location for the port set-up parameters listed below. This location is the
start of protocol memory buffer. It should not be used for other purposes.
Buffer size = 2 + (Max receiving data size) / 2 or to allocate the maximum allowable space
buffer size = 66 Words (for example V2000-V2102).
• Use For Printing Only: Check the box to enable the port settings described below. Match
the settings to the connected device.
• Data Bits: Select either 7–bits or 8–bits to match the number of data bits specified for the
connected device.
• Baud Rate: The available baud rates include 300, 600, 900, 2400, 4800, 9600, 19200,
and 38400 baud. Choose a higher baud rate initially, reverting to lower baud rates if you
experience data errors or noise problems on the network. Important: You must configure the
baud rates of all devices on the network to the same value. Refer to the appropriate product
manual for details.
• Stop Bits: Choose 1 or 2 stop bits to match the number of stop bits specified for the connected
device.
• Parity: Choose none, even, or odd parity for error checking. Be sure to match the parity
specified for the connected device.
Then click the button indicated to send the Port configuration to the CPU, and click Close.
Configure the DL250-1 Port 2 for Non-Sequence
Configuring port 2 on the DL250–1 for Non–Sequence enables the CPU to use the PRINT
instruction to print embedded text or text/data variable message from port 2. See the PRINT
instruction in chapter 5.
In DirectSOFT, choose the PLC menu, then “Setup Secondary Comm Port.”
• Port: From the port number list box at the top, choose “Port 2.”
• Protocol: Click the check box to the left of “Non–Sequence.”