5-6
3. Select Main Menu→System→Maintenance >>→User Maintenance >>→ enter the user maintenance
password →Module→CO
2
→Calibrate.
4. In the Calibrate menu, select
Zero.
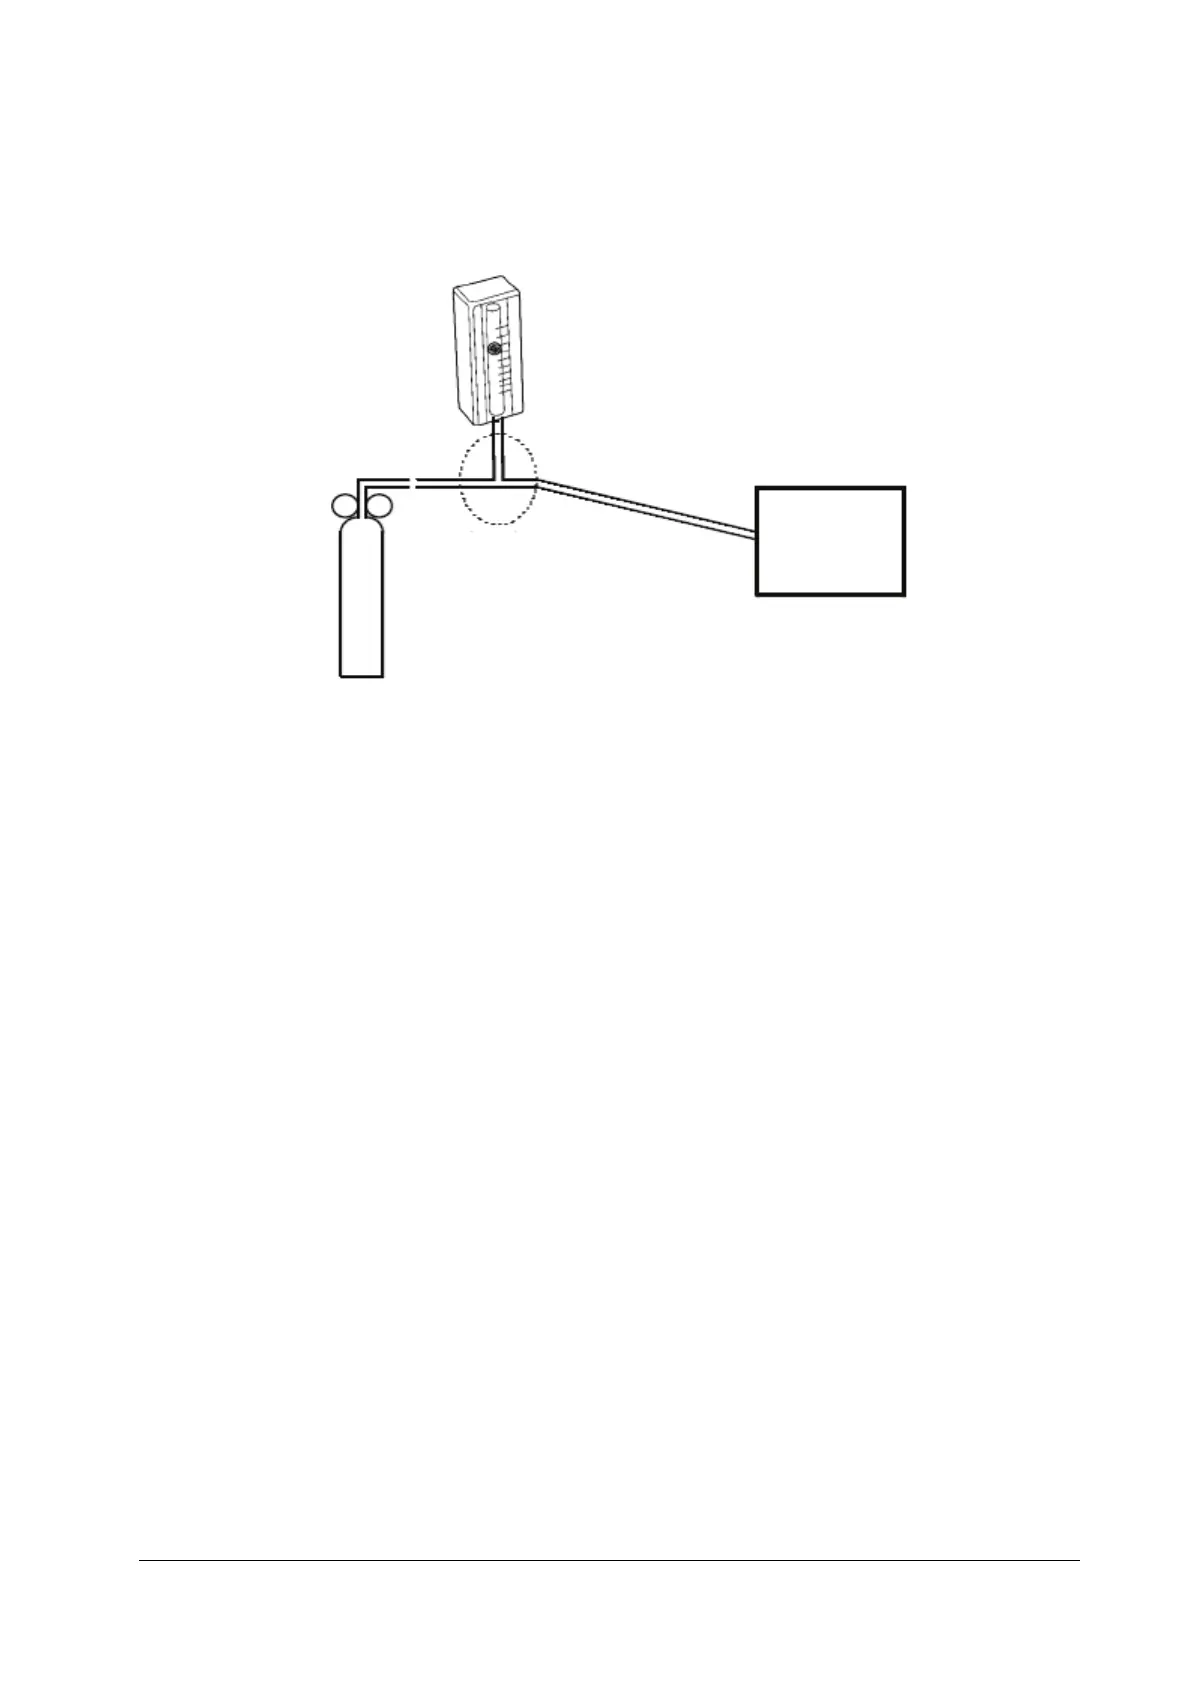
5. After the zero calibration succeeds, connect the monitor and the test tools as follows:
6. Open the relief valve and adjust it until the flowmeter has a stable reading between 10 ml/min and 50 ml/min.
7. In the text box on the upper right corner of the Calibrate menu, enter the vented CO
2
concentration. The measured
CO
2
concentration is displayed in the Calibrate menu.
8. After the measured CO
2
concentration becomes stable, select Calibrate to calibrate the CO
2
module.
If the calibration succeeds, the message "Calibration Completed!" is displayed in the Calibrate menu. If the
calibration fails, the message "
Calibration Failed!" is displayed. In this case, perform calibration again.
5.3 Power-on Test
This test aims to verify that the monitor can power up properly.
When the monitor is powered only by the battery, follow this procedure:
1. Install the battery on the monitor.
2. Press the power switch to turn on the monitor. The battery LED flashes.
When the monitor is powered by using the adapter, follow this procedure:
1. Install the battery on the monitor. Connect the monitor and the adapter. Then connect the adapter and the AC
power supply. In this case, the external power LED and the battery LED are on.
2. Press the power switch to turn on the monitor.
When the monitor is in use with the Dock, follow this procedure:
1. Install the battery on the monitor. Install the monitor on the Dock. Then connect the Dock and the AC power
supply. In this case, the power LED on the Dock and the battery LED on the monitor are on.
2. Press the power switch to turn on the monitor.
Monitor
Gas cylinder
Flowmeter
Relief valve
Tubing
T-shape connector