7-8
7.2.2.2 Module Software Upgrade
Upgrade the module program files according to the "System Software Upgrade Method". When the upgrade is
completed, click the Stop button on the upgrade menu to stop the upgrade, unplug the network cable, turn off the
monitor, and then restart the monitor.
For the detailed operations of network program upgrade, refer to the help and instructions included in the System
Update Tool, or consult our after-sales service personnel.
7.2.3 Guide to Upgrade through a USB Drive
7.2.3.1 Preparing the Directory Structure
Required tools:
Common USB drive in the FAT format (e.g., Kingston or Netac with a memory of 2 GB or above)
1. Create the UPGRADE_AMP\Phecda directory under the root directory of the USB drive.
2. Copy the upgrade BIOS program Merak_Installer.pkg (do not change this file name) to the created directory.
3. Copy the upgrade file (PKG or MPKG) to the created directory.
7.2.3.2 Inserting the USB Drive into the USB Port on the Dock of the Monitor
7.2.3.3 Triggering Upgrade
Method 1: Keep sliding two or more fingers on the touchscreen during startup to enable the monitor to enter the
upgrade mode.
Method 2: Connect the USB keyboard. Continuously press F4+F5 or the star key (*) during startup to enable the
monitor to enter the upgrade mode.
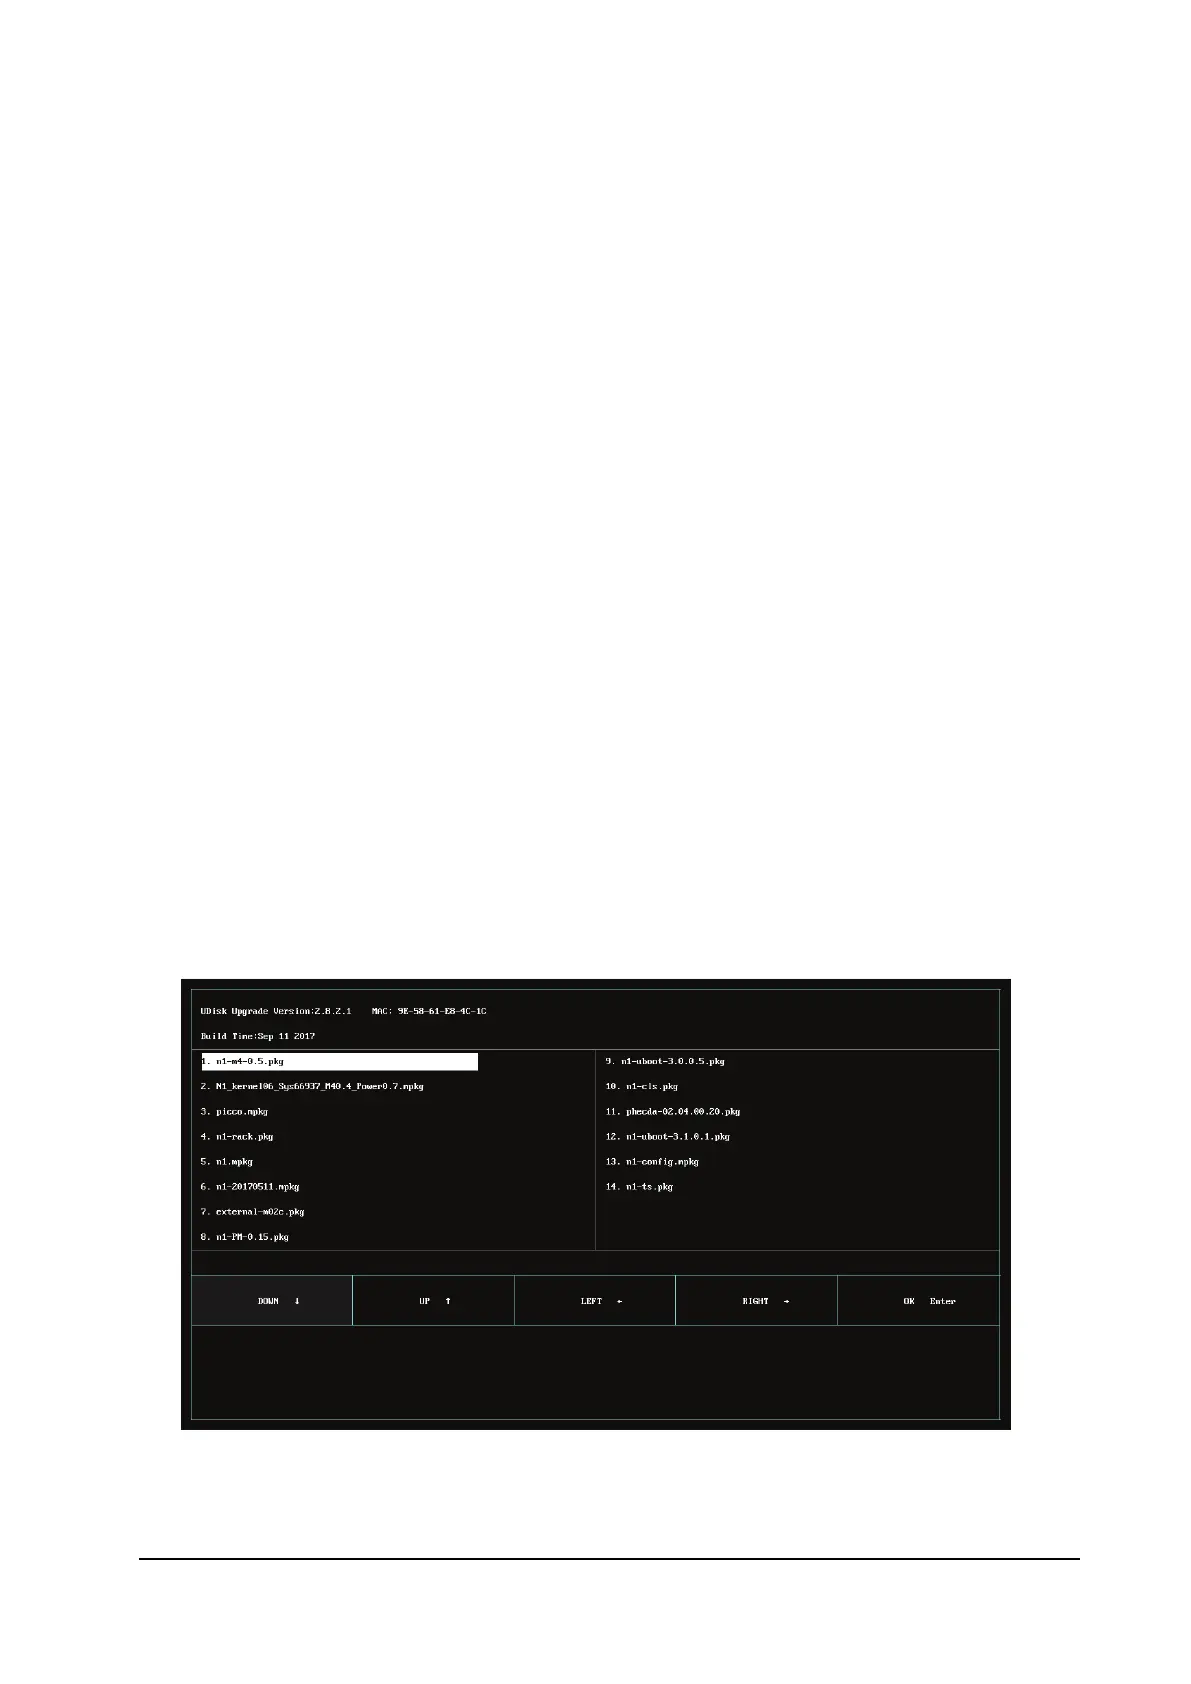
7.2.3.4 Selecting the File for Upgrade
Only one upgrade package file is available at present. It is selected by default. If multiple upgrade packages exist,
they are displayed in the left and right columns, and a maximum of 16 upgrade packages can be displayed. This