7-5
7.2.1.2 PC and Monitor Connection Method
Make sure that at least one network card is installed on the PC. The PC is connected to the monitor through the network
card.
1. Connect the PC to the monitor through the hub.
Connect one end of the network cable to the network card slot of the PC and the other end to the hub slot.
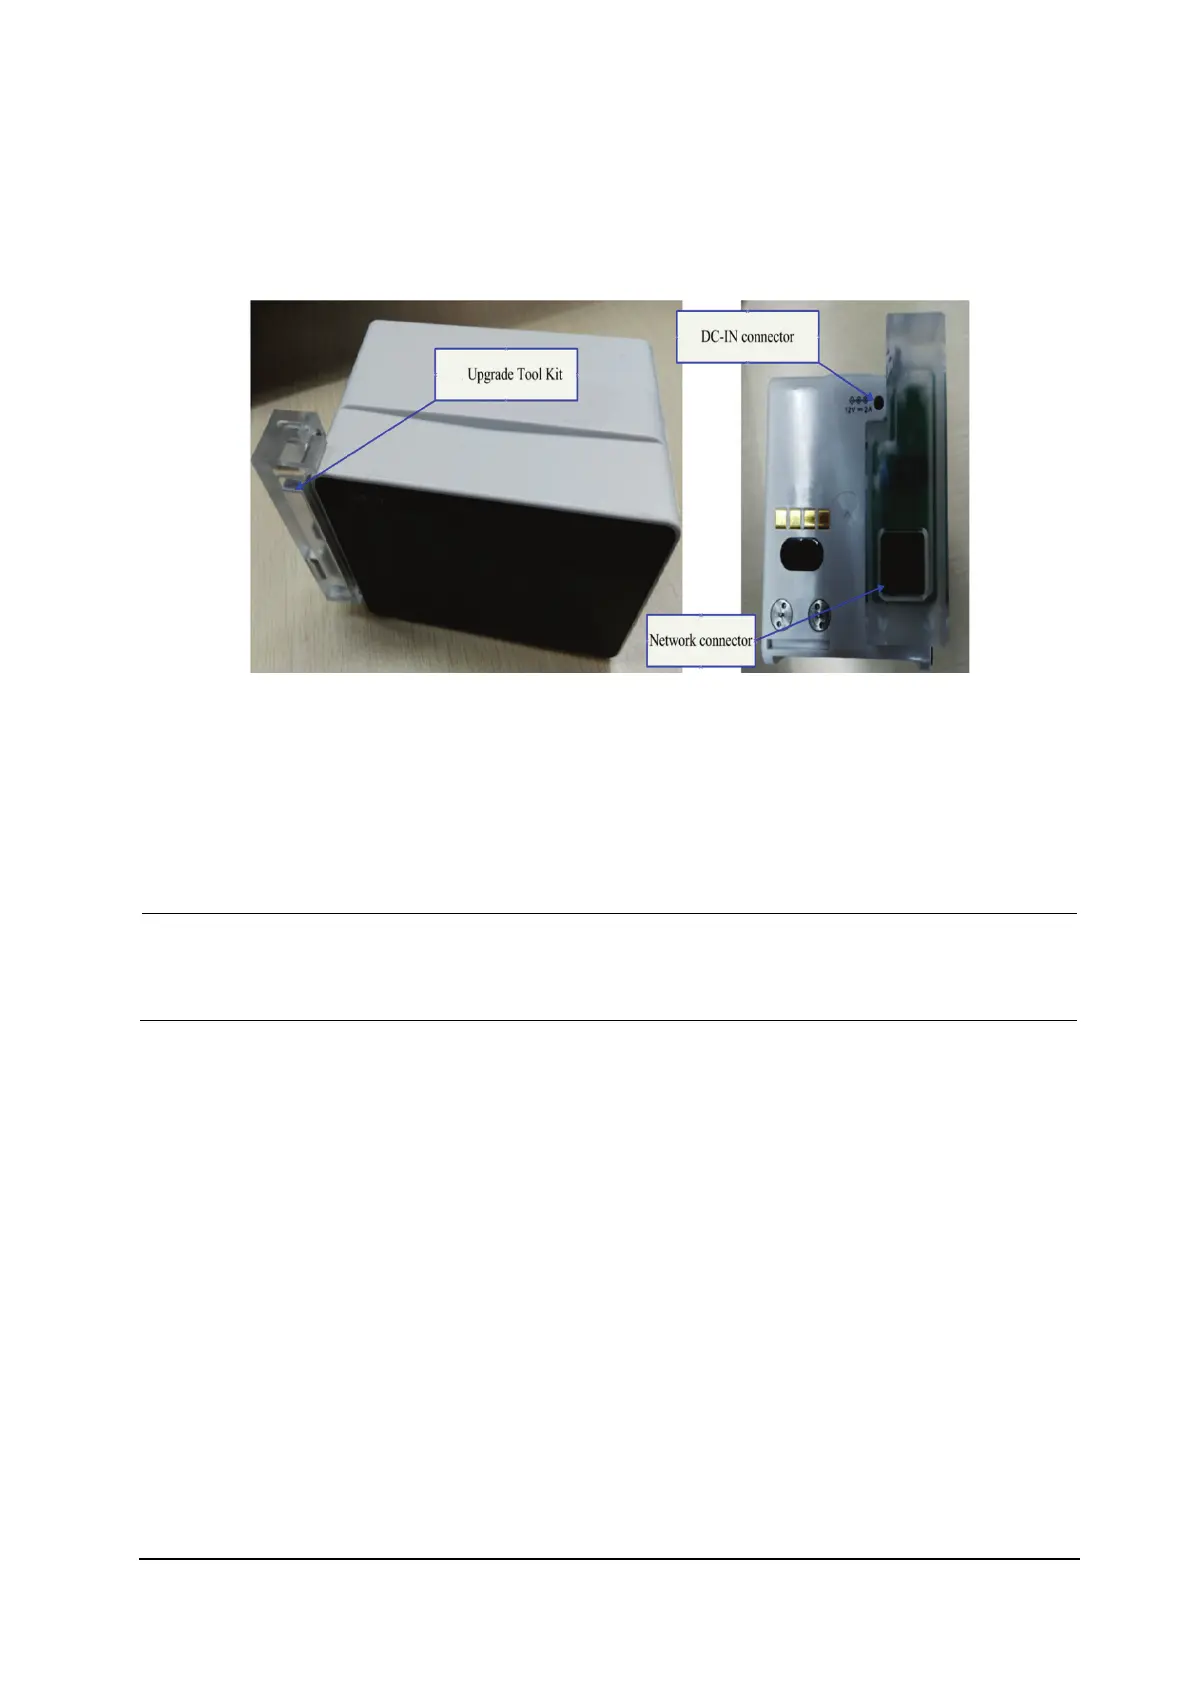
Connect the hub to the network upgrade tool component (P/N: 115-020584-00) through a network cable, and
then insert the network upgrade tool component to the main unit interface of N1 in the same way as the
above. The hub has multiple slots. Therefore, multiple (at least 5) monitors can be connected and upgraded at
the same time.
2. Changing the IP address of PC network card
To ensure correct upgrade, set the IP address to 77.77.1.xx before running the upgrade program. There
are no special requirements for the gateway and DNS. For example, the IP address is 77.77.1.13, and the
subnet mask is 255.255.255.0.
To enter the upgrade mode, follow this procedure:
Use the network upgrade tool component to connect to the network for upgrade. Power on N1, and N1
automatically enters the upgrade interface.
7.2.1.3 Software Tool Upgrade Operations
The software upgrade package of each product needs to be set according to the above configuration requirements. The
software upgrade package can be set and managed only by the administrator. System software upgrade settings:
1. Download the large N1 system software package (the storage location is the model package path), run the installed
system (network) upgrade tool, click Select A New Model Package, select the Phecda. Tool model package, click
Open, and then click OK, as shown in the following figures: