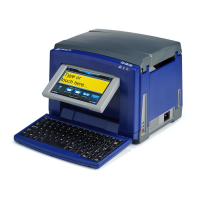
BradyPrinter S3100 Sign & Label Printer User’s Manual
17
Using Your Printer with a PC
Configuring the Printer for Network Communication
•
Username:
This field is only visible for enterprise networks.
•
Password:
Enter the network password.
•
Certificate Authority, Client Certificate, Client Private Key (Optional):
This field is only visible for enterprise networks. Put the memory stick into the
printer’s USB port. Touch
Select.
A list opens. Touch the certificate to use and
then touch the
Connect
button.
8. On the Wi-Fi tab, touch the OK button.
Configuring the Wi-Fi Address
Note: Wi-Fi capability is not available on all printers or in all countries.
1. Touch the Menu button at the top of the home screen.
2. Touch the Setup button.
3. On the System Setup dialog, touch Network.
Note: Wi-Fi Address will only be visible if Wi-Fi Connection has been enabled
on the Wi-Fi screen.
4. Touch Wi-Fi Address.
5. For IP Settings, select either the DHCP or Static check box.
•
DHCP:
DHCP addressing is dynamic and the system uses a DNS server to
obtain the printer IP address for you.
•
Static:
For static addressing, you must supply the printer’s IP address.
6. Fill in the following addressing fields if you selected Static. Tap the field, type
the address, and then touch the OK button.
•
IP Address:
Enter the printer’s IP address.
•
Subnet Mask:
Enter a subnet mask if you are using one.
•
Default Gateway:
Enter the IP address of the default gateway.
•
DNS Server (Primary):
Enter the IP address of the primary DNS server.
•
DNS Server (Secondary):
Enter the IP address of the secondary DNS
server.
 Loading...

