- 21 -
Chapter 3 - Quick Start Guide
To get a basic system up and running, just follow these steps. This guide covers starting a
new project with fixtures connected. To set up a project offline and connect fixtures at a
later stage, see "Chapter 11 - Remote Applications" on page98. Further information on all
the features contained in this Quick Start Guide can be found in the relevant sections of the
manual.
Setting up your system
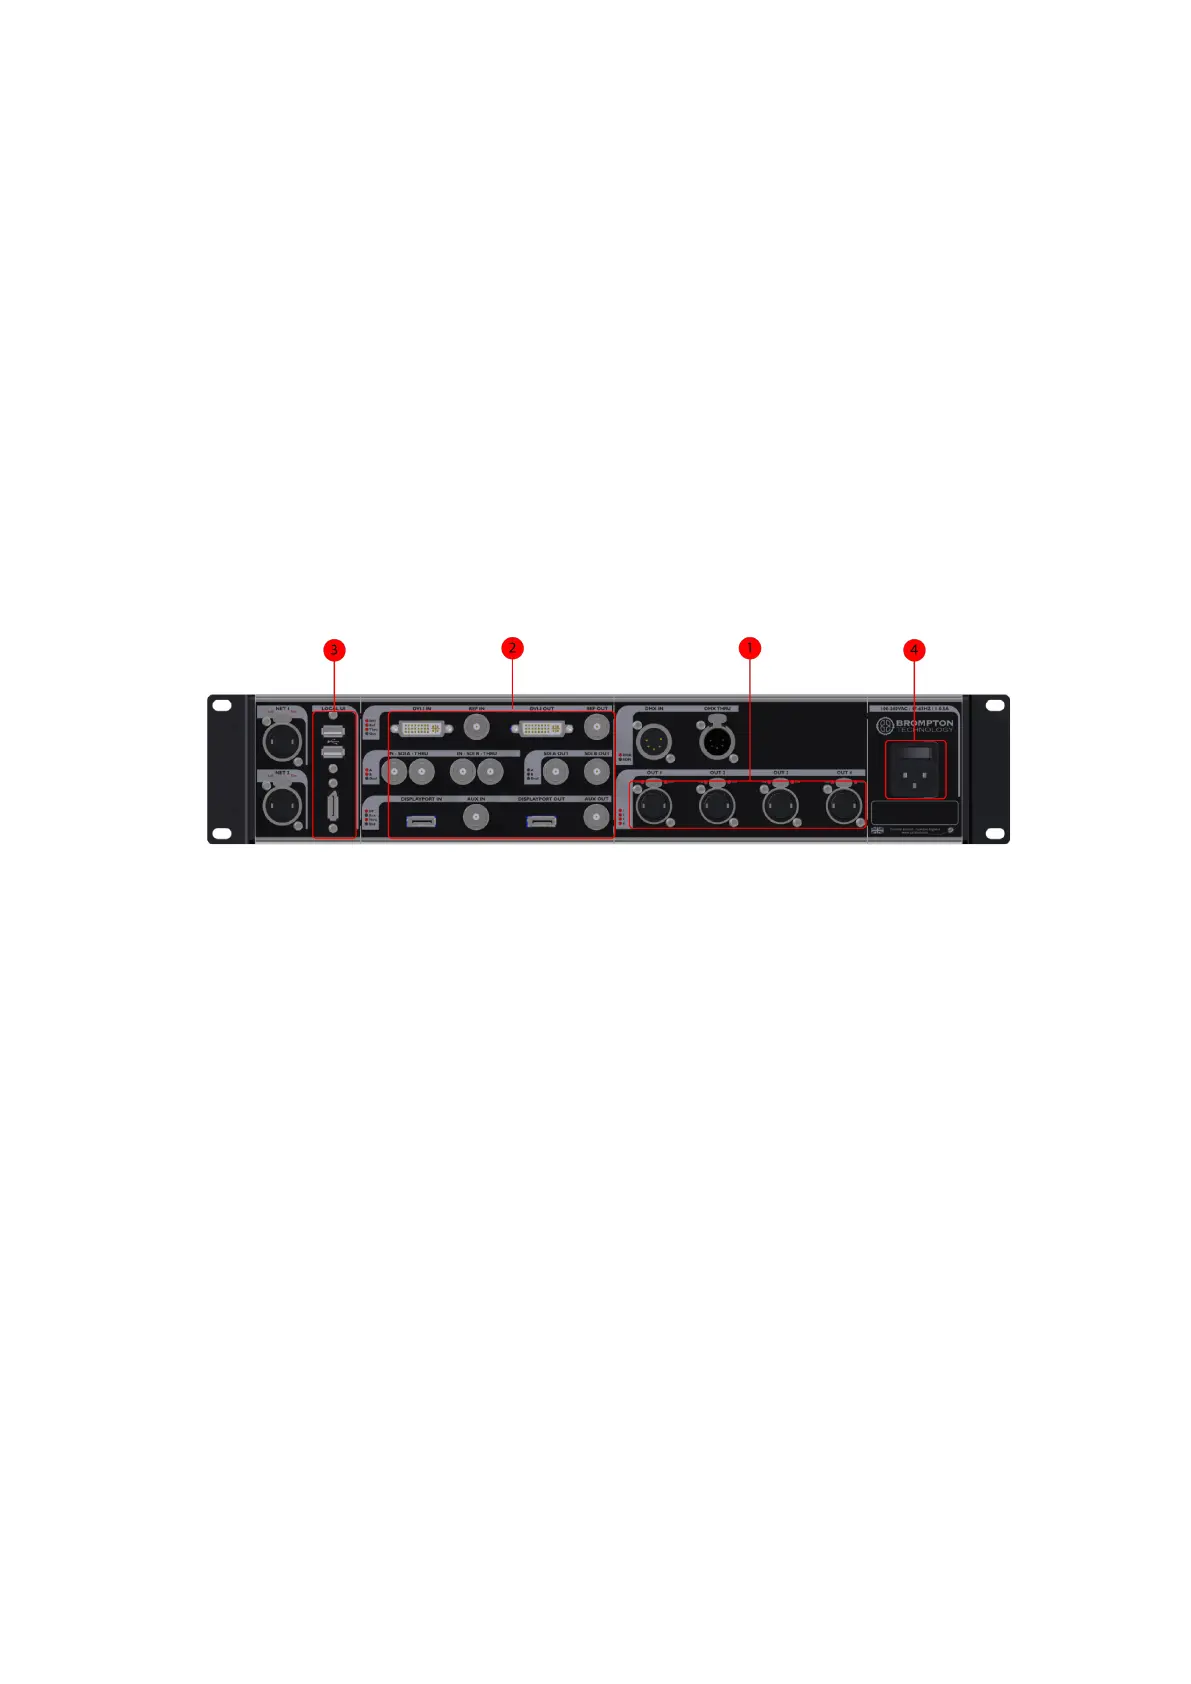
Figure 3-1. The Rear Panel
1. Connect your fixtures to the Ethernet output ports, using Gigabit Ethernet cable (Cat
5e or above) and network switches, if necessary, using Ethernet connection rules.
2. Connect your video input source(s) to the DVI and/or SDI input ports.
3. Connect a monitor to the Local UI DisplayPort connector. If you are using DVI, HDMIor
VGAwith the monitor then you will need to use the relevant DisplayPort adaptor. Con-
nect a keyboard and mouse to the USB ports. Alternatively, you can access the pro-
cessor's user interface through a Mac or Windows PC running the Tessera Remote
application.
4. Connect the IEC mains input and switch the processor on. When the processor has
powered up, the monitor will display the Start Screen. The processor may be con-
figured to auto-load a previous project, which it will do after a set amount of time, by
default 10s, if the user does not invervene. If a previous project auto-loads it is neces-
sary to close the project to return to the Start Screen.