- 35 -
USBflash drive or an other USBstorage device you will need to export it. See "Project
Management" on the next page
If you are creating a project with only one fixture type:
1. Select the manufacturer and fixture type from the dropdown menus.
2. Specify the width and height of the array of fixtures to be generated automatically.
Alternatively, you may uncheck the Create an array of fixtures tickbox and add fix-
tures manually once the project is created.
3. Select the topology from the dropdown menu or leave this at the default setting if you
want to add the topology manually once the project has been created.
4. Click Create to complete the new project wizard and open the new project.
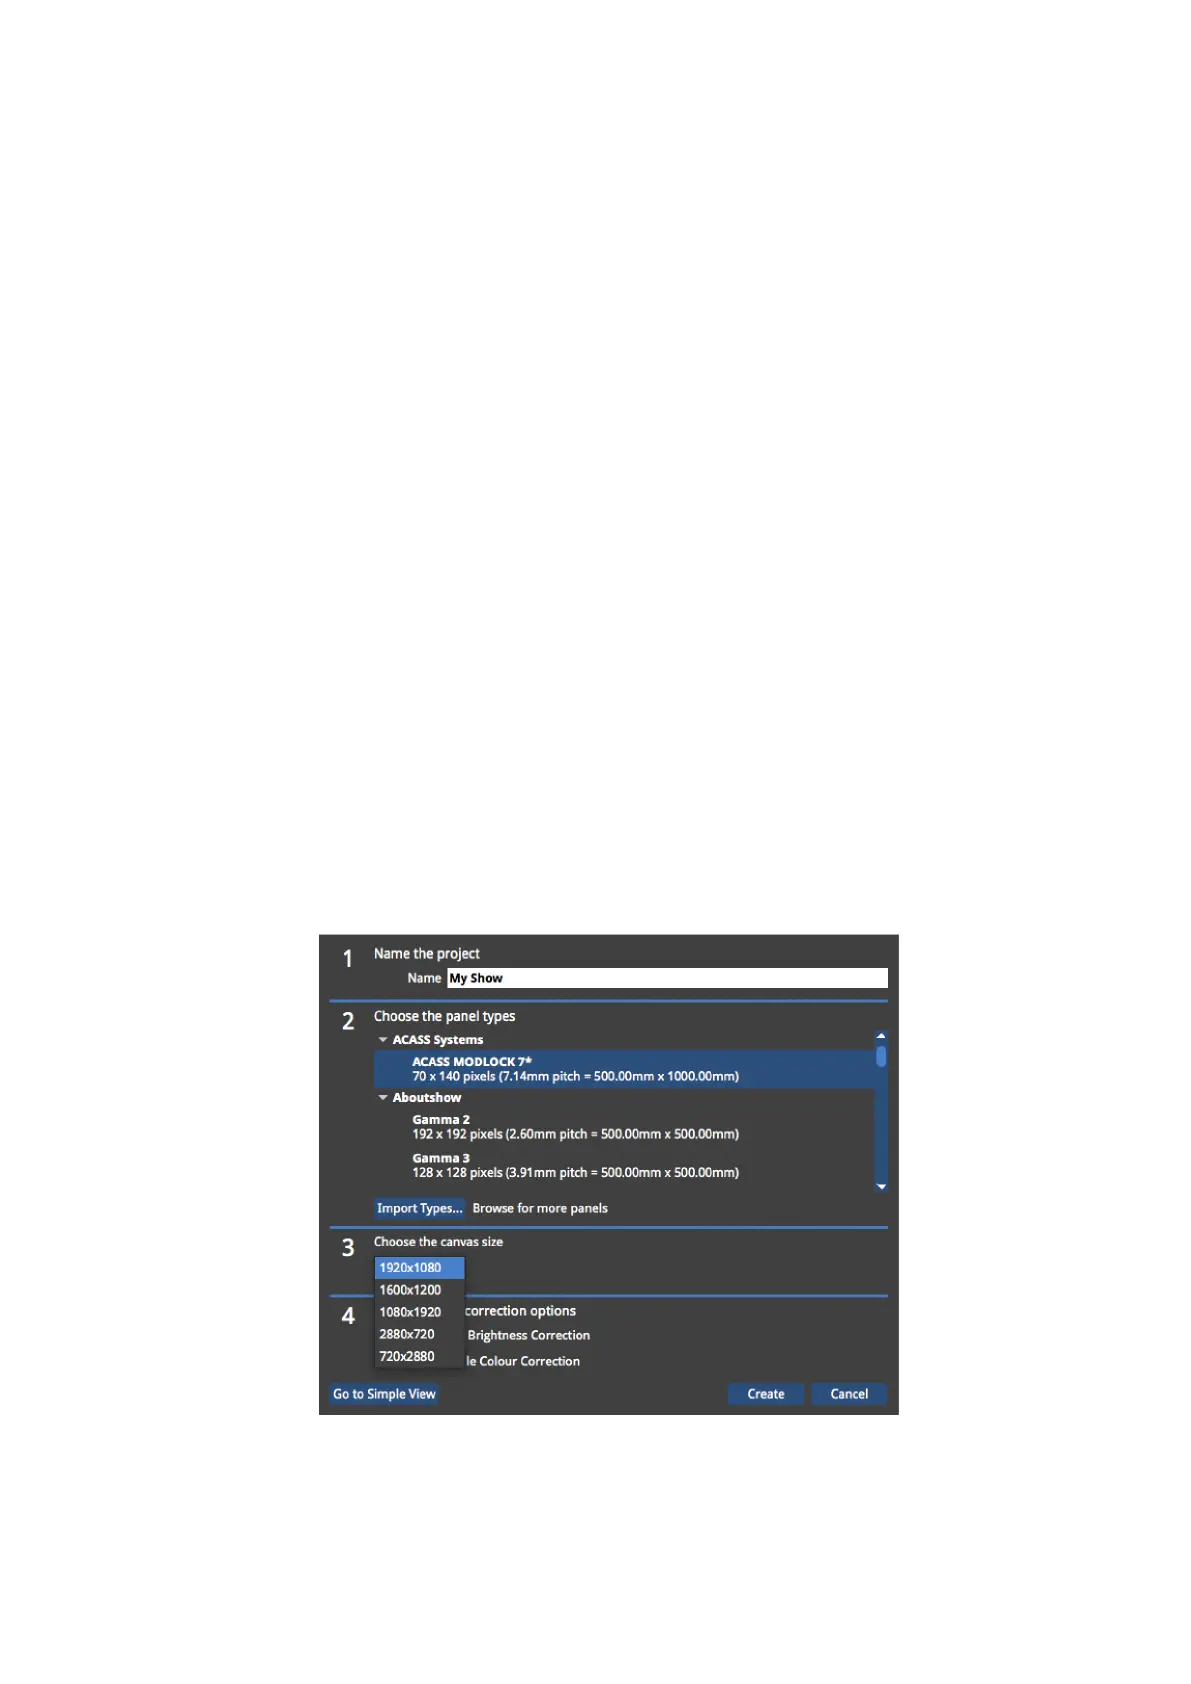
If you are creating a project with more than one fixture type:
1. Click Go to Advanced View and select the fixture types you require from the list using
CTRL+ click. If the required fixture type is not listed, you may import it by clicking
Import Types… (more information on importing fixture types can be found in " Import-
ing Fixtures" on page91).
2. For 1:1 pixel mapping, check the Map pixels directly to the canvas (1:1) tickbox. See
"Mapping Options" on page47
3. The M2 supports a 1920x1080 raster by default, but can also be set to 1080 x 1920,
1600x1200, 2880 x 720 and 720 x 2880 by selecting this from the drop-down menu in
Canvas Size. Using these alternative resolutions puts the processor in to Low Latency
Mode. See "Low Latency Mode" on page93 for the implications of using this mode