3-44
Confidential
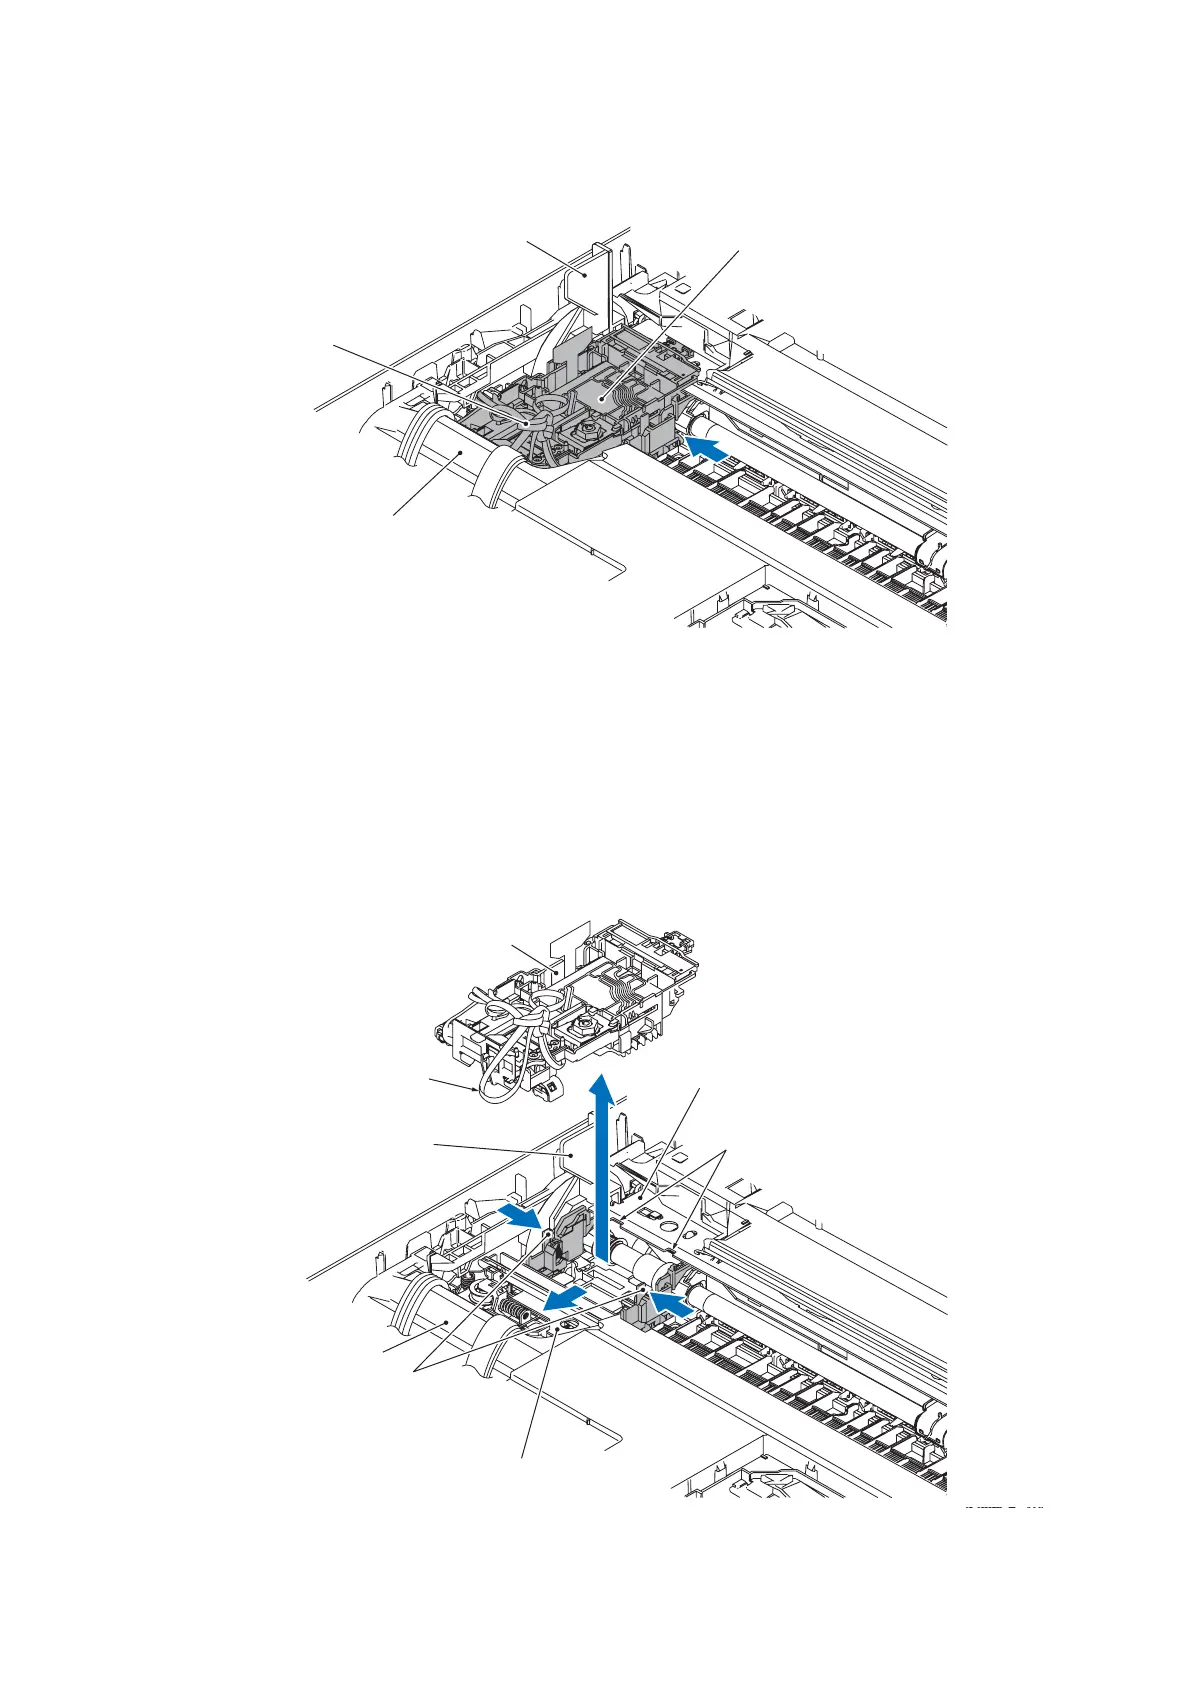
(17)Loosely tie the CR timing belt in a bundle on the head/carriage unit as shown below.
(18)Move the head/carriage unit to the left end of its travel by hand.
(19)Press the right and left tabs of the leveler roller (LR) ASSY inwards and pull the ASSY
towards you to release it downwards from the head/carriage unit.
(20)Slightly lift up the rear end of the head/carriage unit to release it from the CR guide rail
(through the two cutouts), then release the front end from the CR support chassis and take
the head/carriage unit up and out of the machine.
Note: Do not touch the head nozzles (the printing ends) or ink supply ports (to which ink
supply tubes are connected) of the head/carriage unit; doing so will not only stain your
hands with ink but also damage the nozzles and supply ports. If you do touch them though,
perform a head cleaning operation.
(3_011)
LR positioning jig
CR timing belt
Upper cover
Head/carriage unit
CR guide rail
(3_012)
Head/carriage unit
CR timing belt
Upper cover
Tabs of the leveler
roller (LR) ASSY
CR support chassis
Cutouts
LR positioning jig

 Loading...