3-24 2007 Buell Lightning: Engine
HOME
NOTE
If any oil line fittings are found to be loose, or not oriented in
the proper position, those fittings must be removed and thor-
oughly cleaned. After cleaning, apply LOCTITE 565 Sealant
to the fitting and re-install to the correct orientation. When
tightening oil lines, always support the oil line fitting with a
wrench to maintain proper orientation and prevent damage to
the oil line fitting.
24. See 3.10 OIL LINE FITTINGS. Remove all oil lines
(including lines to oil cooler).
25. See Figure 3-16. Remove vent oil line (2).
a. Remove vent line fitting protective cover and discon-
nect vent oil line (2) at gearcase cover.
b. Remove clamp (13) in front of starter securing vent
oil line to return oil line.
c. Disconnect vent oil line at swingarm/oil reservoir (1)
and remove. See 3.10 OIL LINE FITTINGS.
26. See Figure 3-16. Remove feed oil line (3).
a. Loosen fitting at oil pump (14).
b. Remove two p-clamps (12) from feed oil line (one on
crankcase and one on swingarm/oil reservoir.
c. Remove feed oil line (3) at oil pump (14).
d. Disconnect feed oil line at swingarm/oil reservoir
and remove. See 3.10 OIL LINE FITTINGS.
27. See Figure 3-16. Remove return oil line (4).
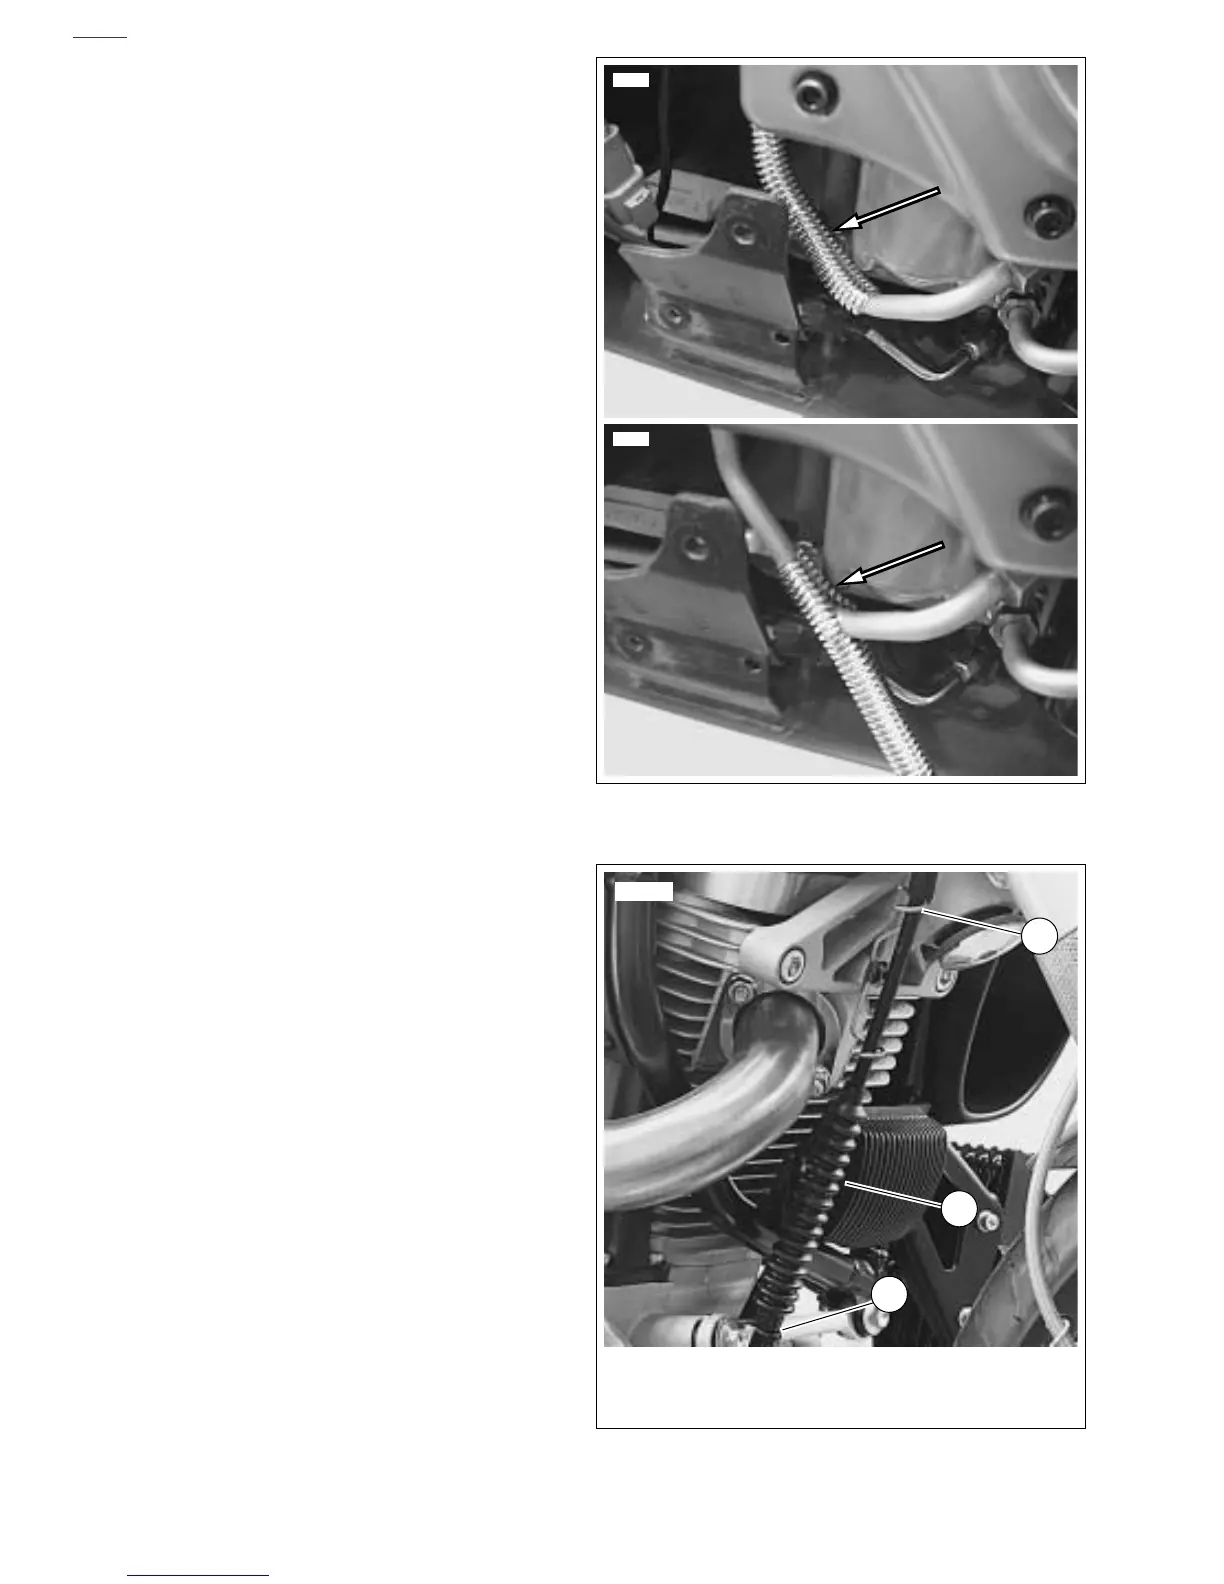
a. See Figure 3-19. Remove convolute covering from
return oil line.
b. See Figure 3-16. Loosen fitting at oil pump (14).
c. Remove p-clamp (12) at swingarm/oil reservoir (1).
d. Disconnect oil return line (4) at swingarm/oil reser-
voir (1). See 3.10 OIL LINE FITTINGS.
e. Disconnect oil return line (4) at oil pump (14) and
remove.
28. Remove front and rear muffler brackets.
Figure 3-19. Removing Convolute Cover From Oil Line
Figure 3-20. Clutch Cable Wire Form Retainer, Retaining
Clamp and Adjuster Boot
12009
12008
1. Wire form retainer
2. Clutch cable adjuster boot
3. Lower retaining clamp
1
2
3
10502