Managing the System
Disk Management
Cisco Small Business NSS 322, NSS 324, and NSS 326 Smart Storage Administration Guide 116
3
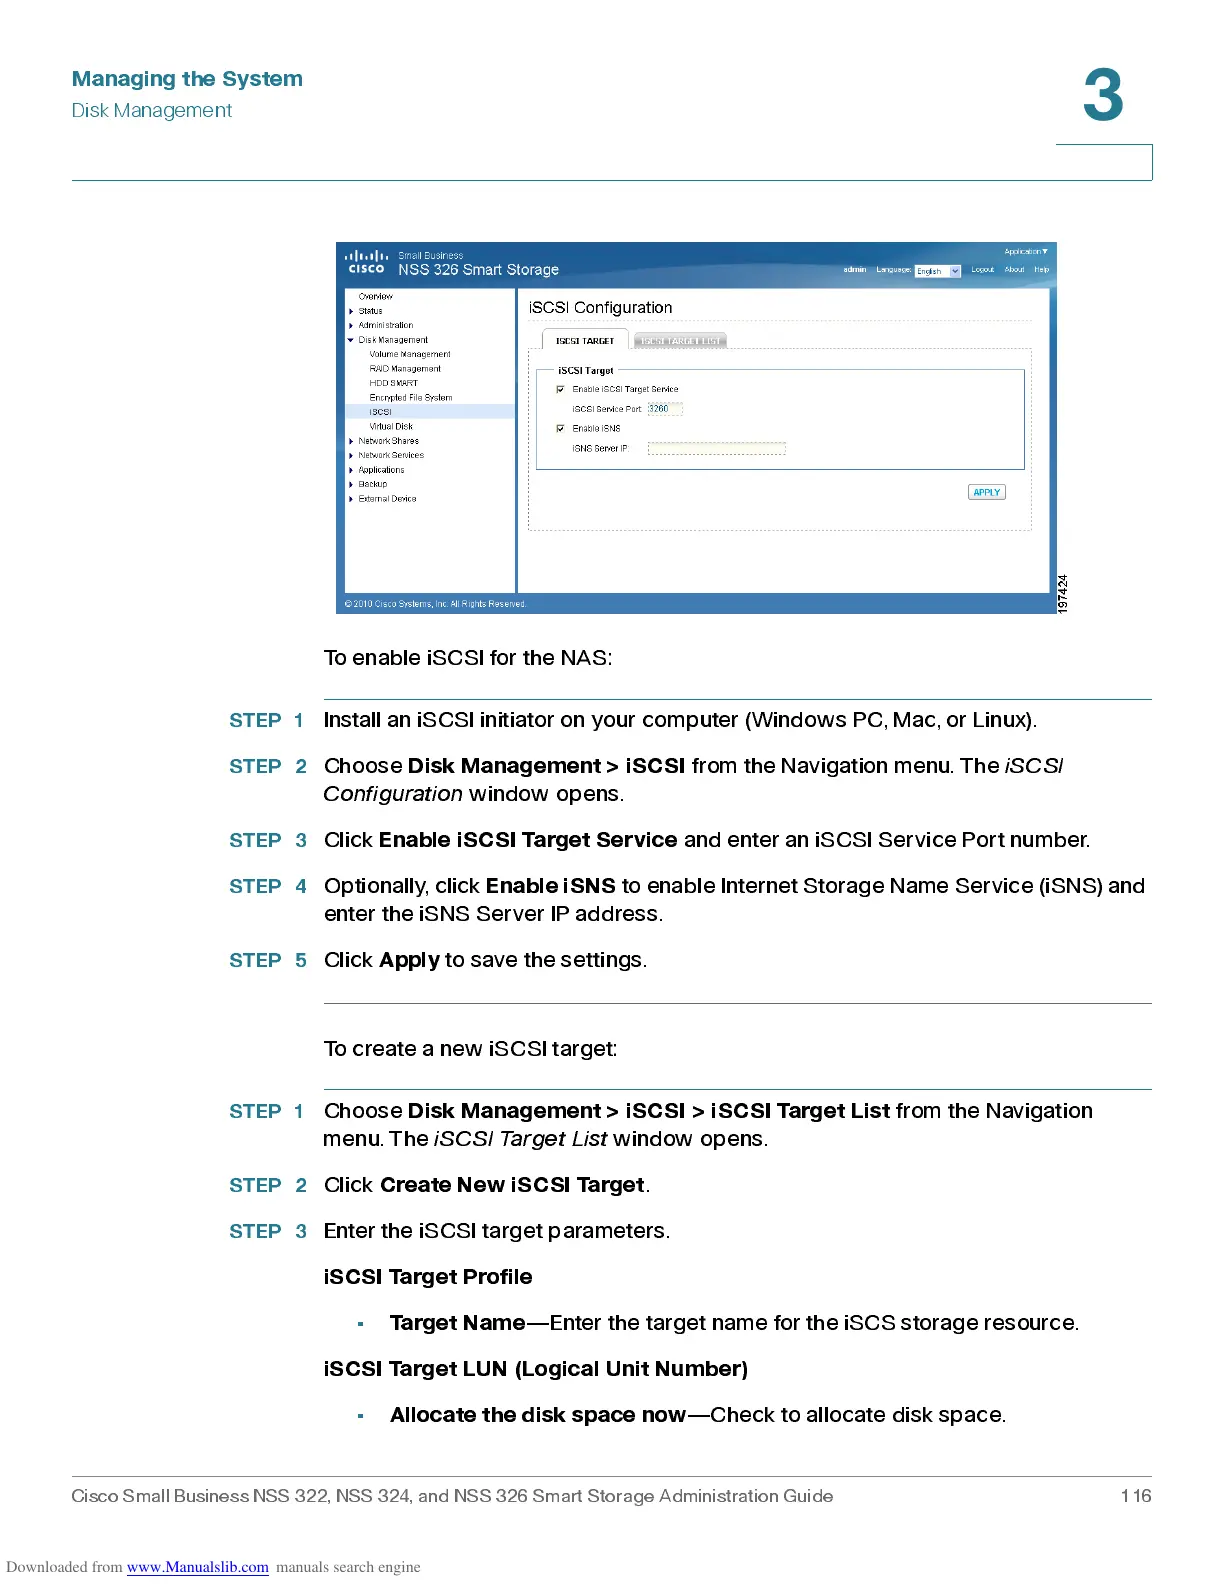
To enable iSCSI for the NAS:
STEP 1
Install an iSCSI initiator on your computer (Windows PC, Mac, or Linux).
STEP 2
Choose
Disk Management > iSCSI
from the Navigation menu. The
iSCSI
Configuration
window opens.
STEP 3
Click
Enab le iS C SI Ta rget S ervi c e
and enter an iSCSI Service Port number.
STEP 4
Optionally, click
Enable iSNS
to enable Internet Storage Name Service (iSNS) and
enter the iS N S S erver IP ad dress .
STEP 5
Click
Apply
to save the s et tings.
To create a n ew iSCSI target:
STEP 1
Choose
Disk Management > iSCSI >
iSCSI Target List
from the Navigation
menu. The
iSCS I Tar ge t Lis t
wind ow opens.
STEP 2
Click
Create New iSCSI Target
.
STEP 3
Enter the iSCSI target parameters.
iSCSI Target Profile
•
Target Name
—Enter the target name for the iSCS storage resource.
iSCSI Targ et LUN (Logical Unit Number)
•
Allocate the disk space now
—Ch eck to allocate disk spac e.