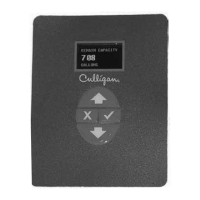
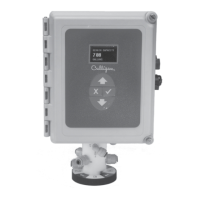
32 Culligan® Smart Controller (GBE) for Softeners and Filters
32 Cat. No. 01021161
Flow Profiles
This feature allows you to monitor the amount of time that softener or filter spends within different flow ranges. Select flow
ranges by setting the Low Flow Limit and High Flow Limit when programming the controller. To best explain this, refer to
the following example.
Programming Flow Profiles for a Hi-Flo 22 WS-90
The low flow limit can be set to any low value. Consider setting it at the minimum flow rate shown in the manual. This is
usually calculated using 2 gpm per square foot of bed area. The WS-90 has a 16” diameter tank, so its cross section is
1.4 square feet (area = PI * r²). 1.4 sf * 2 gpm is 2.8, rounded up to 3. Next you can set the high flow limit at the unit’s
rated peak flow, in this case 38 gpm. Here is what the controller is going to do.
First it will take the high flow limit and subtract the low flow limit: 38 – 3 = 35. It then divides this into four equal divisions:
35 ÷ 4 = 8.75, and then tracks six separate values or flow profiles. The flow profile values are displayed in minutes.
• Profile 1 is any flow below the low flow limit.
• Profile 2 is any flow from 3 to 11.75 gpm
• Profile 3 is any flow from 11.76 to 20.51 gpm
• Profile 4 is any flow from 20.52 to 29.26 gpm
• Profile 5 is any flow from 29.27 to 38 gpm (the high flow limit)
• Profile 6 is any flow above the high flow limit.
View flow profiles through the Diagnostics menu. Go to ADVANCED STATS then FLOW STATS and scroll down to FLOW
PROFILE R1 through R6. The values displayed are the number of minutes the flow rate has been in that range.
Aqua-Sensor
®
Schematic (Optional)
The Aqua-Sensor
®
device requires a 2.5 VAC power source. This source is provided via two of the posts on the 24
VAC/2.5 VAC transformer (see figure 19). The two leads from the transformer are run through the same cable grip as
the 24 VAC and then must be pushed into the white power connector for connection to the 2.5 V power pins on the GBE
circuit board.
The wire connector from the Aqua-Sensor
®
probe is then routed through the included cable grip and plugged into the
Aqua-Sensor terminal on the Smart Controller circuit board. See below.
For information and detailed instructions for installing the Aqua-Sensor in the tank, refer to the specific product manual.
Aqua-Sensor
®
If you are going to install an Aqua-Sensor
®
, you can set up the 2.5 VAC power now.
1. Locate the power cord packed with the Aqua-Sensor
®
. It has two spade terminals on one end of the cable and
two metal “slip in” tabs on the other.
2. Locate the cord grip.
3. The cable can be run through the cable grip and wall from either end of the cable. Make sure the end with the
metal tabs goes INSIDE the controller. The spade terminals should be coming out the top end of the grip.
4. Locate the connector at the end of the power cord. You may have already plugged it into the board.
5. Press the two metal tabs on the end of the power cord into the open slots on the connector. They will connect
to the pins labeled 2.5 V on the Base Board.The other end of the power cord with the spade terminals should
be connected to the two 2.5 VAC terminals on the transformer (see Figure 18).
CAUTION! Verify wiring from terminals to circuit board are correct before applying power to con-
trol. 24 VAC power must not be applied to the 2.5 VAC terminals of the circuit board or
the circuit board will be damaged.