34 Culligan® Smart Controller (GBE) for Softeners and Filters
34 Cat. No. 01021161
Programming the Aqua-Sensor
®
Probe
After installing the Aqua-Sensor
®
kit 01008779–CSM, Hi-Flo 50, or 01018959–Hi-Flo 22, you must configure the settings.
The Aqua-Sensor
®
probe should be installed prior to loading the resin in the tank.
1. Run the probe lead through the opening in the top of the tank. Systems with
fiberglass tanks will have a tank plug on the cord. Systems with steel tanks
require a 3/4” x 1/2” reducing bushing (included in kit) for the cord grip.
2. Run the probe through the bushing prior to inserting into tank.
3. Use a supplied strain relief to run the connector into the controller.
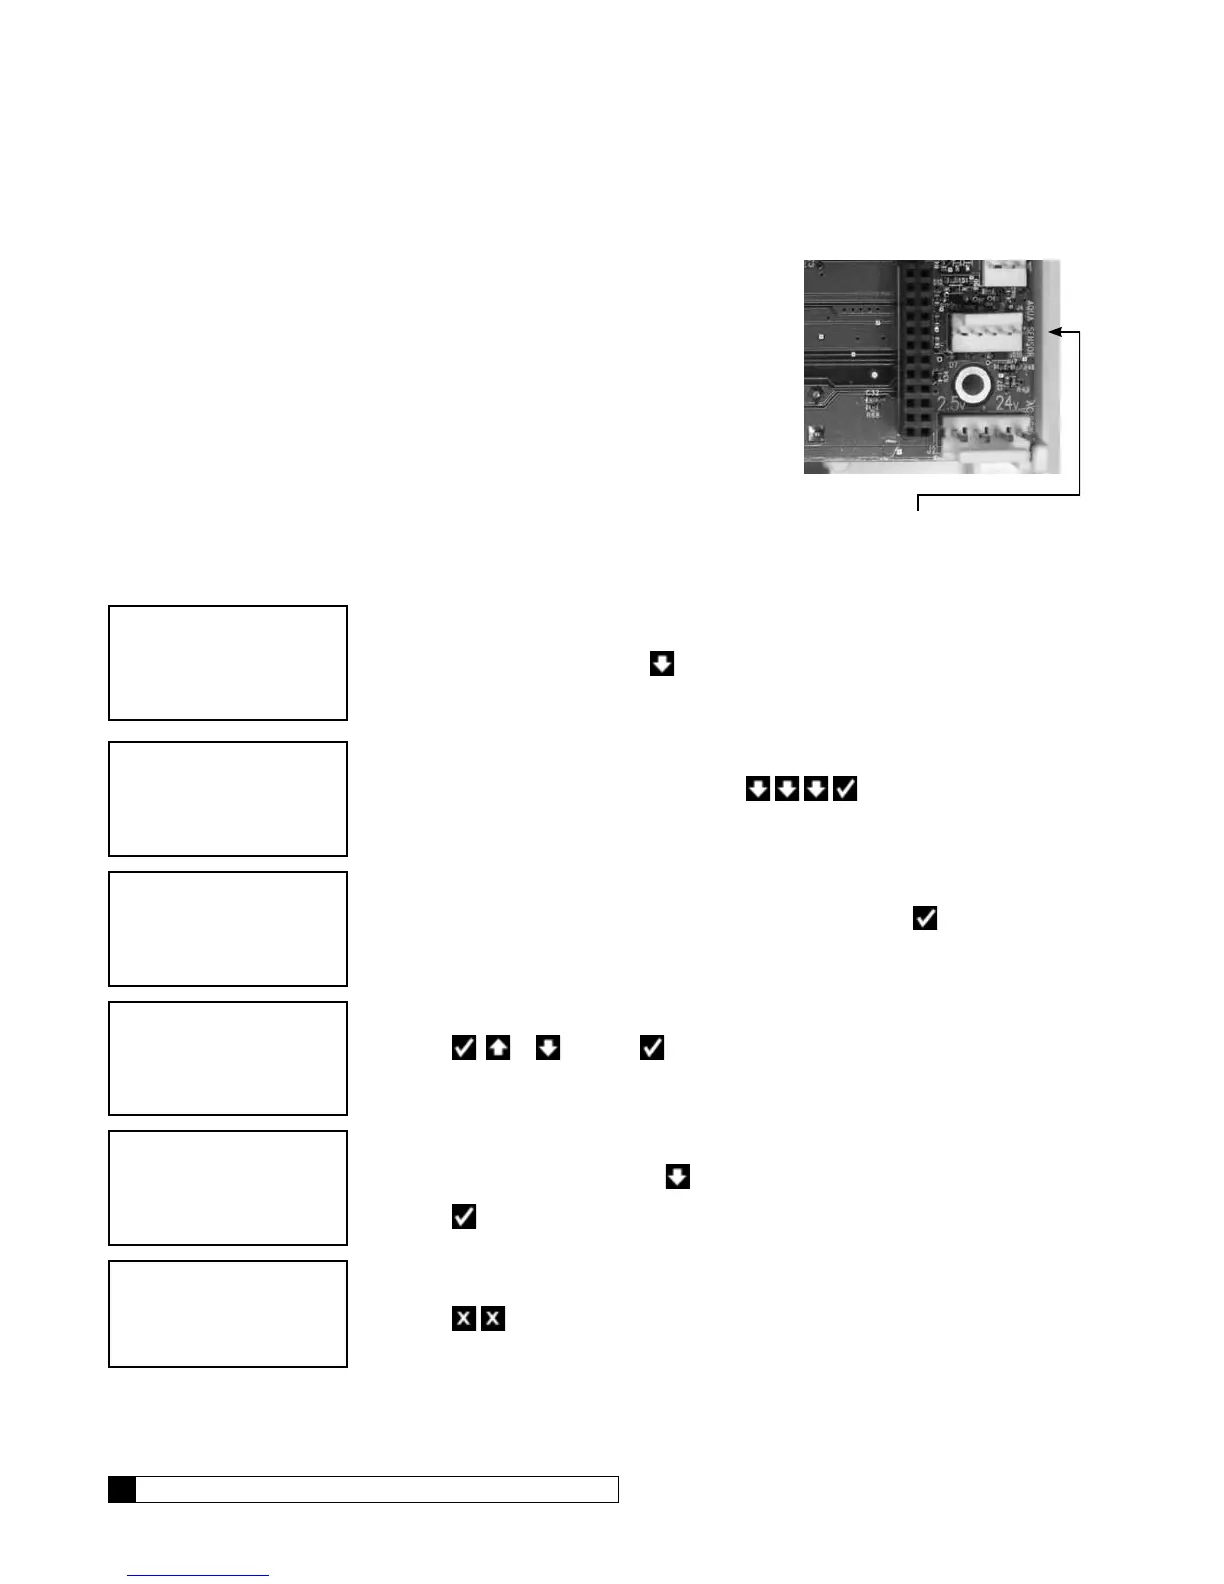
4. Plug the connector into the circuit board at the position labeled Aqua-
Sensor
®
. See Figure 20.
Configuring the Aqua Sensor
®
Probe Settings
1. From the HOME screen, press to view the main menu.
2. The screen displays the main menu. Press to select
4)ACCESSORIES.
3. The cursor is already pointing at the 1)AQUASENSOR so press to display the
Aqua-Sensor
®
settings.
4. Press or and then to change the setting from NOT INSTALLED to
INSTALLED. Press the CHECK MARK button to accept the setting.
5. If the Aqua-Sensor setting state is INSTALLED, this screen displays the Aqua-
Sensor
®
debugging mode. Press to toggle between on and off.
6. Press when the correct Aqua-Sensor
®
debugging mode is displayed.
7. Press to display the home screen.
Figure 20.