xStack® DES-3528/DES-3552 Series Layer 2 Managed Stackable Fast Ethernet Switch Web UI Reference Guide
39
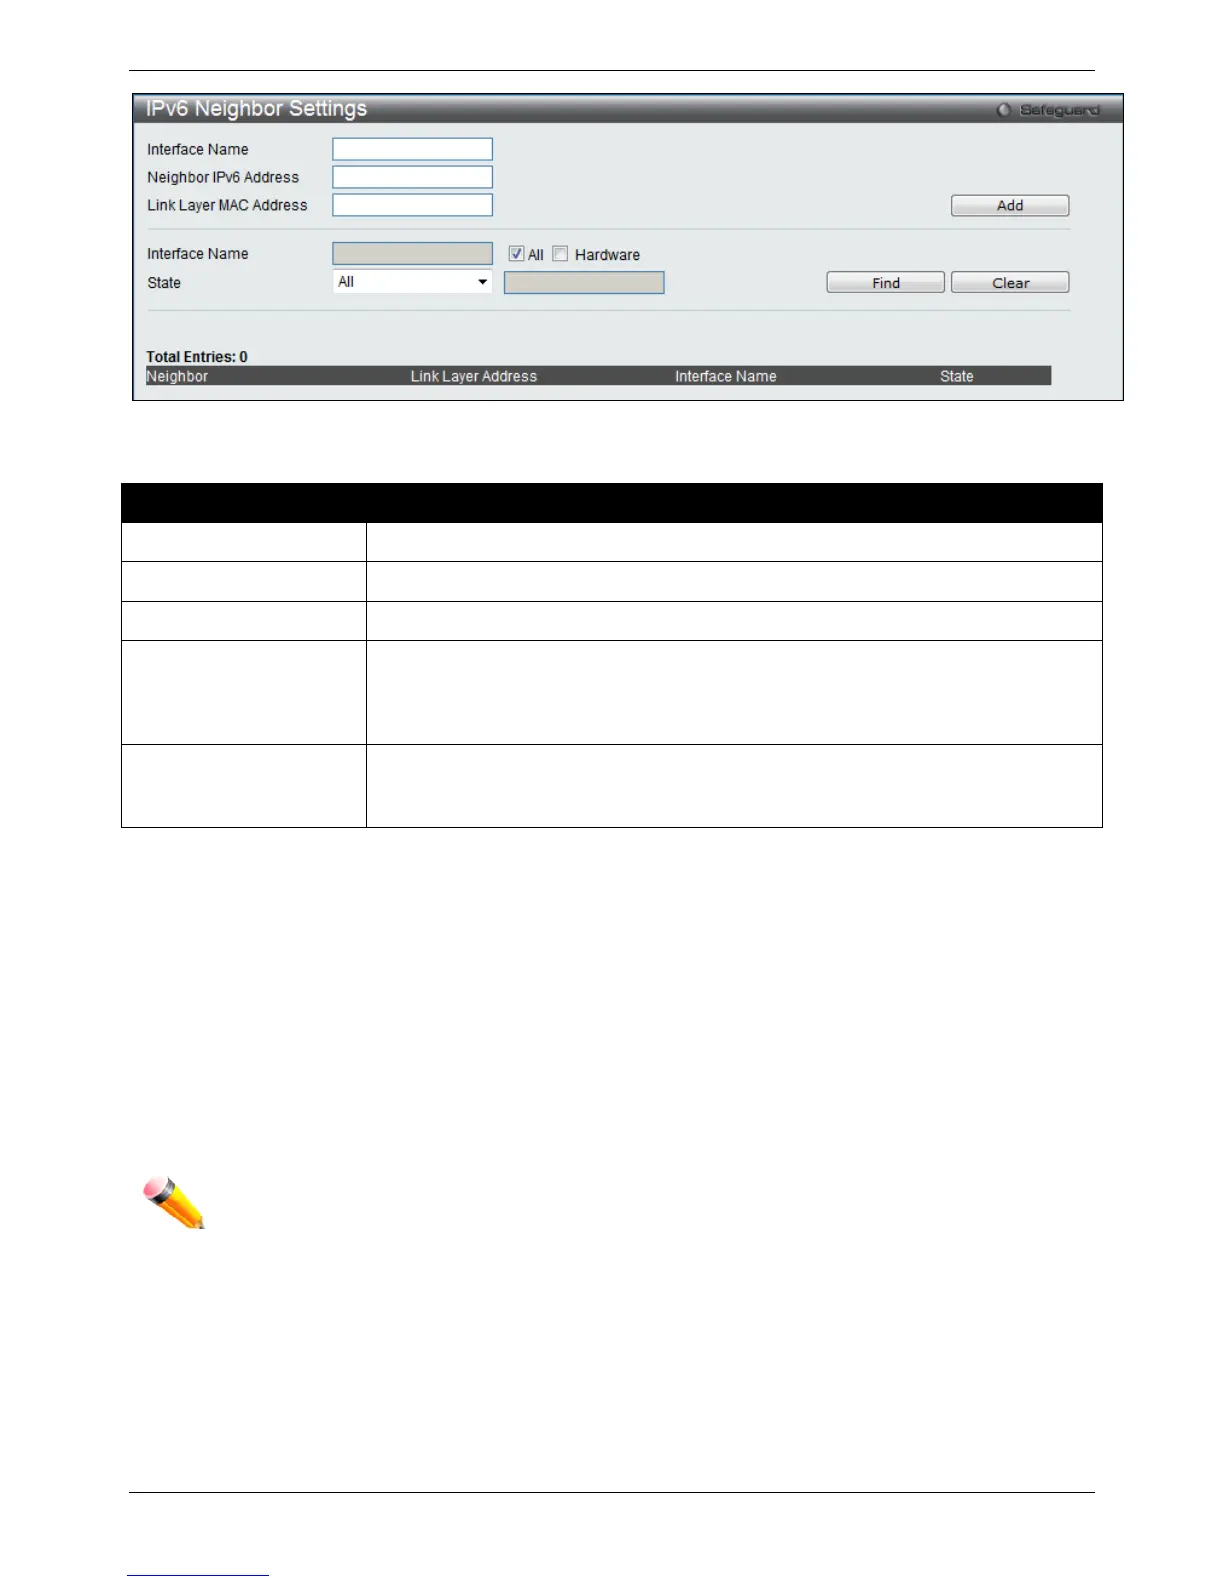
Figure 3-6 IPv6 Neighbor Settings window
The fields that can be configured are described below:
Parameter Description
Interface Name
Enter the interface name of the IPv6 neighbor.
Neighbor IPv6 Address
Enter the neighbor IPv6 address.
Link Layer MAC Address
Enter the link layer MAC address.
Interface Name
Enter the interface name of the IPv6 neighbor. To search for all the current interfaces
on the Switch, go to the second Interface Name field in the middle part of the window,
tick the All check box. Tick the Hardware option to display all the neighbor cache
entries which were written into the hardware table.
State Use the drop-down menu to select All, Address, Static, or Dynamic. When the user
selects address from the drop-down menu, the user will be able to enter an IP
address in the space provided next to the state option.
Click the Add button to add a new entry based on the information entered.
Click the Find button to locate a specific entry based on the information entered.
Click the Clear button to clear all the information entered in the fields.
IP Interface
System IP Address Settings
The IP address may initially be set using the console interface prior to connecting to it through the Ethernet. The
Web manager will display the Switch’s current IP settings.
NOTE: The Switch’s factory default IP address is 10.90.90.90 with a subnet mask of 255.0.0.0 and a
default gateway of 0.0.0.0.
To view the following window, click Management > IP Interface > System IP Address Settings, as shown below:

 Loading...