User's Manual
253
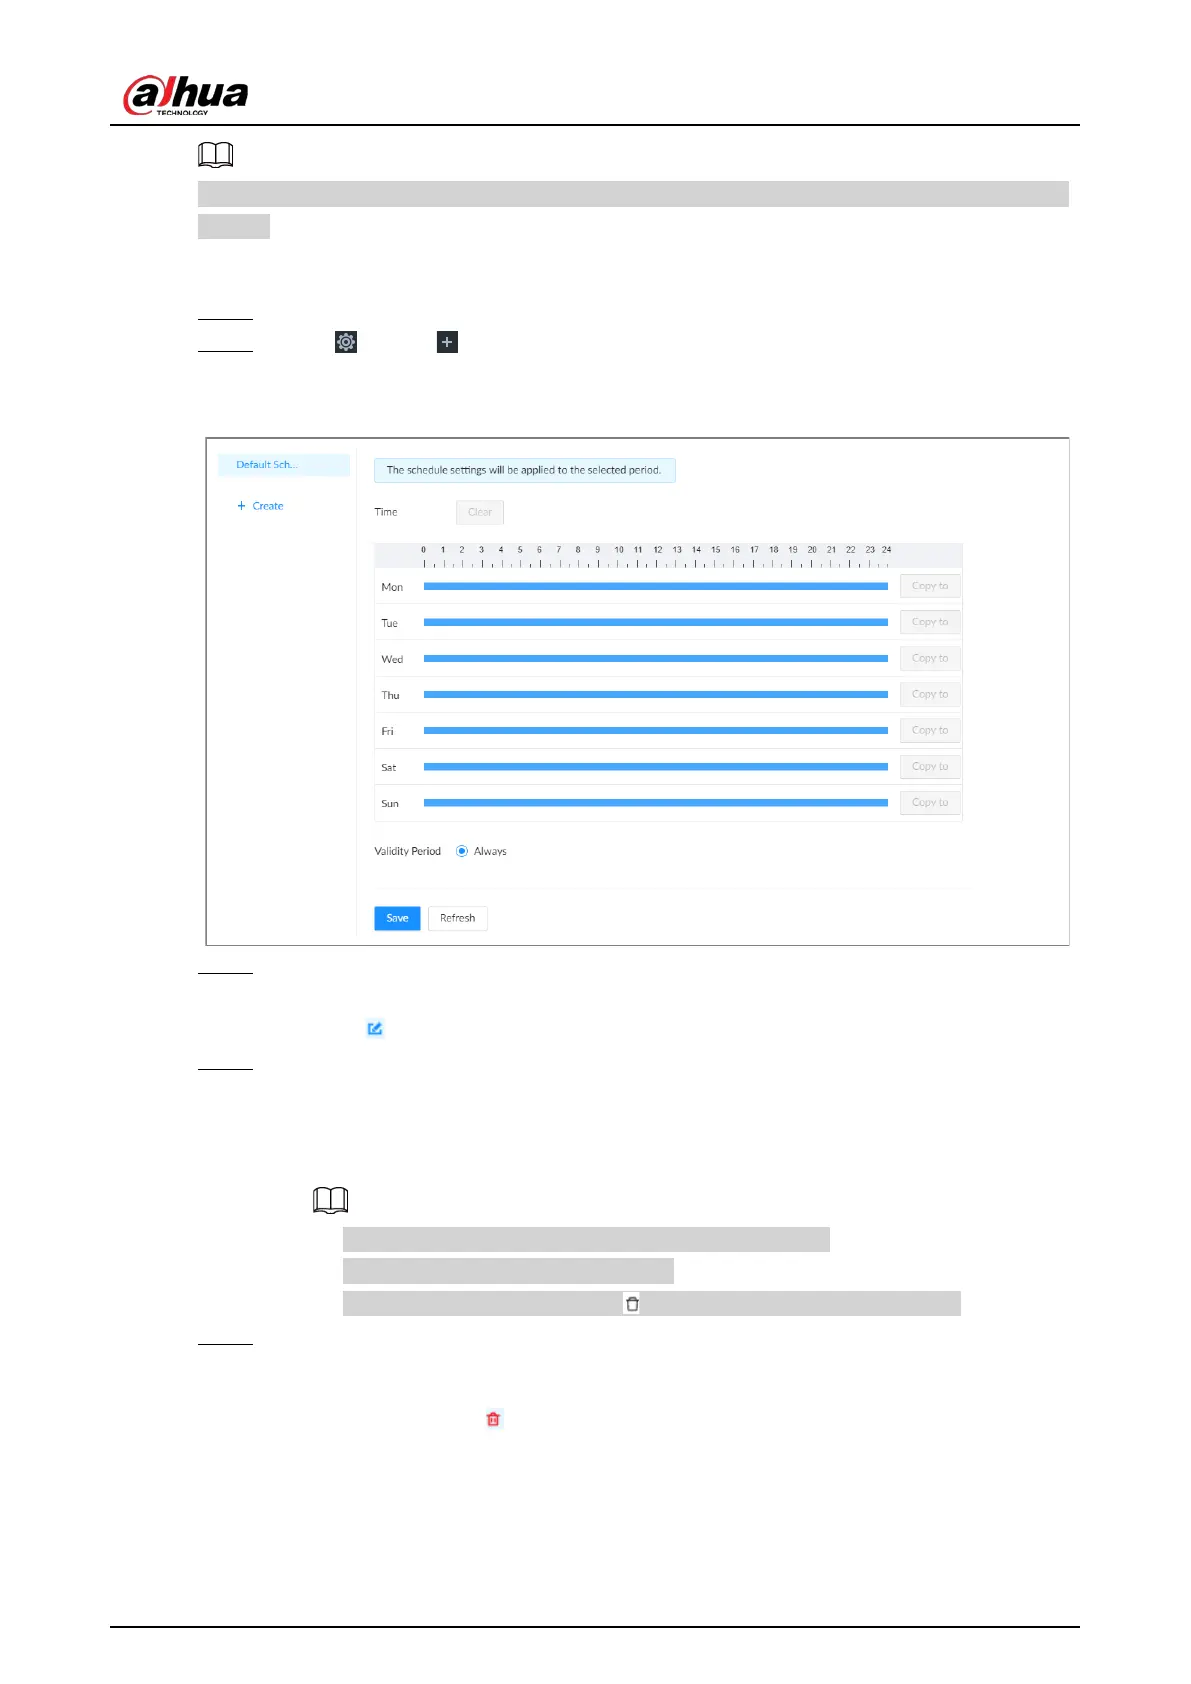
Default Schedule
has been created by default, which is always effective and cannot be modified or
deleted.
Procedure
Step 1 Log in to the PC client.
Step 2 Click , or click on the configuration page, and then select
SYSTEM
>
Schedule
>
Schedule
.
Figure 8-84 Schedule
Step 3 Add a schedule.
1) Click
Create
.
2) Click to edit the schedule name.
Step 4 Set the validity periods.
●
Always
: The schedule is always effective.
●
Custom
: Customize validity periods for the schedule. Click the time bar and then drag
the blue strip to set a period.
◇
You can add up to 50 validity periods for each schedule.
◇
Click
Clear
to clear all validity periods.
◇
Click a blue strip and then click to delete the corresponding period.
Step 5 Click
Save
.
Related Operations
Select a schedule and then click to delete it.
 Loading...