188
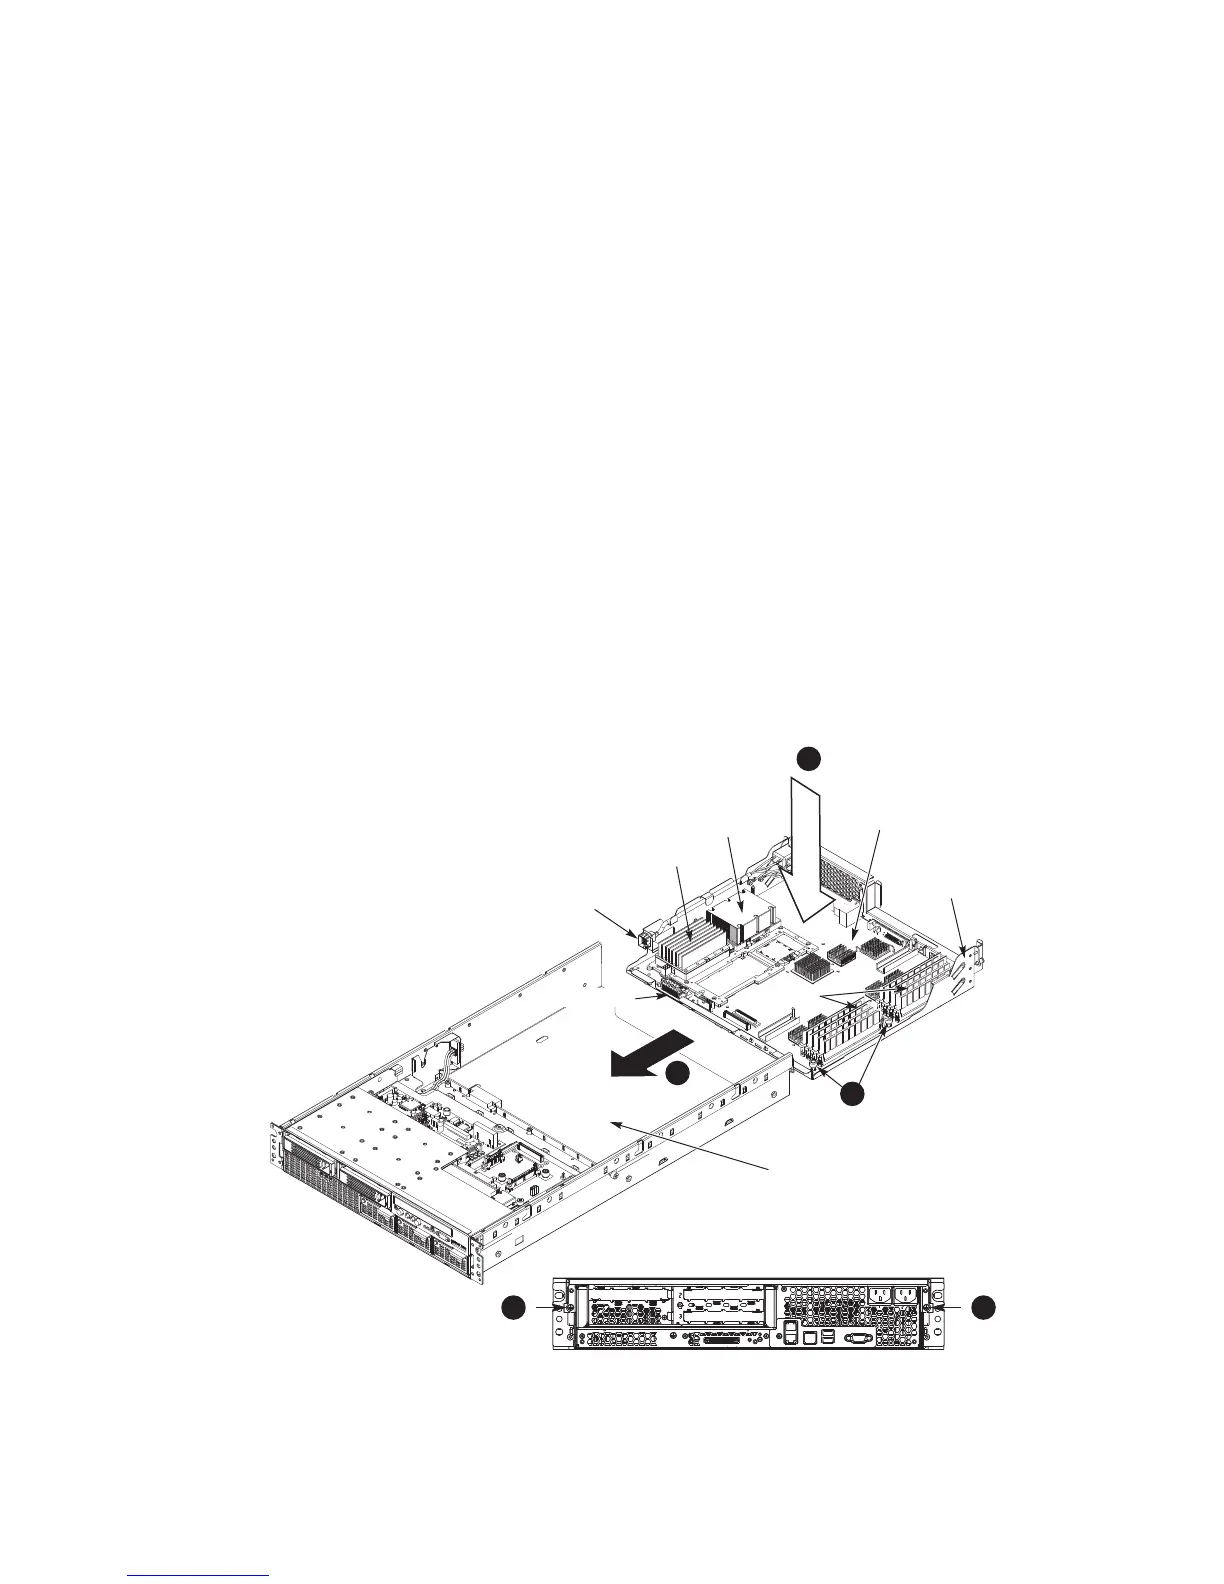
Installing the Main Board
To install the main board:
1. Place the main board in the electronics bay, aligning it with the locating pins and I/O cutouts at
the rear of the tray.
2. Secure the main board to the tray by tightening the two captive Phillips-head screws near the
DIMM sites on the main board. See number 2 in Figure 68.
3. Slide the electronics bay tray into the chassis from the rear, checking to see that the two power
connectors (AC and DC connectors) align properly and mate securely when the tray is fully
inserted.
4. Secure the electronics bay to the main chassis by tightening the two captive screws. See
number 4 in the figure below.
5. Reinstall the memory DIMMs if they were removed. For instructions see steps 1 – 7 under
Installing DIMMs.
6. Reinstall the processor(s), and power pod(s) if they were removed. For instructions see
Installing a Processor followed by steps 1 – 6 under Installing a Power Pod.
7. Reinstall the riser retention lever assembly to the electronics bay.
8. Reinstall the PCI riser assembly. For instructions see steps 1 – 3 under Installing the PCI Riser
Assembly.
9. Reinstall the top cover. For instructions, see Installing the Top Cover.
Processor
Power Pod
3
1
Chassis Rear View
DIMMs
4 4
2
AC Connector
DC Connector
Electronics Bay
Mainboard
Electronics Tra
Figure 68. Installing the Main Board