44 | Using Aruba Configuration in Daily Operations AirWave Wireless Management Suite | Configuration Guide
One possible workaround to update an Aruba AP device name in AWMS would be as follows, and this is not
the most efficient approach:
1. Configure and deploy the AP from AOS (separate from AWMS).
2. Delete the AP from AWMS.
3. Have AWMS rediscover the device.
A more efficient and robust approach is to deploy Aruba APs in AWMS with the following steps:
1. Define communication settings for Aruba APs pending discovery. Use the
Device Setup > Communication
page. This assigns communication settings to multiple devices at the time of discovery, and prevents
having to define such settings manually for each device after discovery.
2. Discover new Aruba APs with AWMS. You can do so with the
Device Setup > Discover page
3. Click
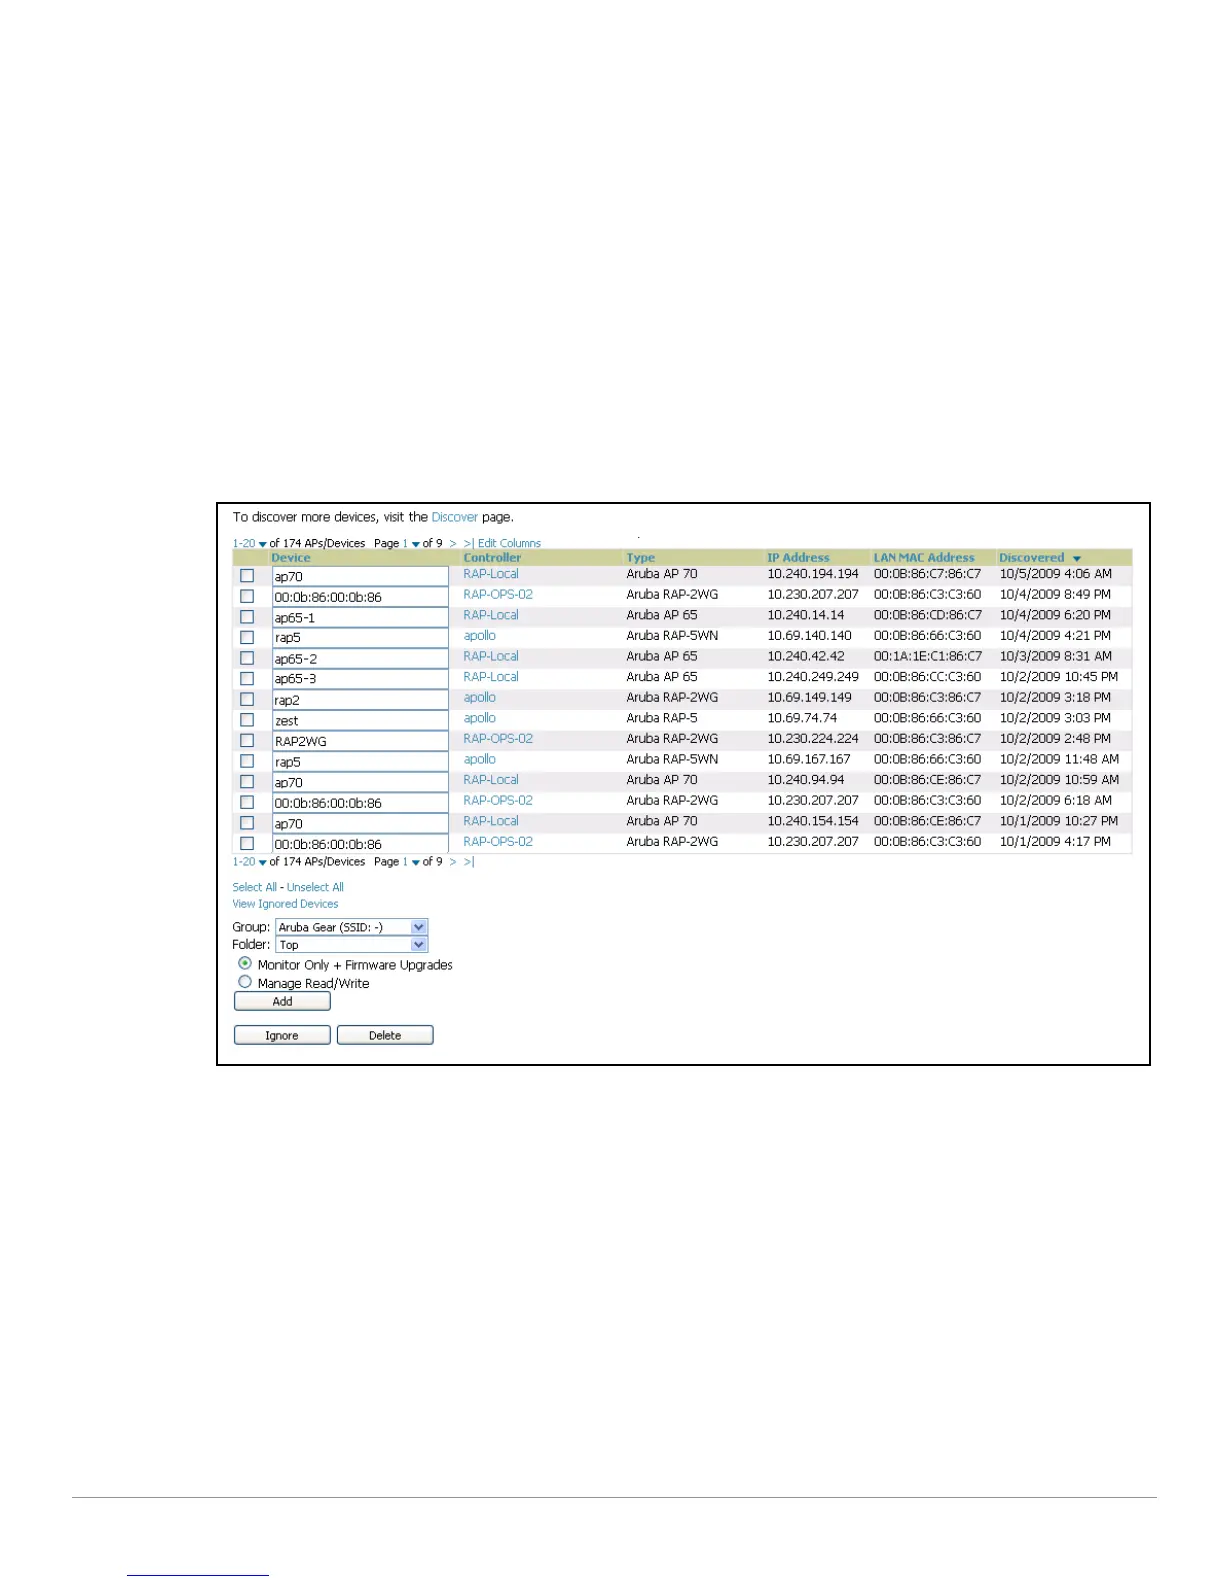
New Devices In the Status section at the top of any AWMS page, or navigate to the APs/Devices >
New
page, illustrated in Figure 28.
Figure 28 APs/ Devices > New Page Illustration
4. Select (check) the box next to any AP you want to provision.
5. Rename all new APs. Type in the new device name in the
Device column.
6. Scroll the bottom of the page and put APs in the appropriate AWMS group and folder. Set the devices to
Manage Read/Write mode.
7. Click
Add. Wait approximately five to 10 minutes. You can observe that the APs have been renamed not
only in AMP but also on the Aruba AP Group and Aruba controller with the
show ap database AOS
command.
8. To set the appropriate Aruba AP Group, select the
AP/Devices or Groups page and locate your APs.
9. Click
Modify Devices under the User and Bandwidth flash graphics.
10. Select the APs you want to re-group.
11. In the field that states
Move to Aruba AP Group, below the list of the APs, select the appropriate group,
and click
Move.
 Loading...