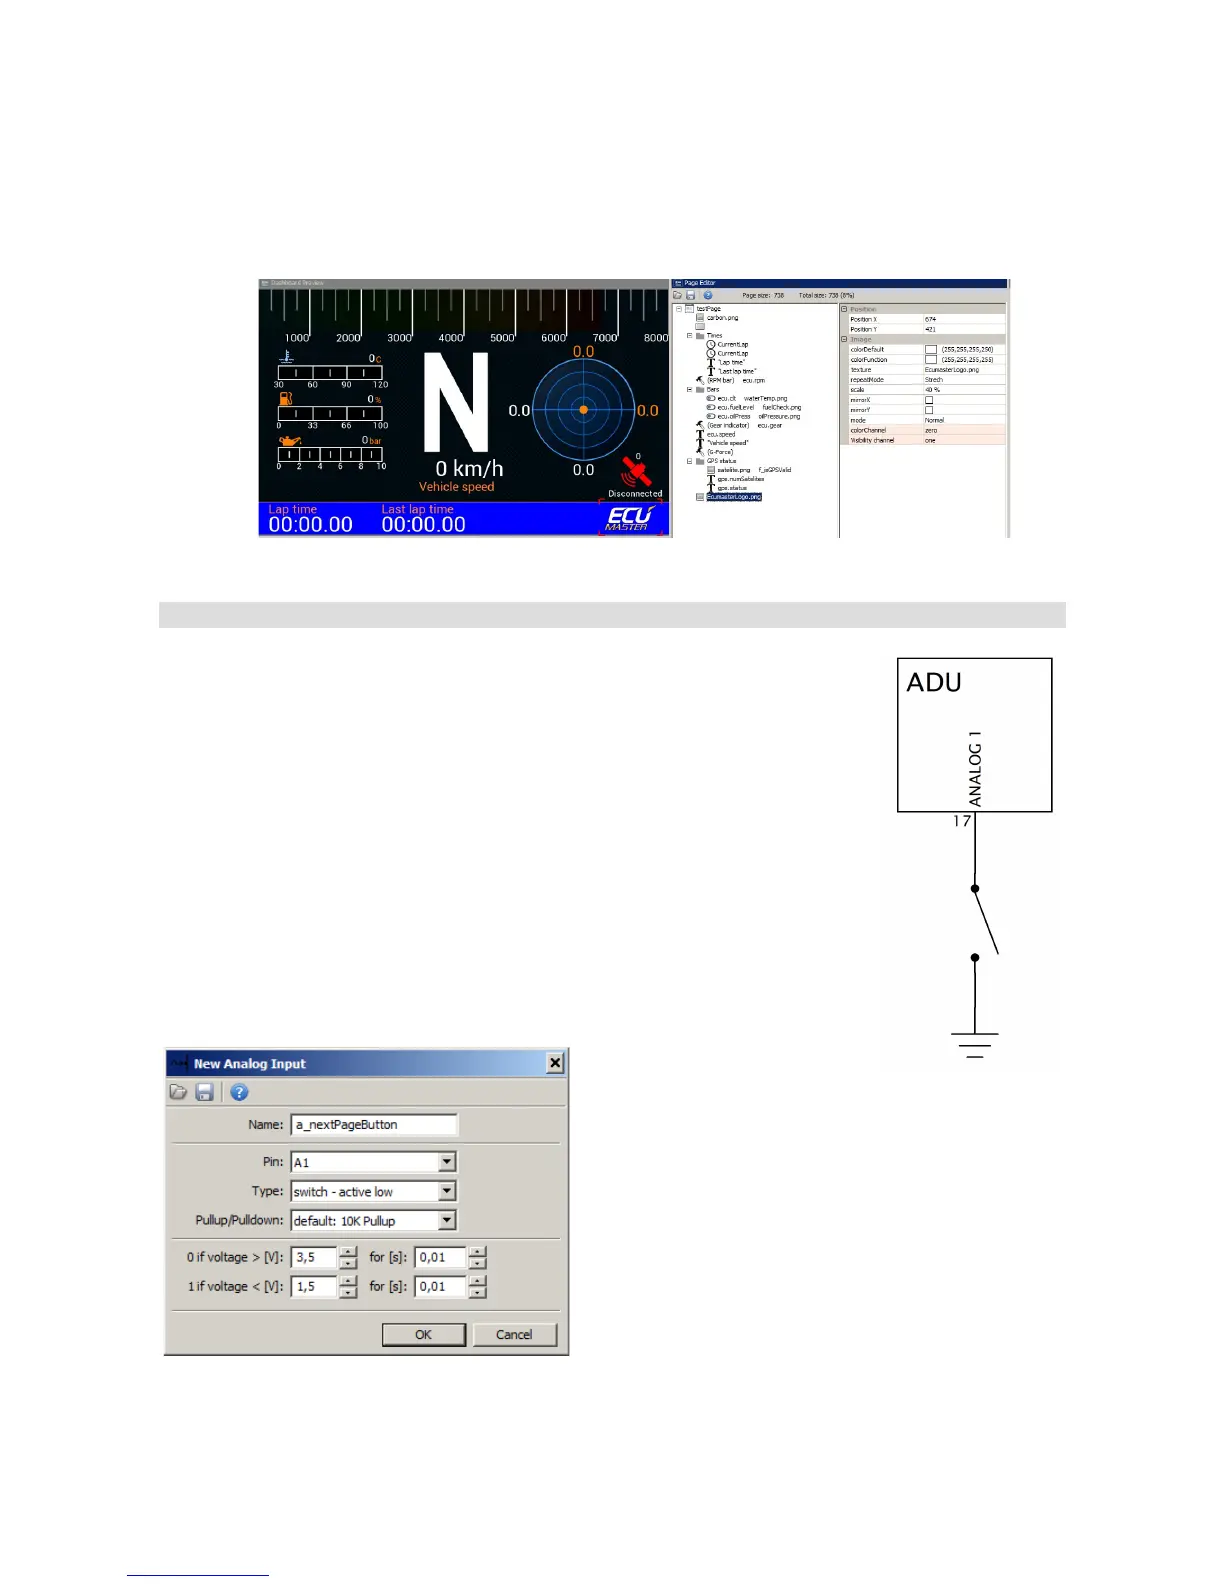
The last element to be added to the page will be the company logo. In this example we will use the
logo of Ecumaster embedded in the device. However, you can add your own graphics and display
the logo of your own company. You will find more information about this later in the manual. In
order to add graphics, select the Image indicator and then the desired logo (in the Texture field).
Page switching
There are two methods of switching between pages. The first method is
using a button connected directly to the ADU (by means of analogue or
digital inputs) or to another device (e.g. a CAN switch board) and then sent to
ADU via CAN bus. The button to be used for switching between the pages
must be defined in the Buttons panel.
The following example shows how to connect and configure a page-switching
button. The button is connected to the analogue input Analog #1 and shorts
to ground.
In the Project tree the button must be defined as an analogue input. To do
this, press Add and then select Analog input.
The following pane should pop up:
Name determines the name of
the input that will be visible in the project. In the Pin
field define the analogue input to which the button is
connected (Analog #1 in our case). Choose
Switch - active low (which means that the button
is activated at a low state). You also need to select
a 10K pullup resistor.
To preview the button state, open the Analog inputs panel, in which you will be able to track all
Page 49/137