Proline Prosonic Flow W 400 HART Mounting procedure
Endress+Hauser 39
4. Fit the sensor cover on the sensor holder and turn until the sensor cover engages
with a click and the arrows (▴ / ▾ "close") are pointing towards one another.
5. Insert the sensor cable into each individual sensor until the end stop.
A0043383
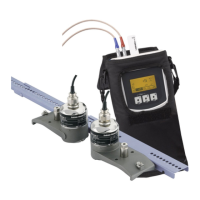
31 Mounting the sensors and connecting the sensor cables
This completes the mounting procedure. The sensors can now be connected to
the transmitter via the sensor cables and the error message can be checked in the
sensor check function.
• To ensure good acoustic contact, the visible measuring pipe surface must be clean
and free from flaking paint and/or rust.
• If the sensor is removed from the measuring pipe, it must be cleaned and new
coupling gel applied (if there is no coupling pad).
• On rough measuring pipe surfaces, the gaps in the rough surface must be filled with
sufficient amounts of coupling gel if use of the coupling pad does not suffice
(installation quality check).
Installation for measurement via 2 traverses
Requirements
• The installation distance is known.
• Strapping bands are pre-assembled.
Material
The following material is required for mounting:
• Two strapping bands incl. mounting bolts and centering plates where necessary (already
pre-assembled → 31, → 32)
• A mounting rail to position the strapping bands:
• Short rail up to DN 200 (8")
• Long rail up to DN 600 (24")
• No rail > DN 600 (24"), as distance measured by sensor distance between the
mounting bolts
• Two mounting rail holders
• Two sensor holders
• Coupling medium (coupling pad or coupling gel) for an acoustic connection between the
sensor and pipe
• Two sensors incl. connecting cables
• Open-ended wrench (13 mm)
• Screw driver