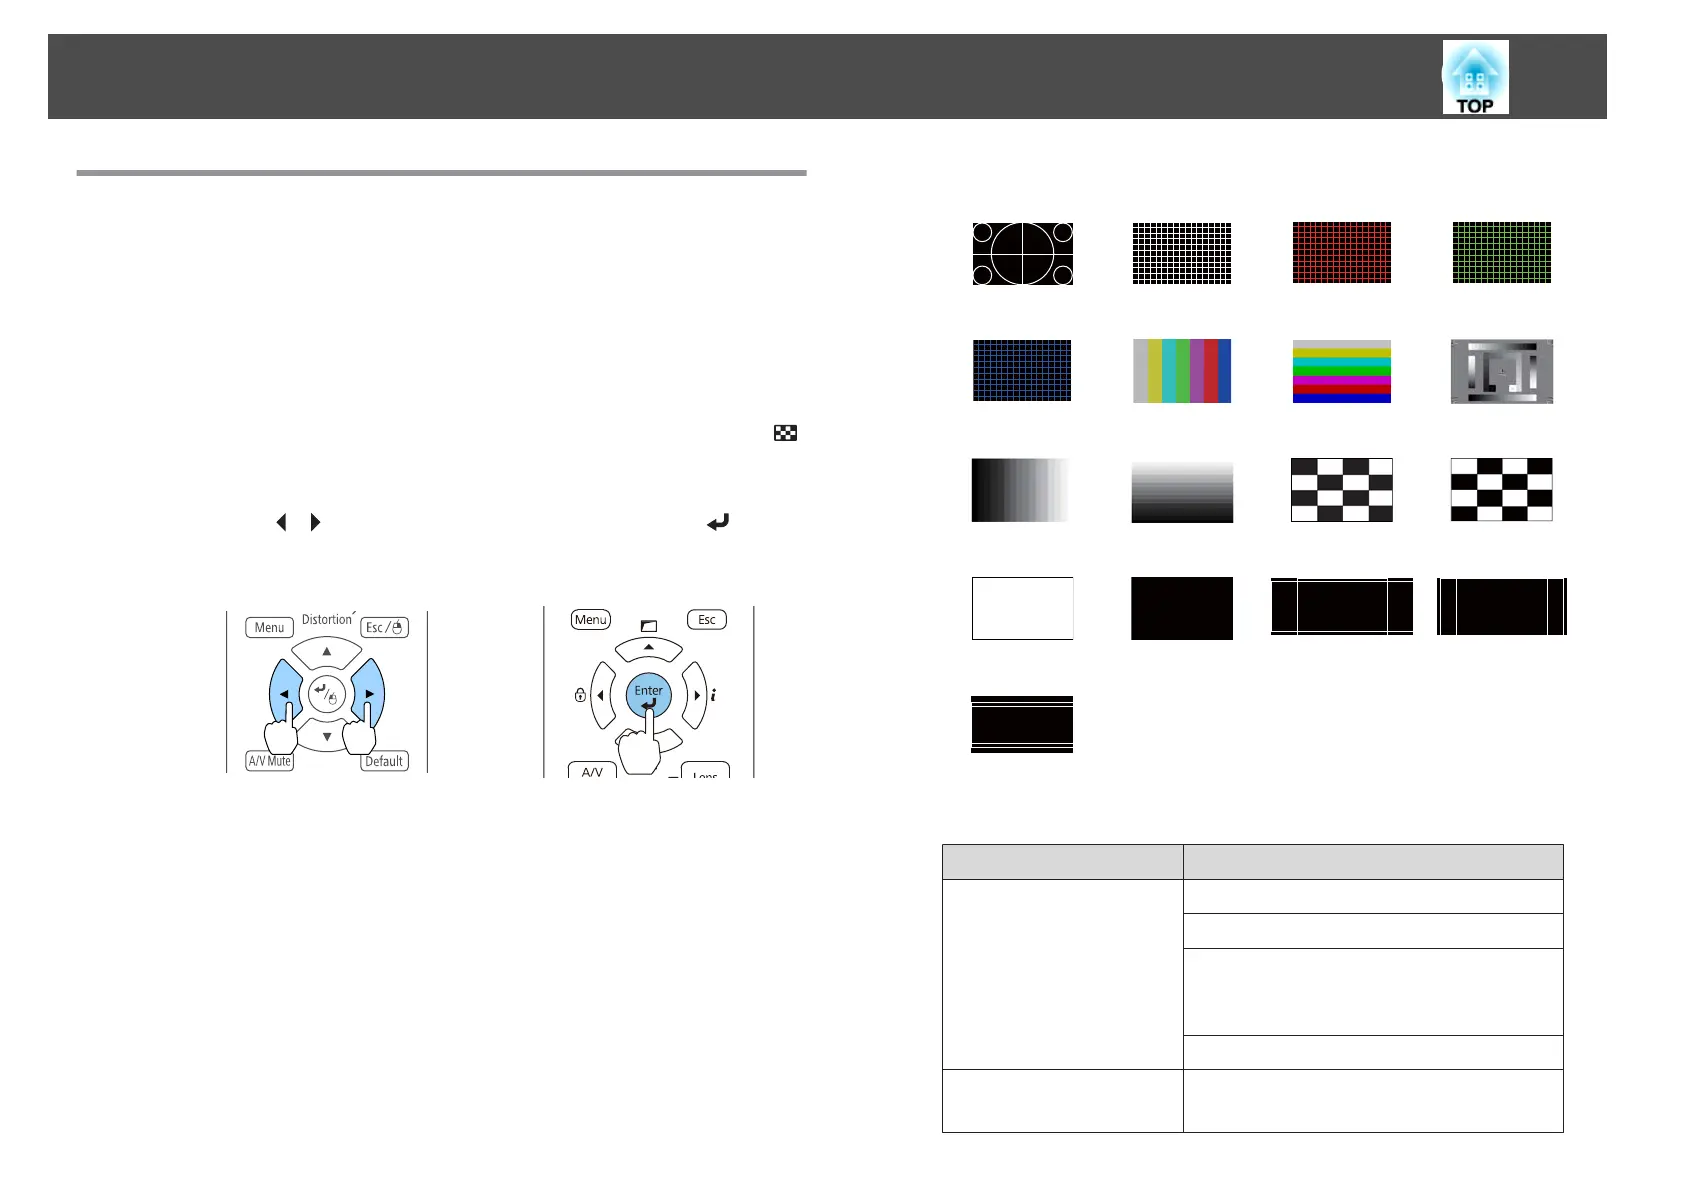
Displaying a Test Pattern
A test pattern can be displayed to adjust the projection status without
connecting video equipment.
The shape of a test pattern is according to the setting of Screen Type. Set
Screen Type first.
s "Screen Settings" p.31
a
Press the [Test Pattern] button of the remote control or the [ ]
button on the control panel while projecting.
b
Press the [ ][ ] buttons on the remote control or the [ ] button
on the control panel to change the test pattern.
Using the remote control Using the control panel
Standard Cross-hatching
Cross-hatching
R
Cross-hatching
G
Cross-hatching
B Color Bars V Color Bars H Grayscale
Gray Bars V Gray Bars H
Checkerboard
1
Checkerboard
2
White Black
16:10Aspect
Frame
16:9Aspect
Frame
4:3Aspect
Frame
In addition to lens operations, the following image adjustments can
be made while the test pattern is being displayed.
Top Menu Name Sub Menu/Items
Image
Color Mode s p.78
White Balance
Advanced
- Gamma
*1
s p.86
- RGBCMY s p.85
Reset
Set
Geometry Correction s p.66
Brightness Settings
Installing the Projector
33