156
• When the media form is die-cut label (black marks) or continuous paper (black marks)
Paper is jammed
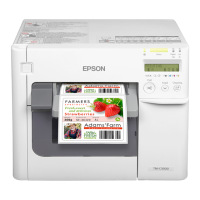
If a paper jam occurs, remove the paper by following the steps below.
1
Turn the printer off. (U "Turning the Power Off" on page 43)
2
Open the roll paper cover.
3
If there is a paper jam, remove the paper.
4
Load paper again. (U "Loading and Replacing Roll Paper" on page 46,
U "Loading and Replacing Fanfold P
aper" on page 56)
5
Turn the printer on. (U "Turning the Power On" on page 42)
Cause Solution and Reference
The paper being used differs
from that of Media detection
settings.
Check the paper being used and Media detection settings of
the printer. (U "PrinterSetting Functions and Operating
P
r
ocedures" on page 115)
The black mar
ks do not
comply with the specifications.
If the reflectivity of the black marks is higher than the specified
value, the black marks may not be recognizable. Infrared light is
used for black mark detection, and the infrared reflectivity
needs to be the specified value or lower.
Check the specifications of black mark printing, and use black
marks that comply with the printer specifications.
The black marks may become recognizable by executing Adjust
the Black Mark Detection Sensor.
Click Printer Setting Utility on the Printer Utilities tab of the
printer driver to display PrinterSetting. Then execute Adjust the
Black Mark Detection Sensor from Printer Adjustment -
Sensor Adjustment.
The sensor has failed. If operation was normal up until now, the sensor has probably
failed. Request repairs.
Downloaded from ManualsNet.com search engine