Operating of the Machine
Paraquda Startup & Safety © Essemtec AG
4-77
0000003/11 / November 4, 2014
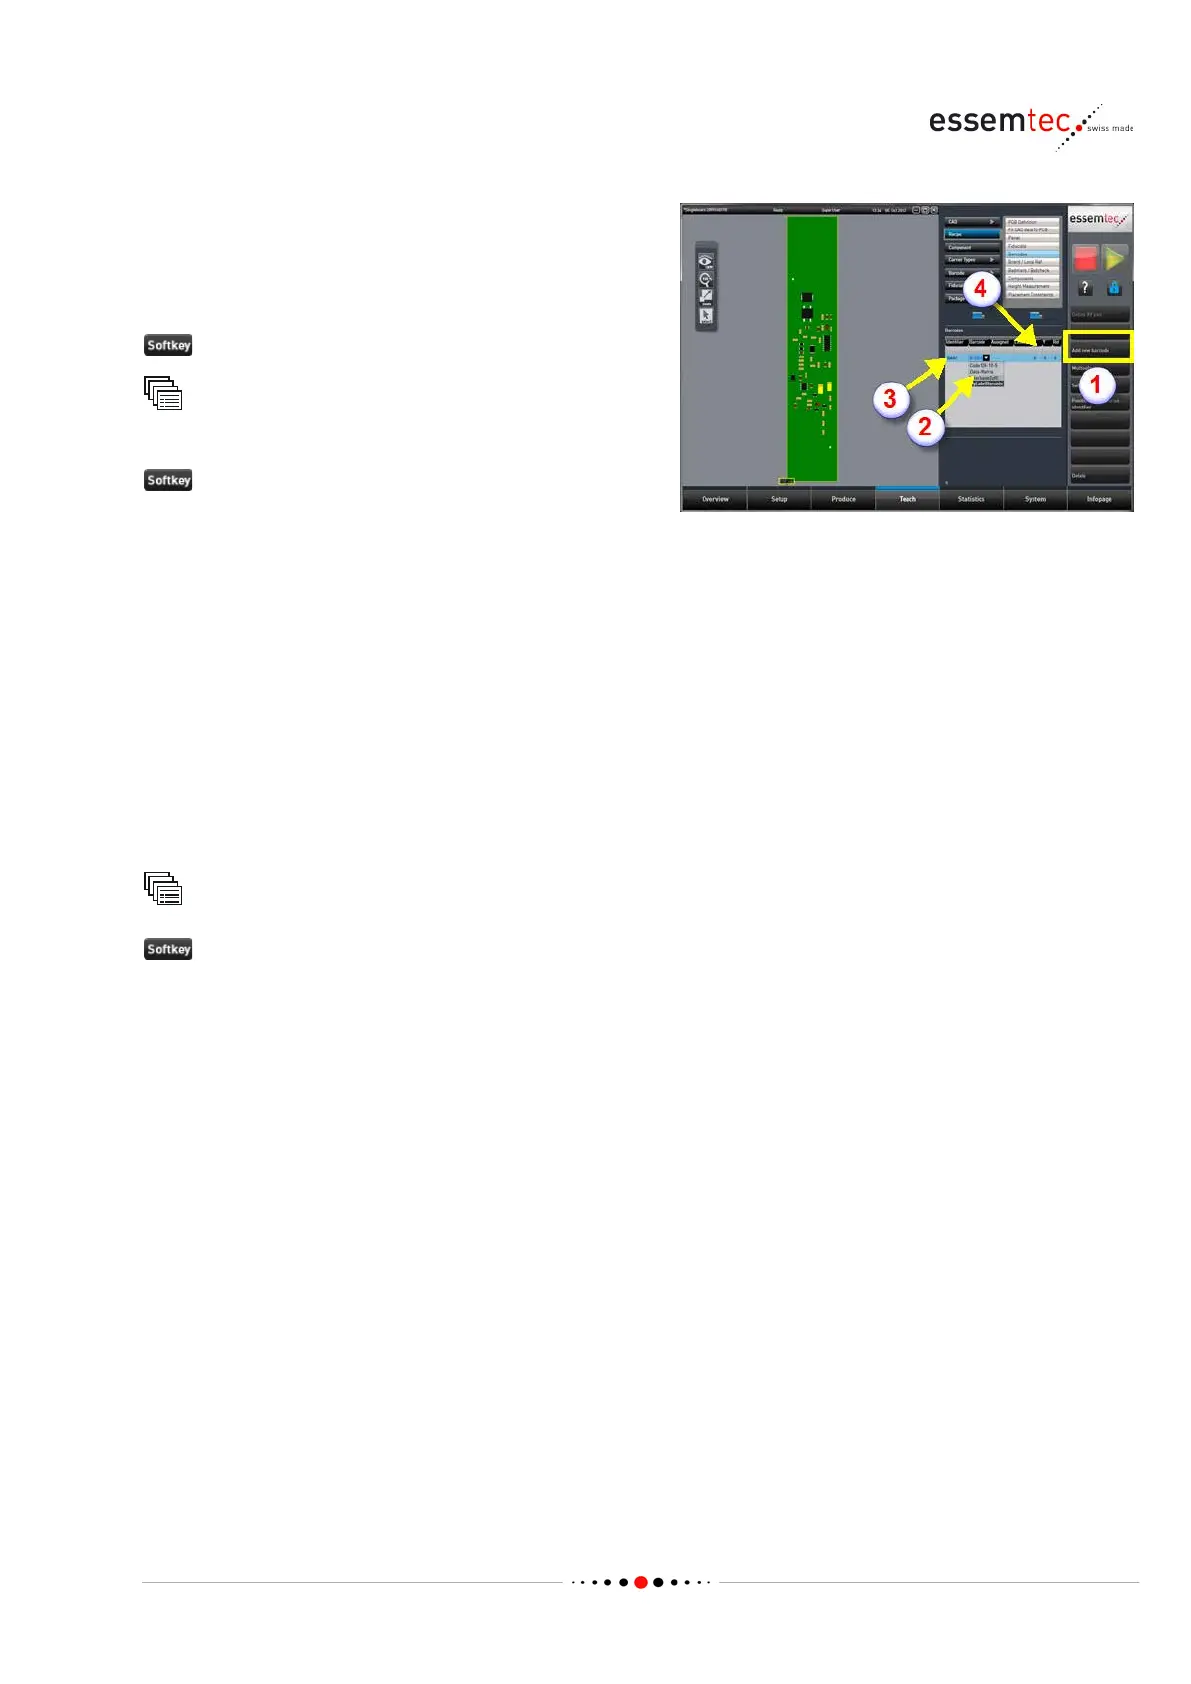
arcode to the recipe and assign it as
Out of the recipes table, select the desired
recipe.
to edit the recipe.
Recipe
Barcodes
(1) to add the barcode to the
barcode list and to define the location on the
PCB.
of the column 'Barcode' (2), select the
In the column 'Identifier' (3), type in the desired
identifier (e.g. BAR2).
In the column 'Assigned', select PCB ID.
Type in the coordinates X / Y / Rot of the
barcode (4), the position is visuali
zed in the
To finalize the recipe, go back to:
Recipe
or Save as... to save the recipe.
4.6.8 Set up Label / Label Feeder
To pick a label from the label feeder and to place it to a certain position on the PCB, a few steps are
necessary:
• Add a label to the chip template.
• Create a package which represents the physical dimensions of the label and its vision
parameters.
• Create a carrier type with the correct size and pitch.
• Create a component with the package, representing the label on the carrier.
• Create a barcode which defines the physical size of the barcode and the code type.
• Add the component to the recipe at the position where the label shall be placed.
• Add the barcode to the recipe, assign it as PCB ID and link it to the identifier of the created
component.
• Define the process sequences and constraints if needed.